Navigate ADE in Code Repository Questions
Last updated: November 16, 2026
This article applies to the new Interview experience.
Code Repository question opens in the Agentic Development Environment (ADE). ADE provides a preconfigured codebase and the tools you need to navigate files, use a terminal, modify code, and build, run, test, inspect, and debug an application during your interview.
If the hiring company enables the AI Assistant, you can use approved AI models to investigate the codebase, plan an approach, implement changes, and resolve issues.
ADE components
The ADE contains a collapsible navigation panel on the left, the agent workspace in the center, and a collapsible development panel on the right.
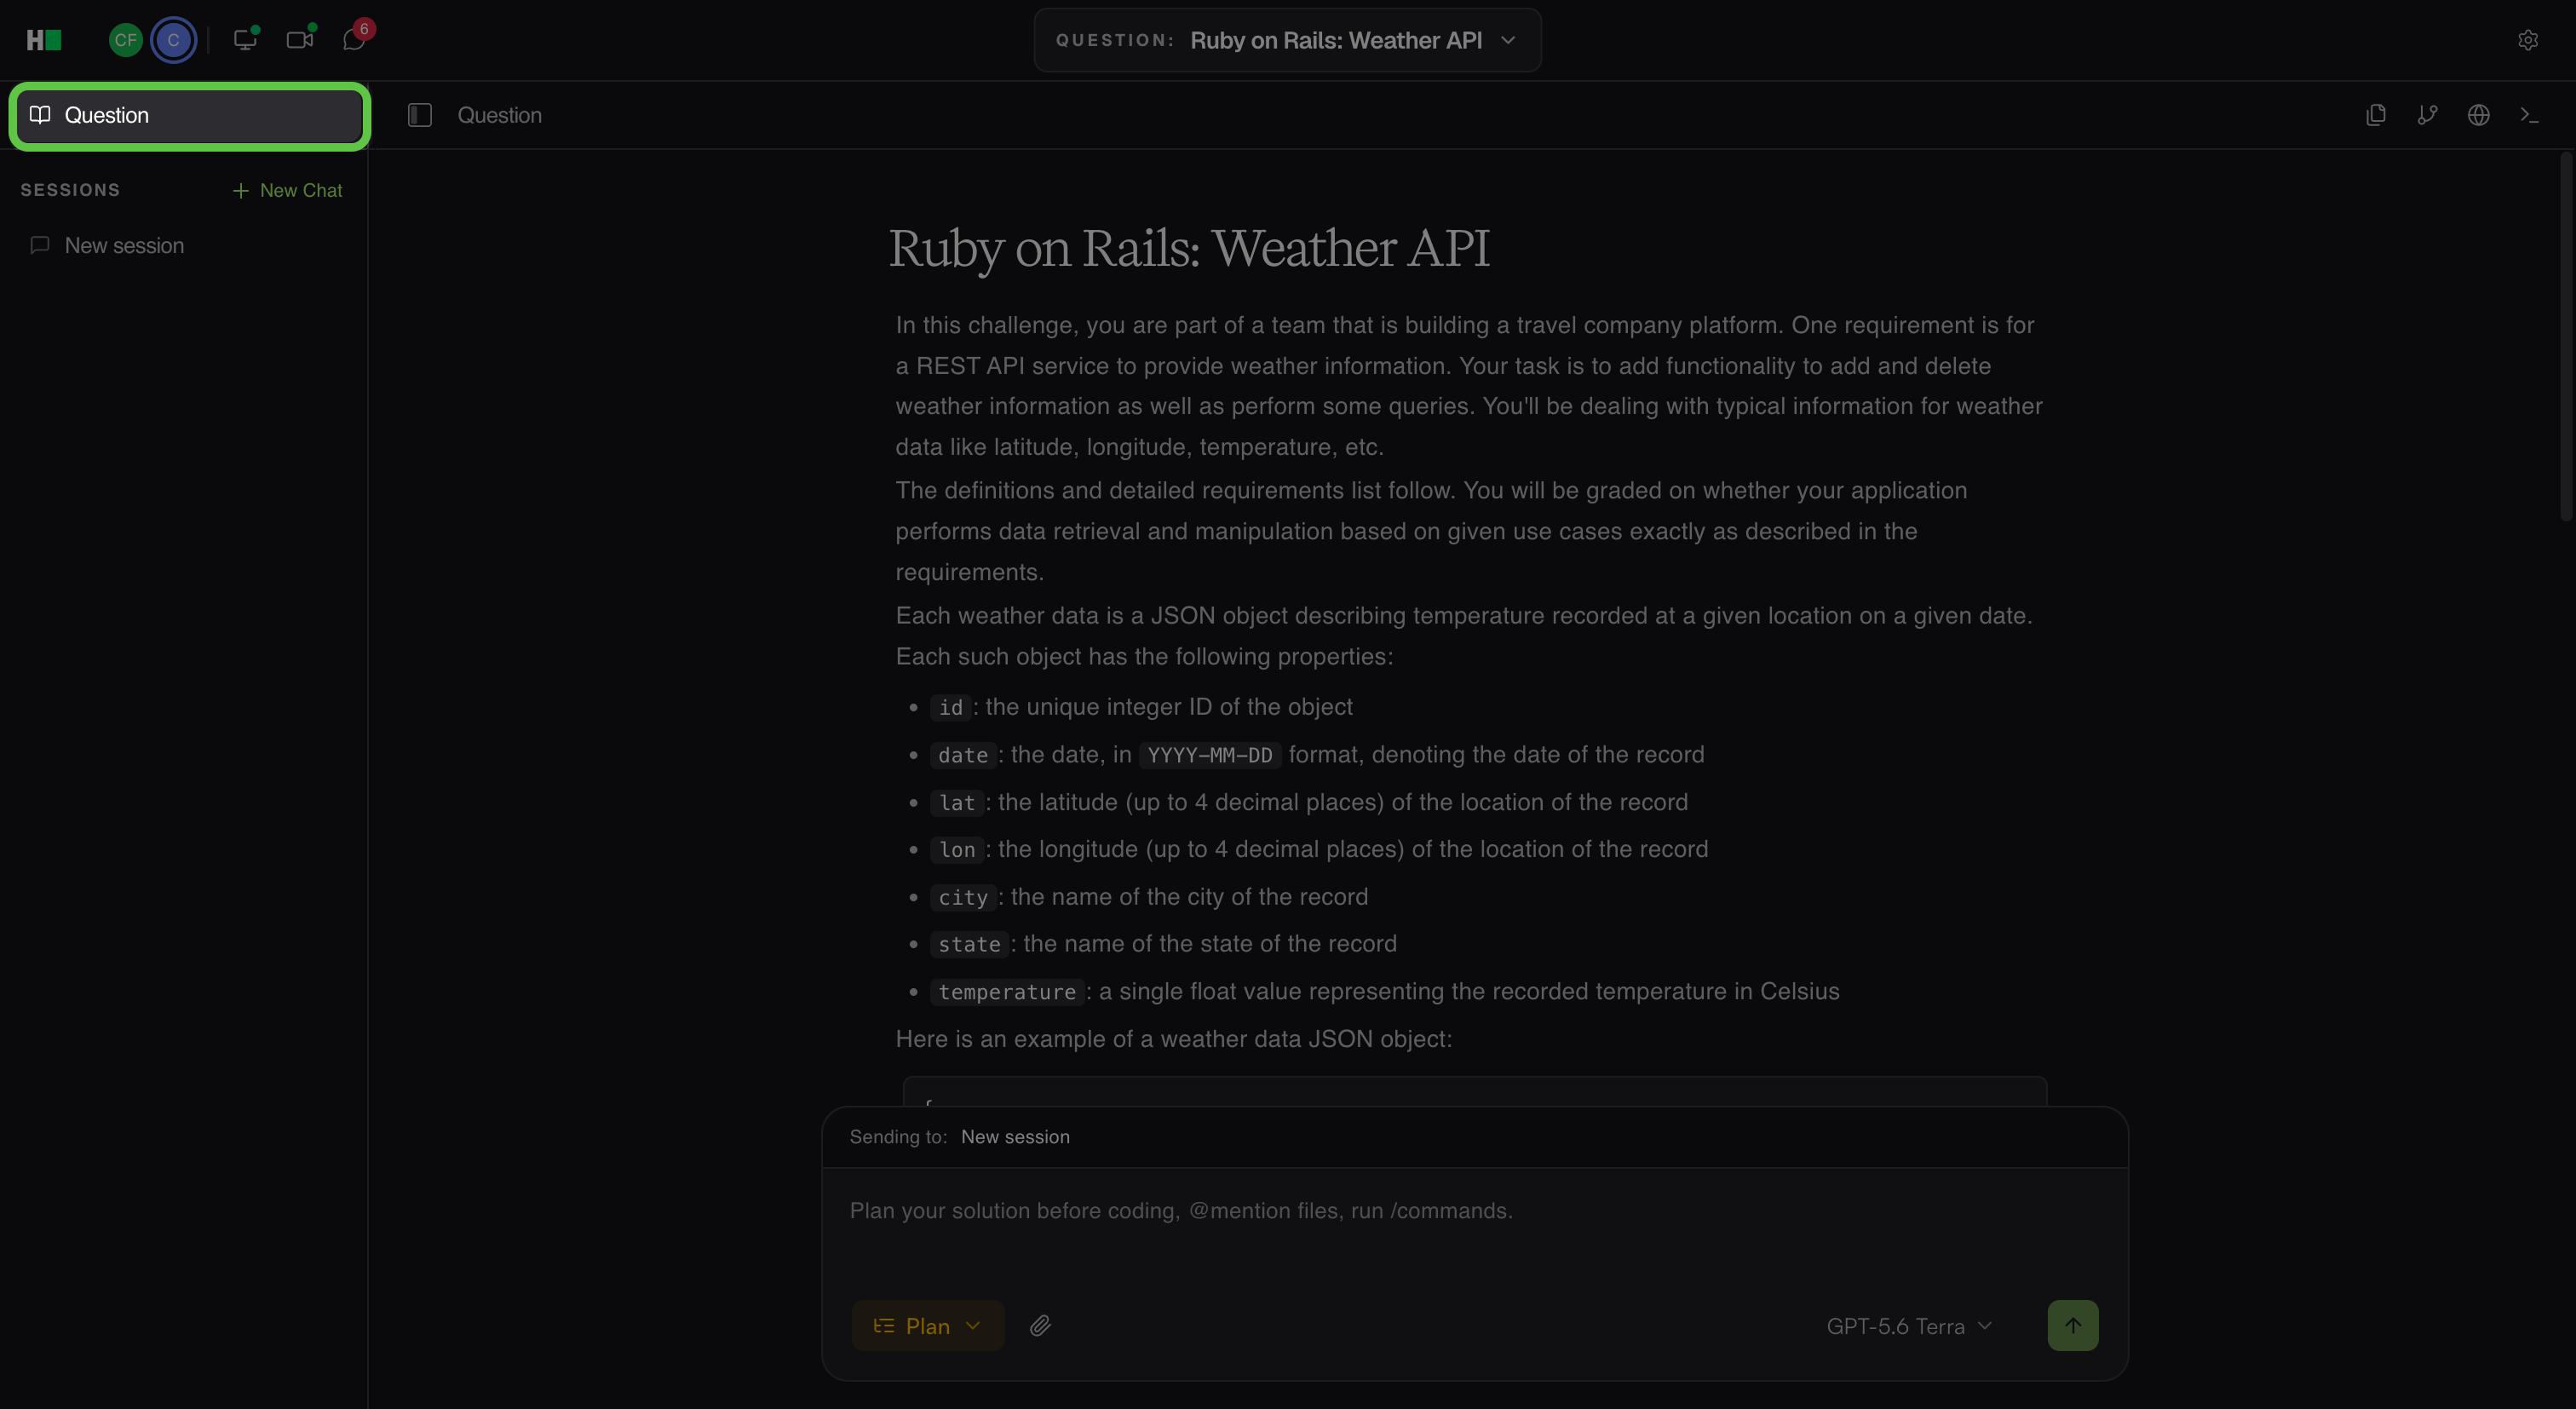
Question
Select Question in the left panel to display the problem statement, requirements, constraints, and repository context.
Agent Sessions
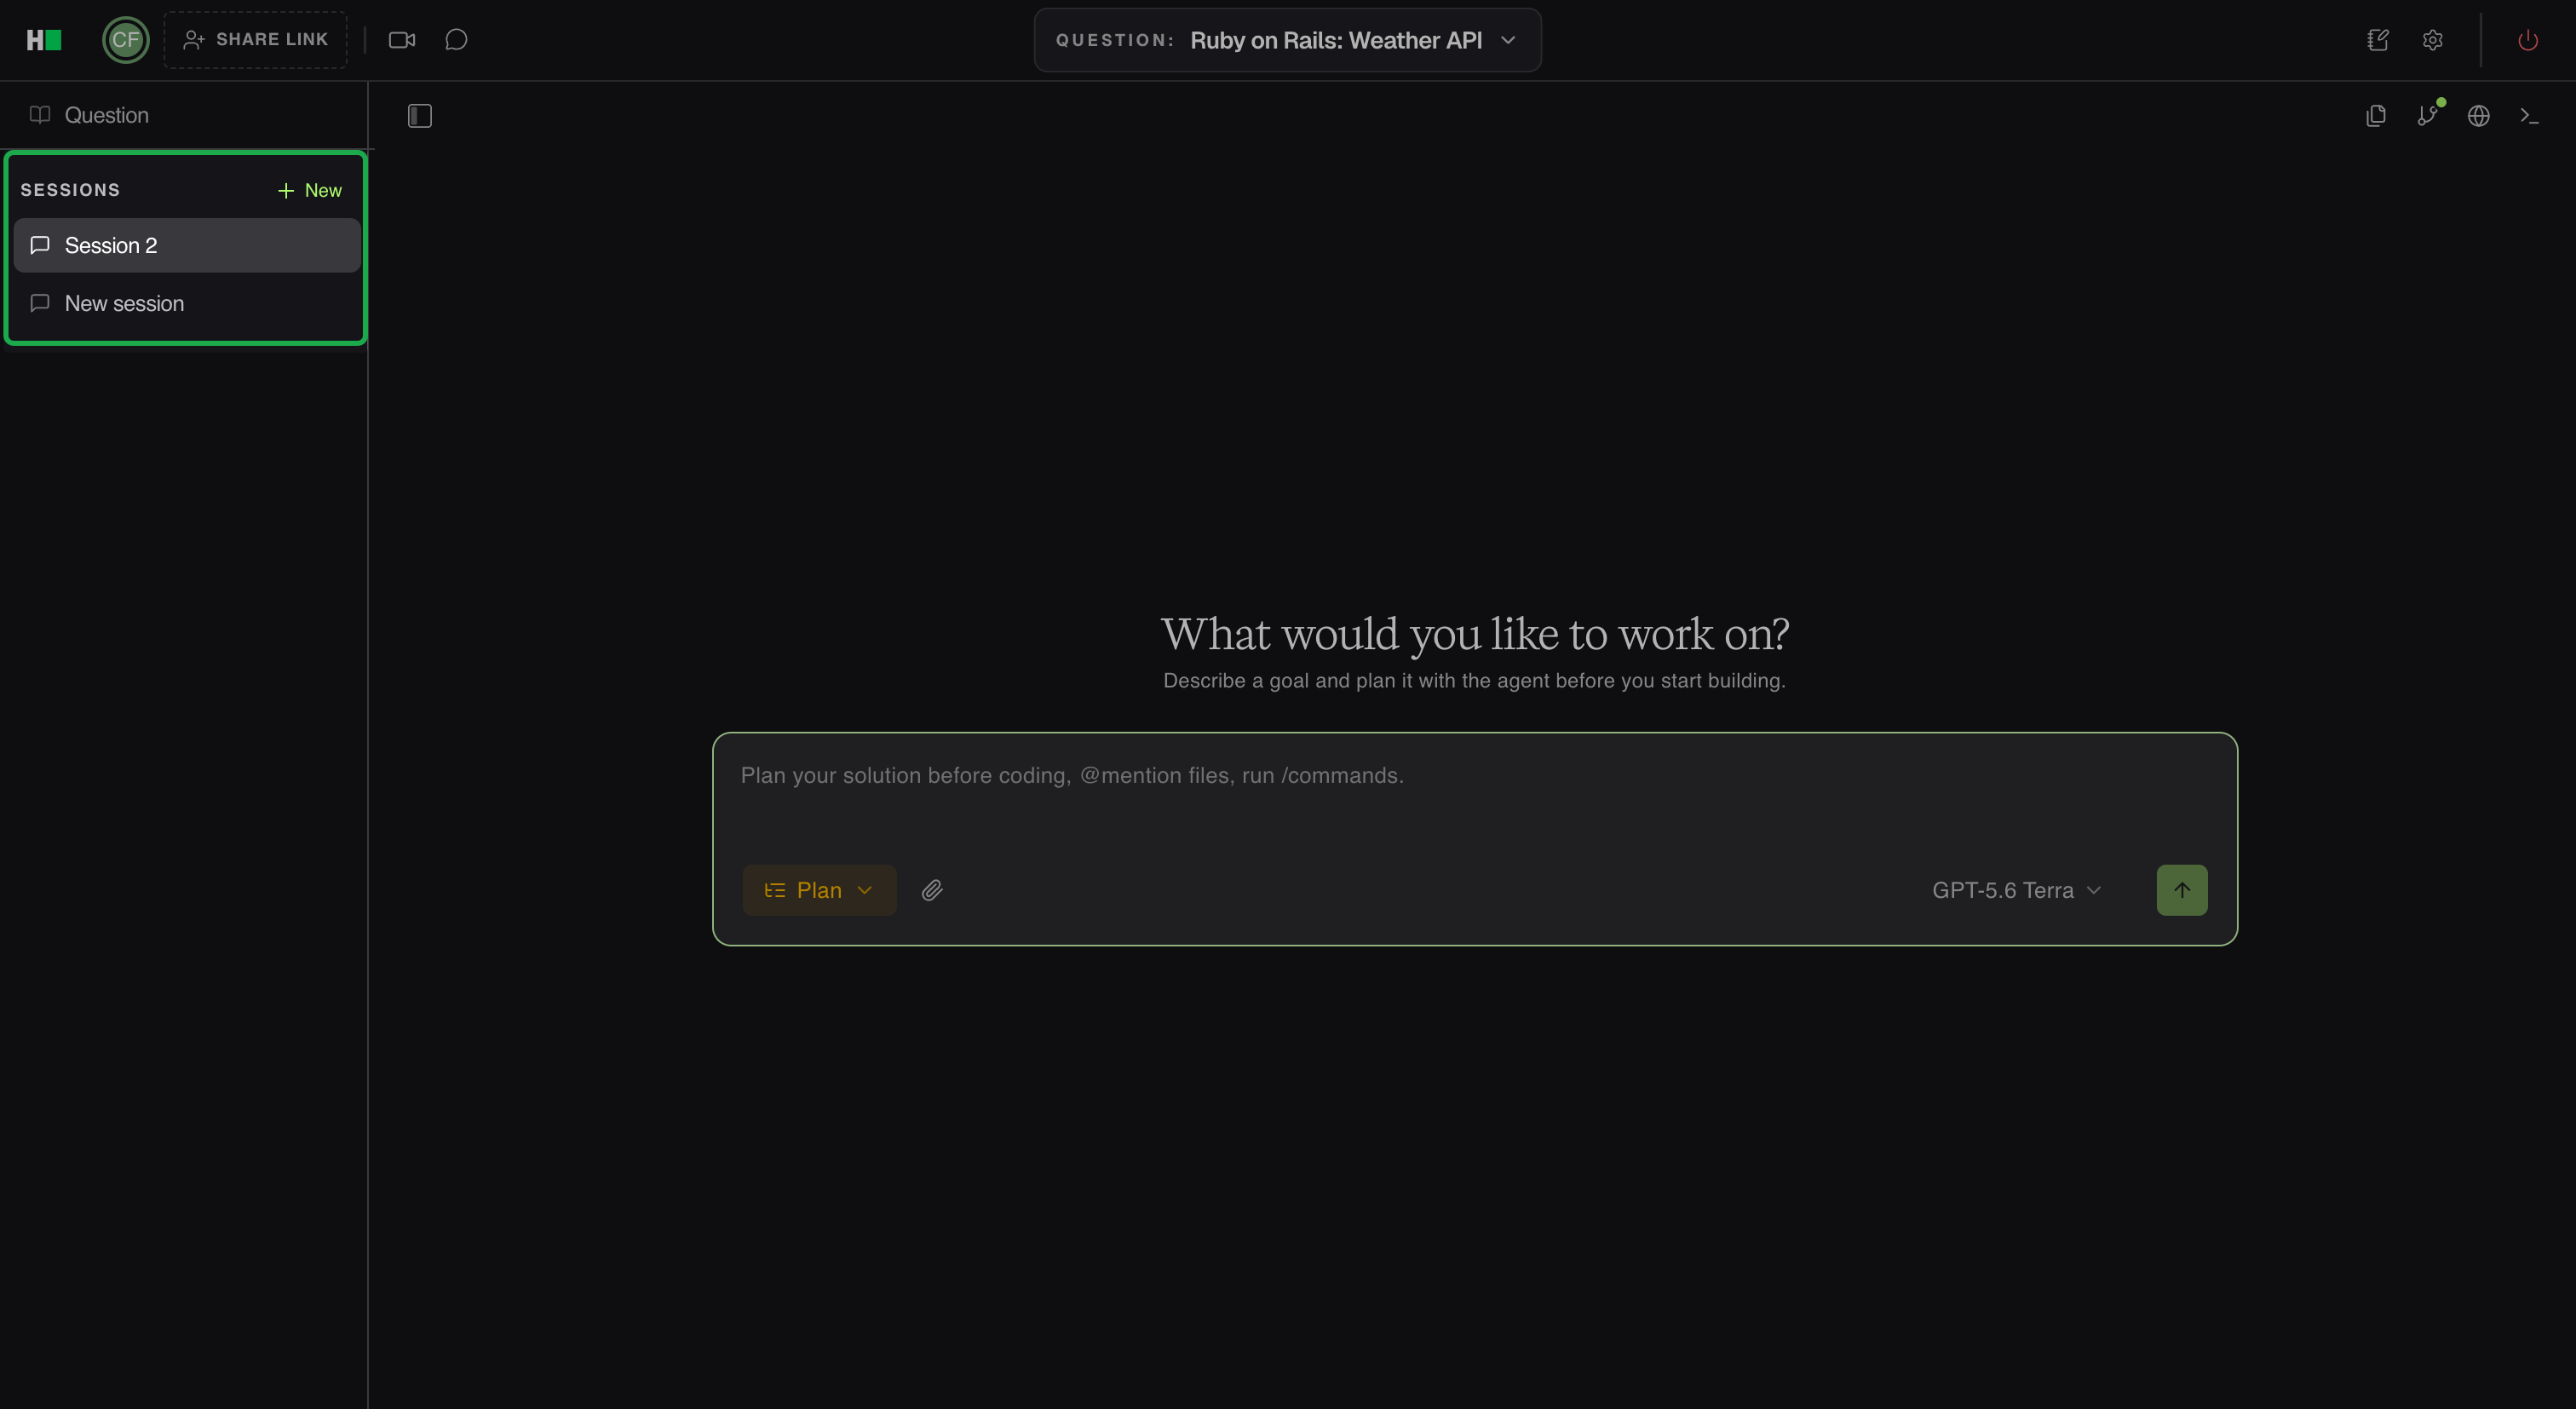
The Sessions panel lists the agent sessions in the interview. You can create separate sessions for different tasks.
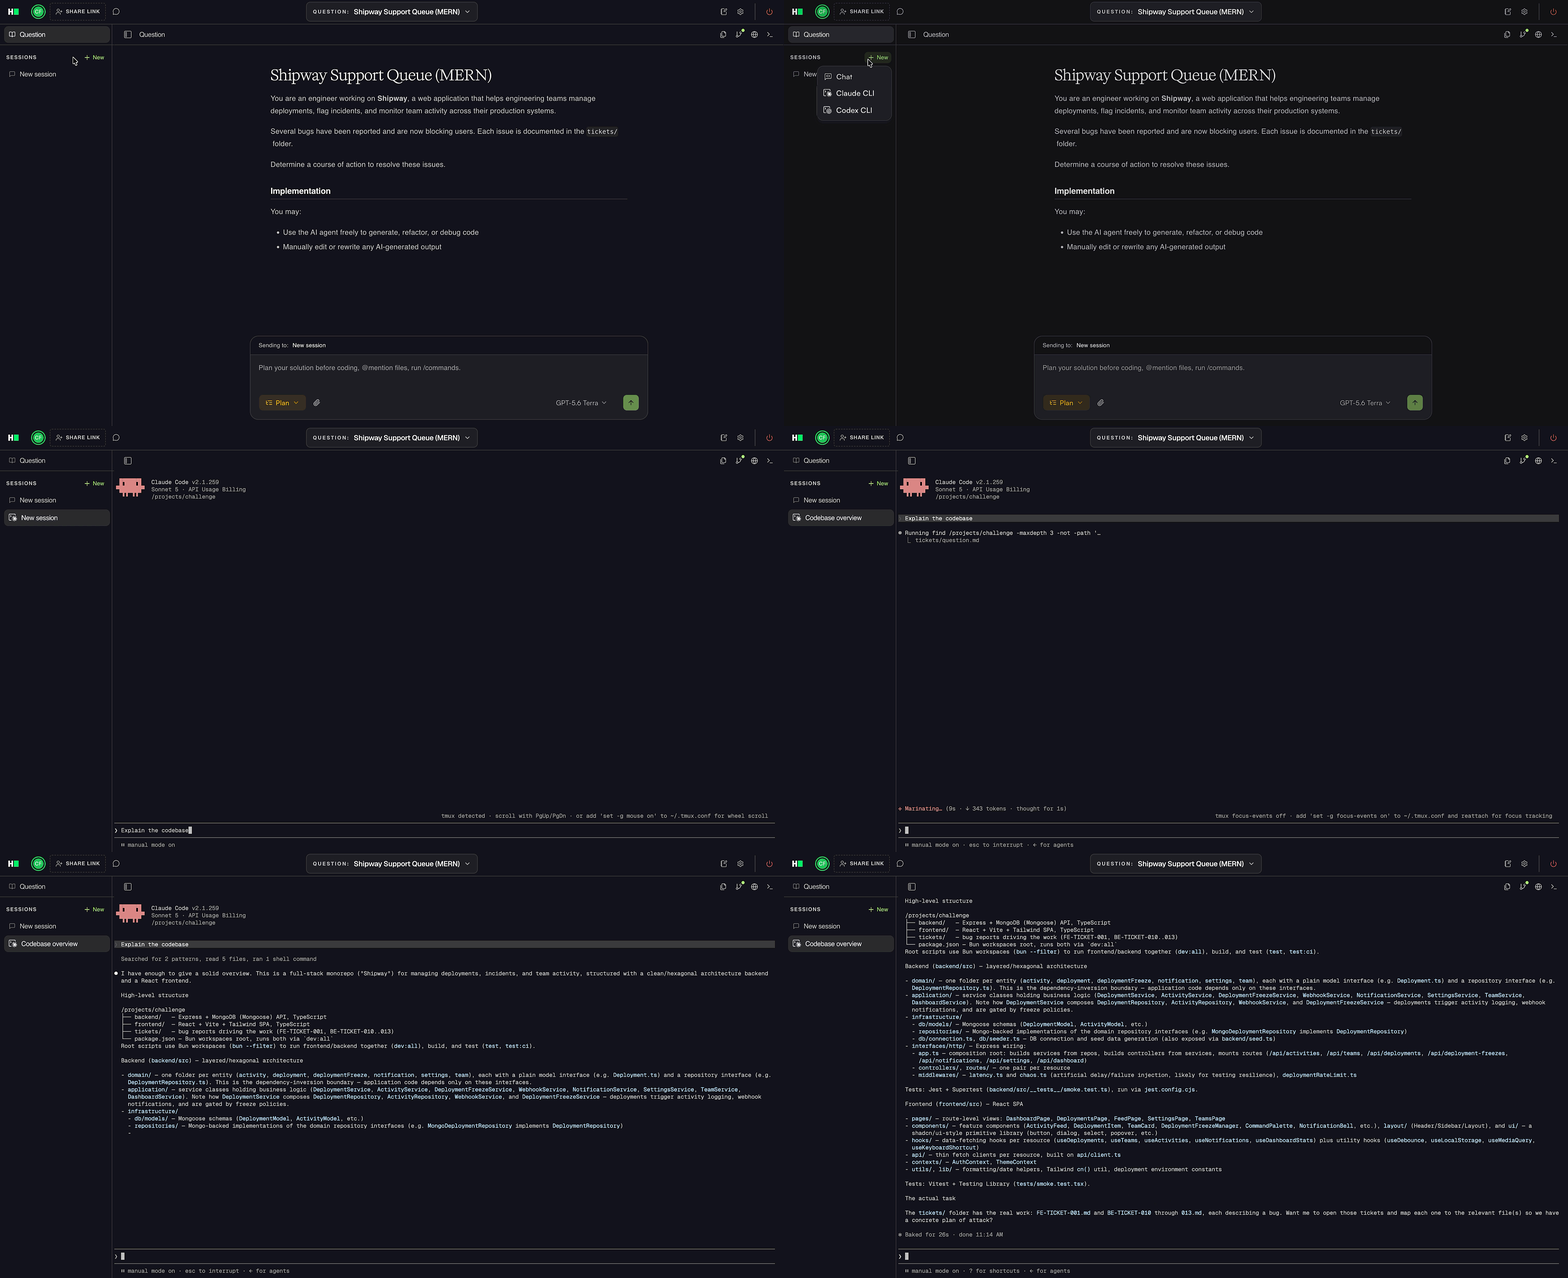
To start a session, click New in the Sessions panel and select one of the following:
Chat: Starts a session with HackerRank’s built-in AI Assistant.
Claude CLI: Starts a session with Claude Code.
Codex CLI: Starts a session with Codex.
When you select Claude CLI or Codex CLI, the tool opens in a terminal session within ADE. Claude Code and Codex require no additional setup.
AI Assistant
Use the prompt field at the bottom of the workspace to enter prompts, reference files with @ mentions, run / commands, select an AI Assistant mode and model, attach files, and submit prompts.
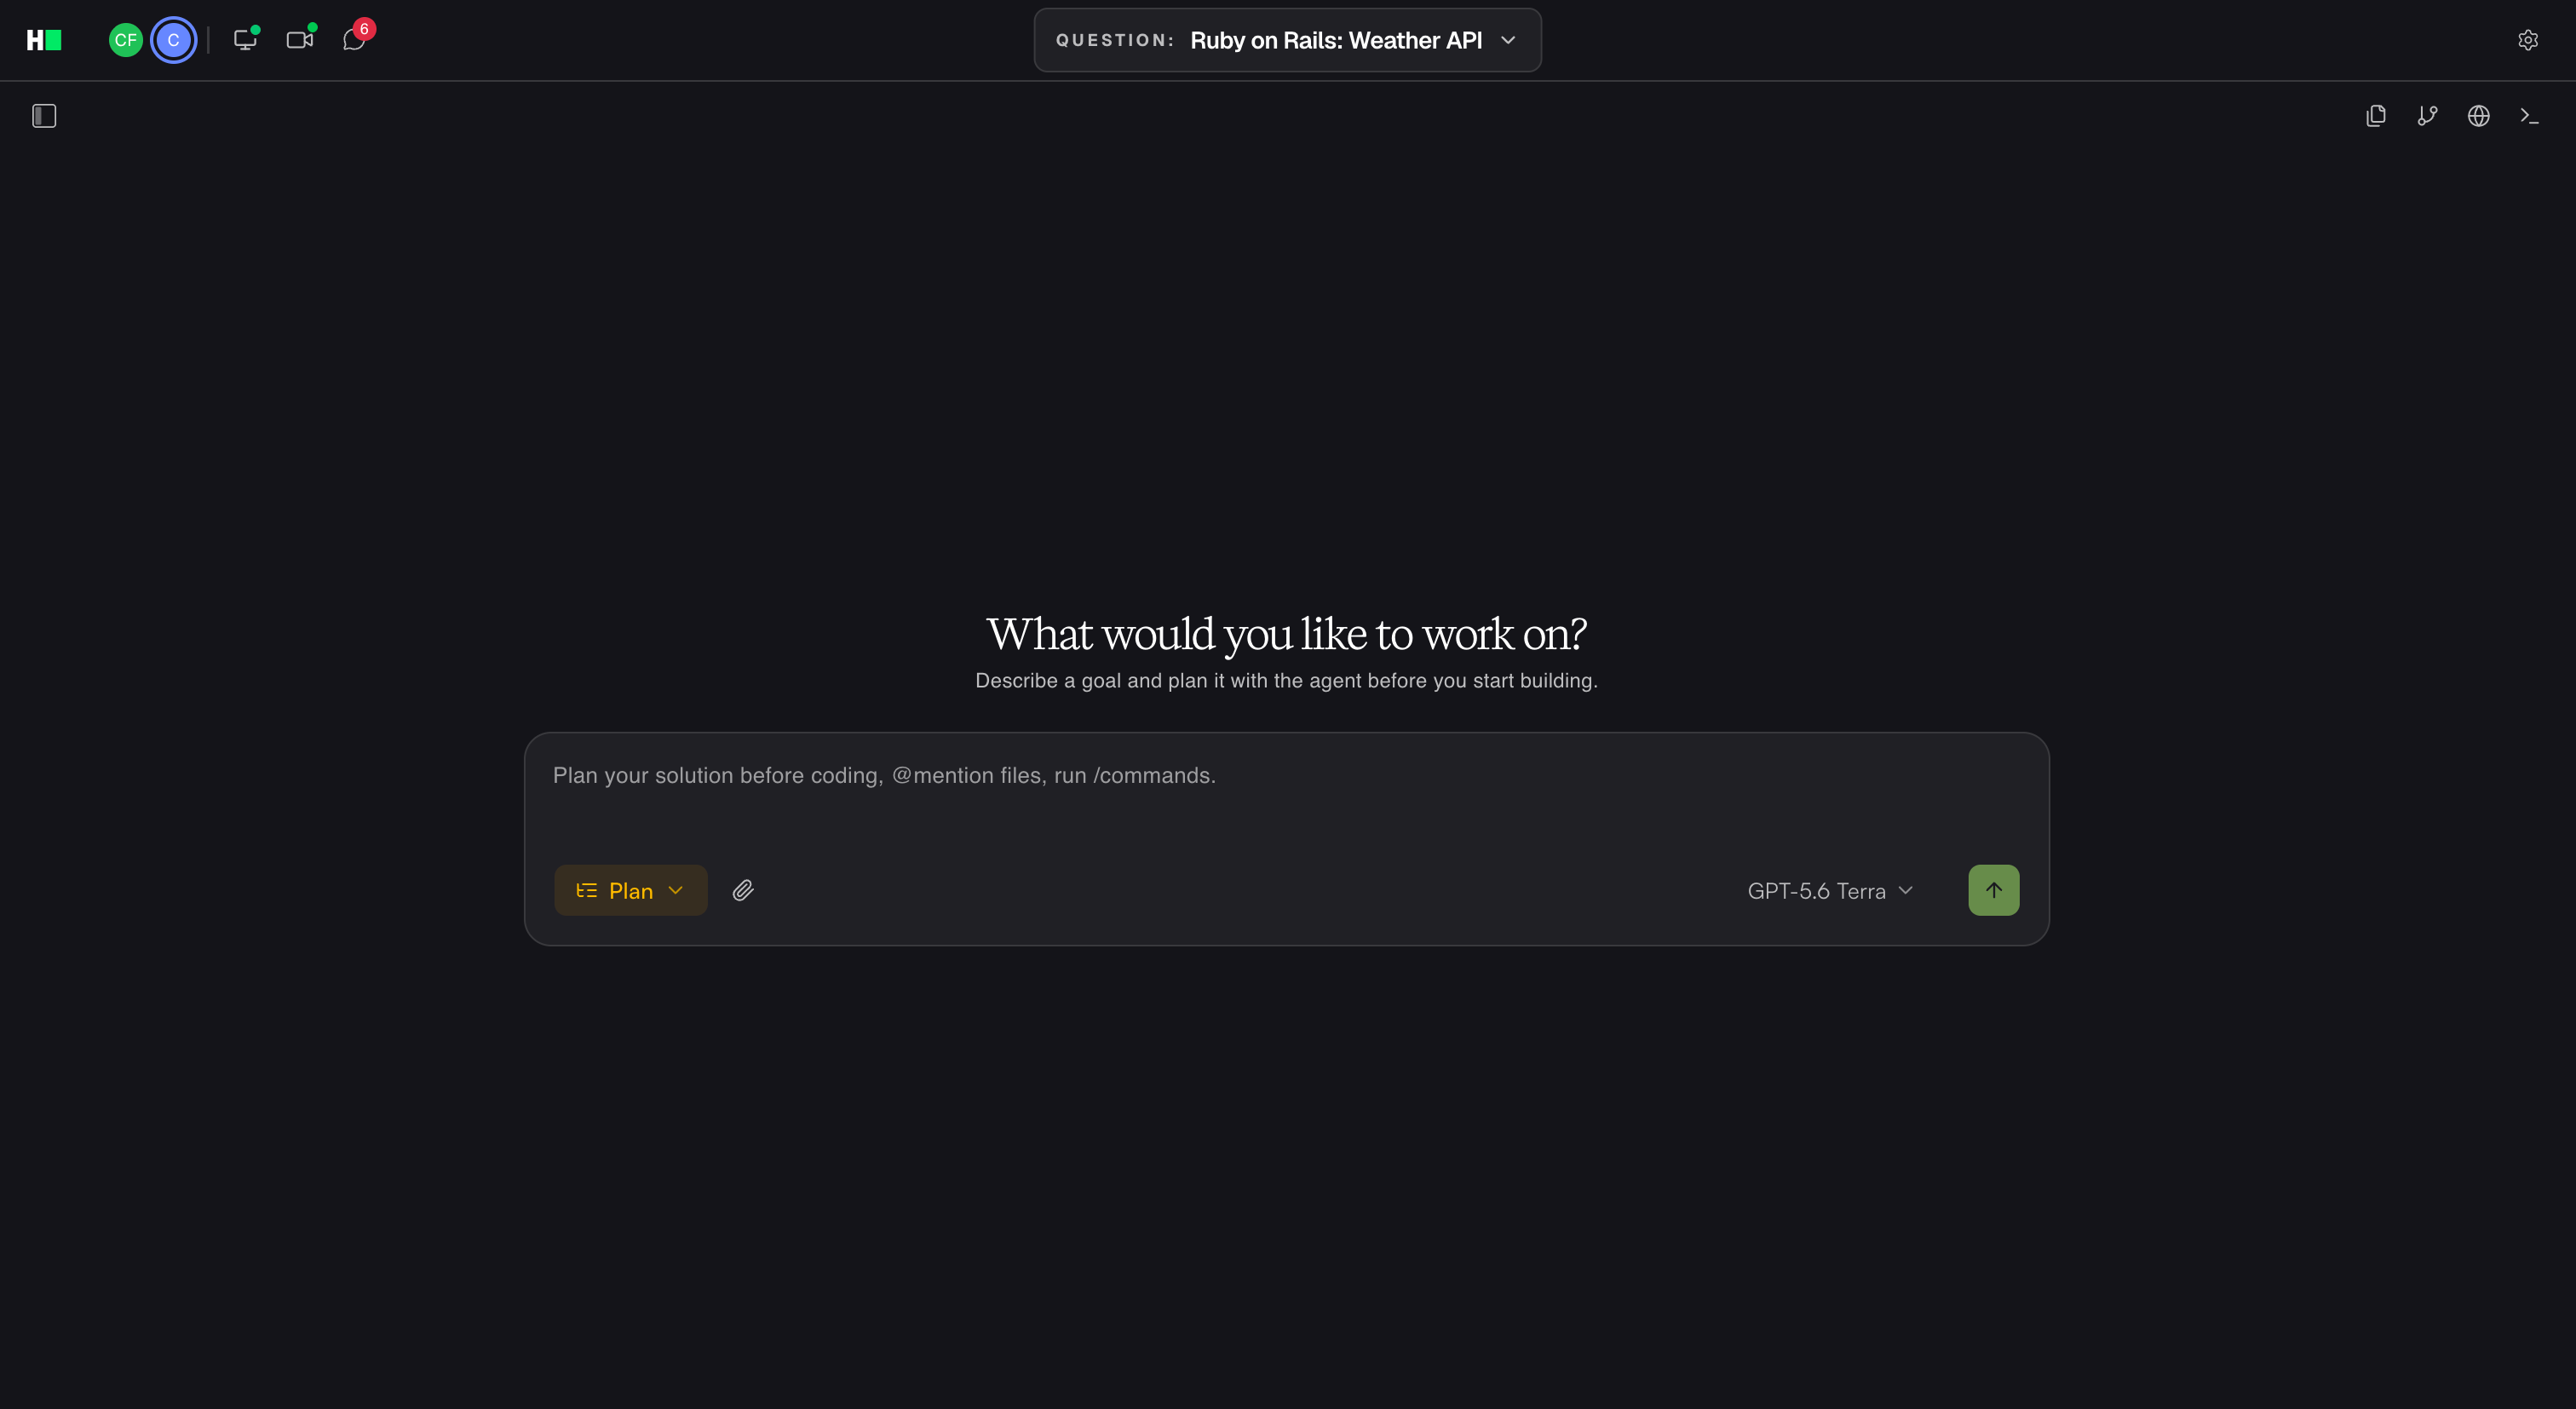
AI Assistant Mode: You can use the following modes:
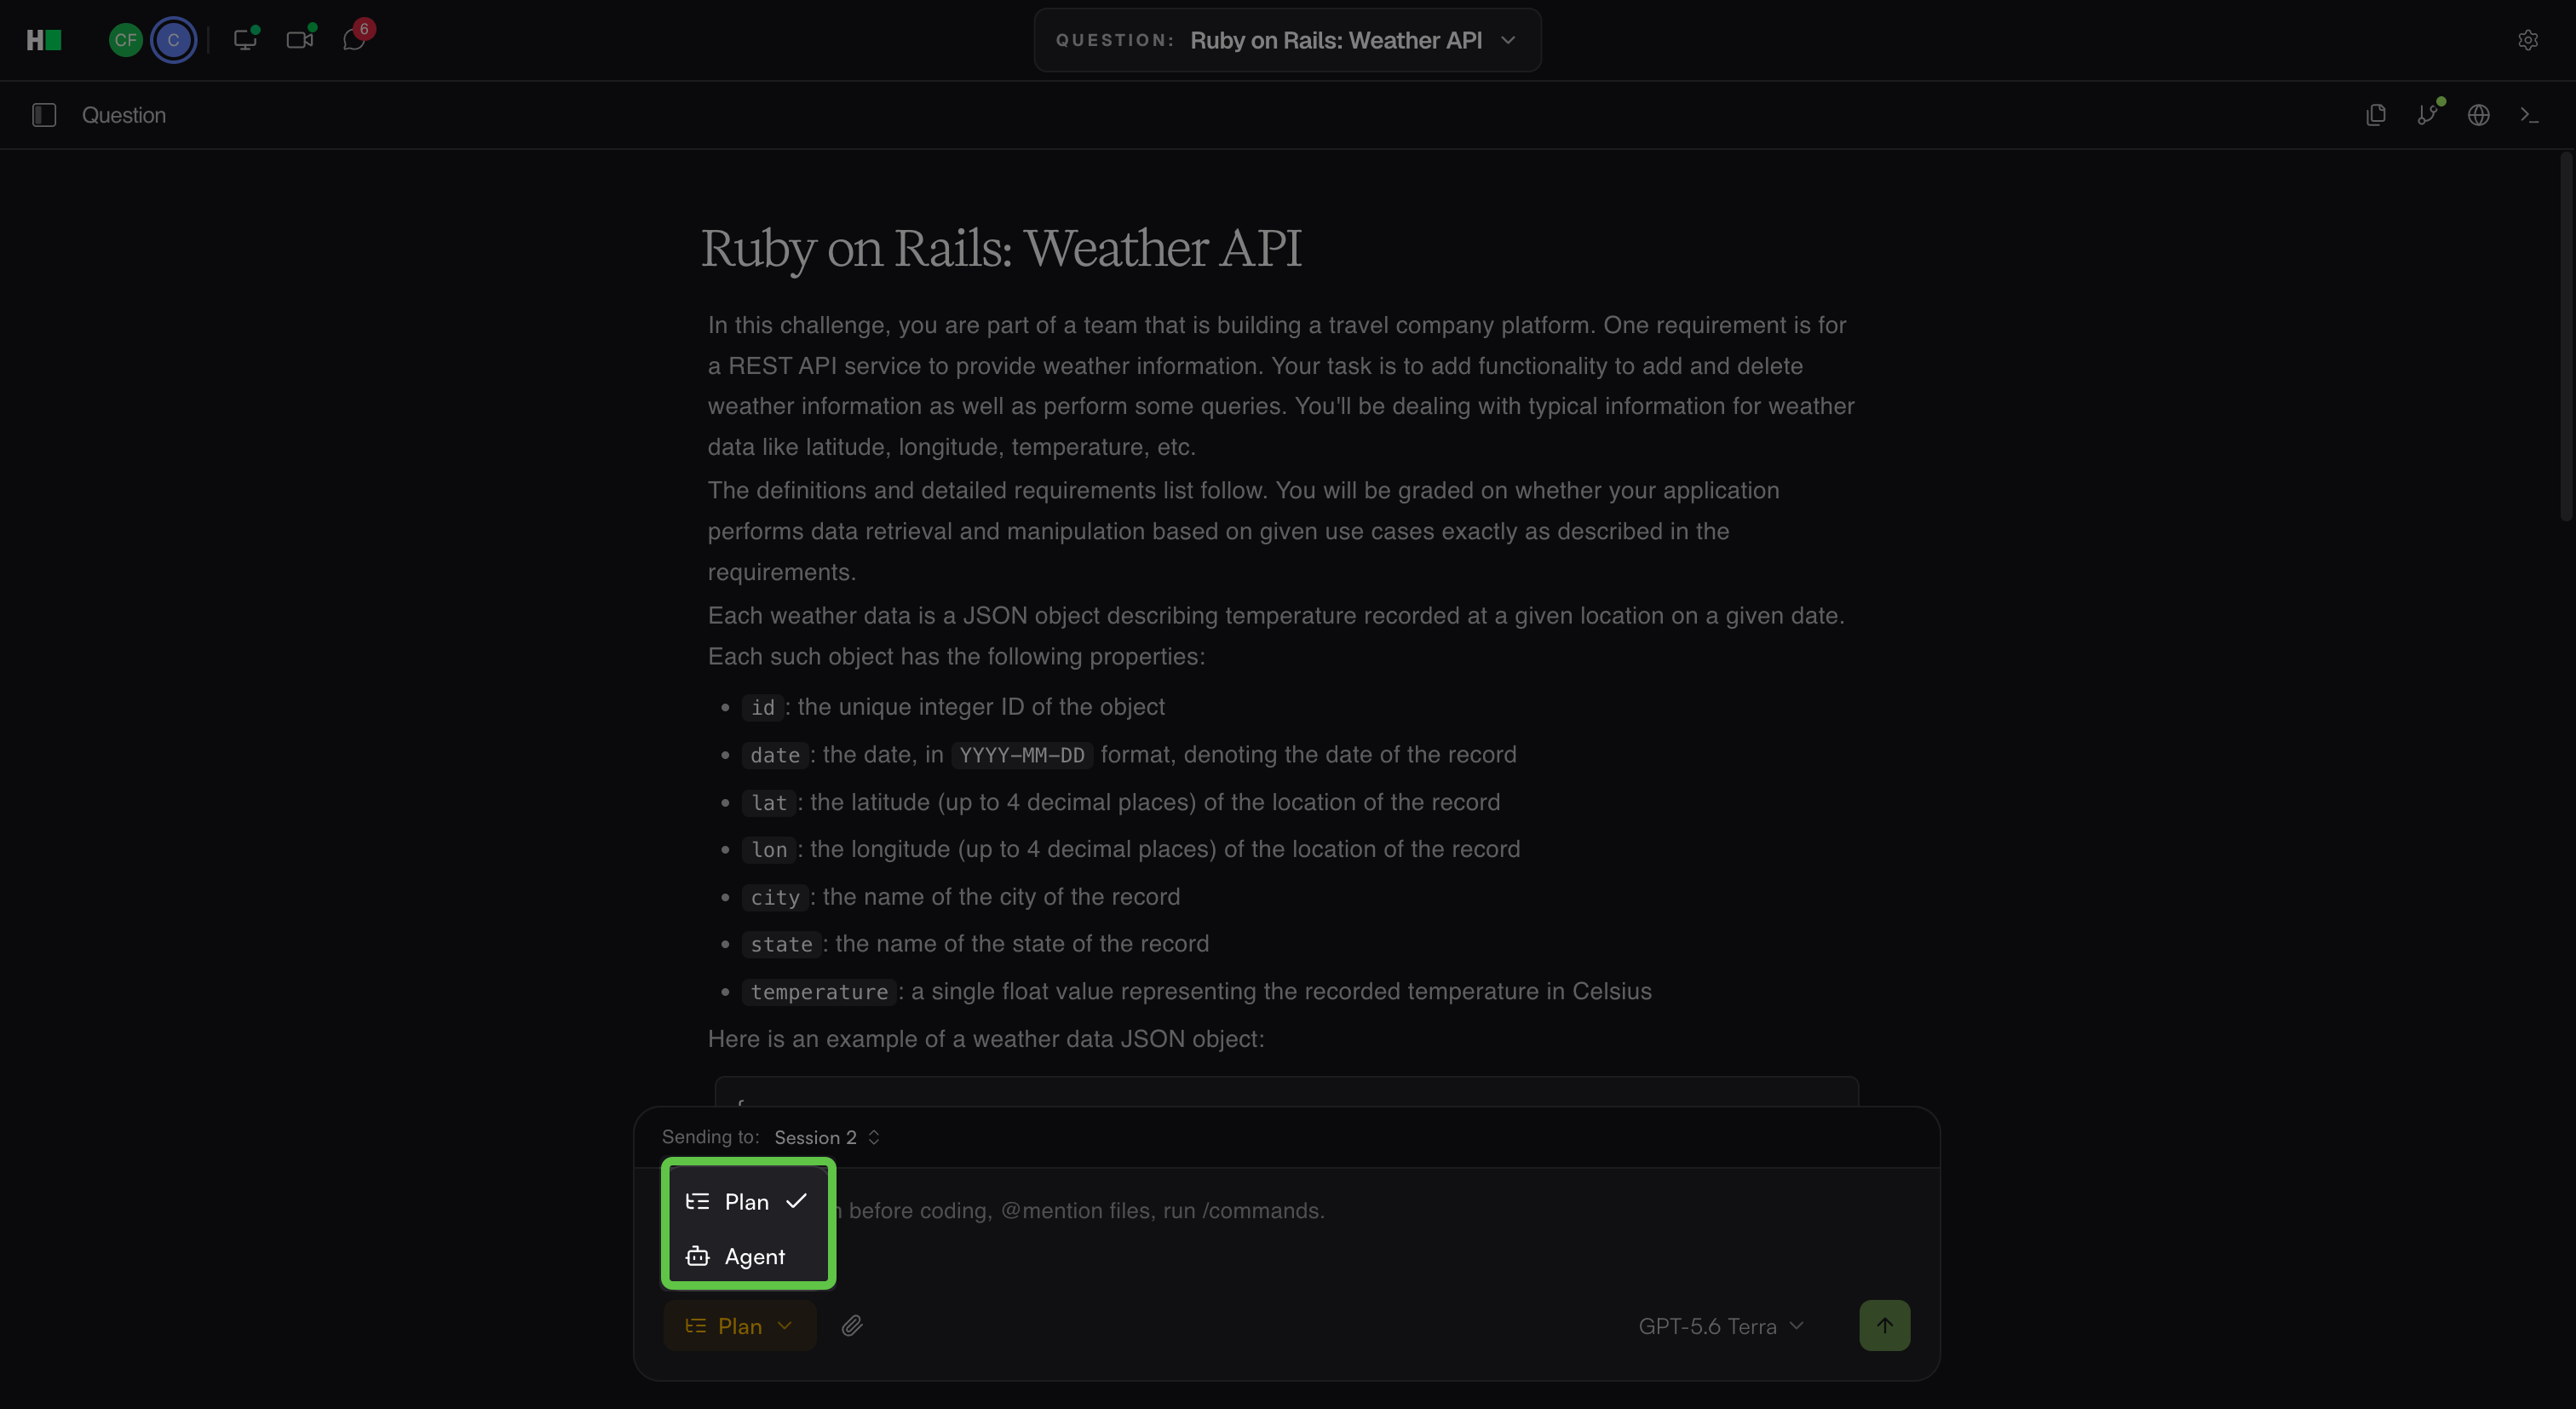
Plan Mode: Analyze the problem and create an implementation plan before writing code. The AI Assistant reviews the problem statement and existing code, asks clarifying questions when requirements are ambiguous, and creates a proposed implementation plan in Markdown. Plan Mode does not modify code.
Agent Mode: Implement your solution with the AI Assistant. The AI Assistant can write code, edit files, and run actions based on your prompts.
Use the mode selector in the prompt field to switch between modes.
Model Switching: Select an available model based on your task or preference. These selections persist when you start a new chat or refresh the IDE. The available models depend on the hiring company’s configuration.
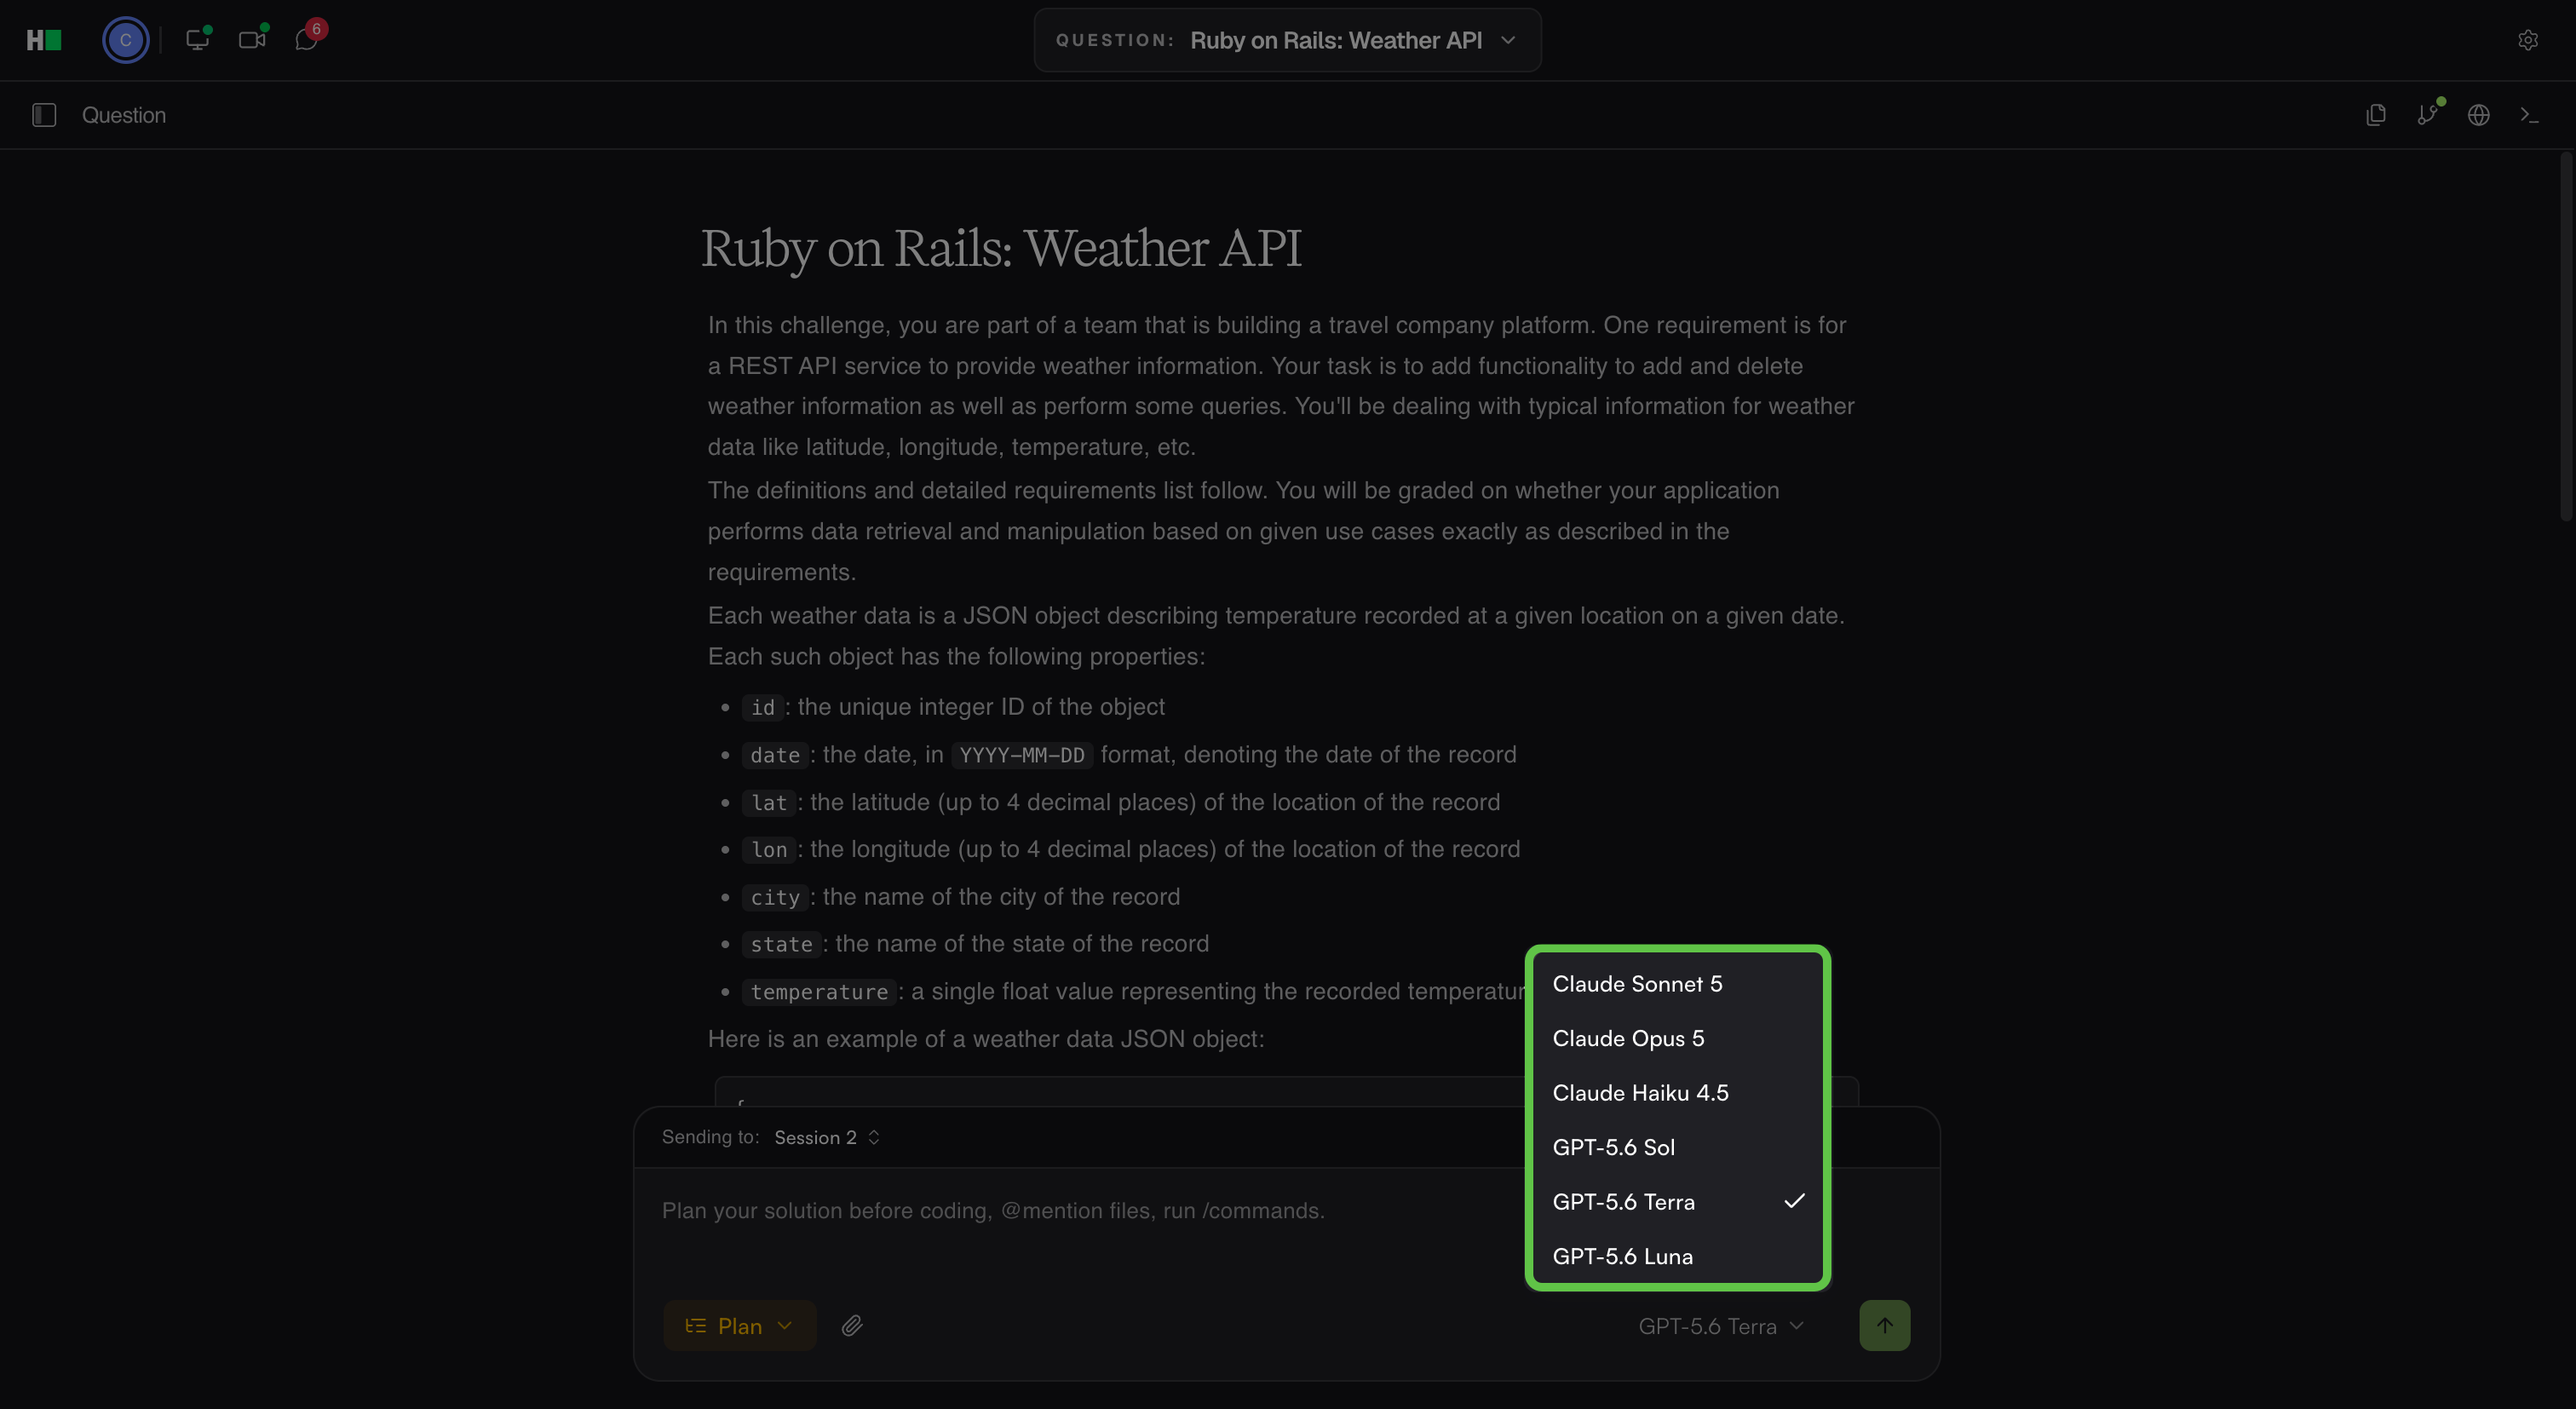
Note: The AI Assistant is available only when the hiring company enables it. For more information, see 📄 AI Assistant in Interview.
Editor
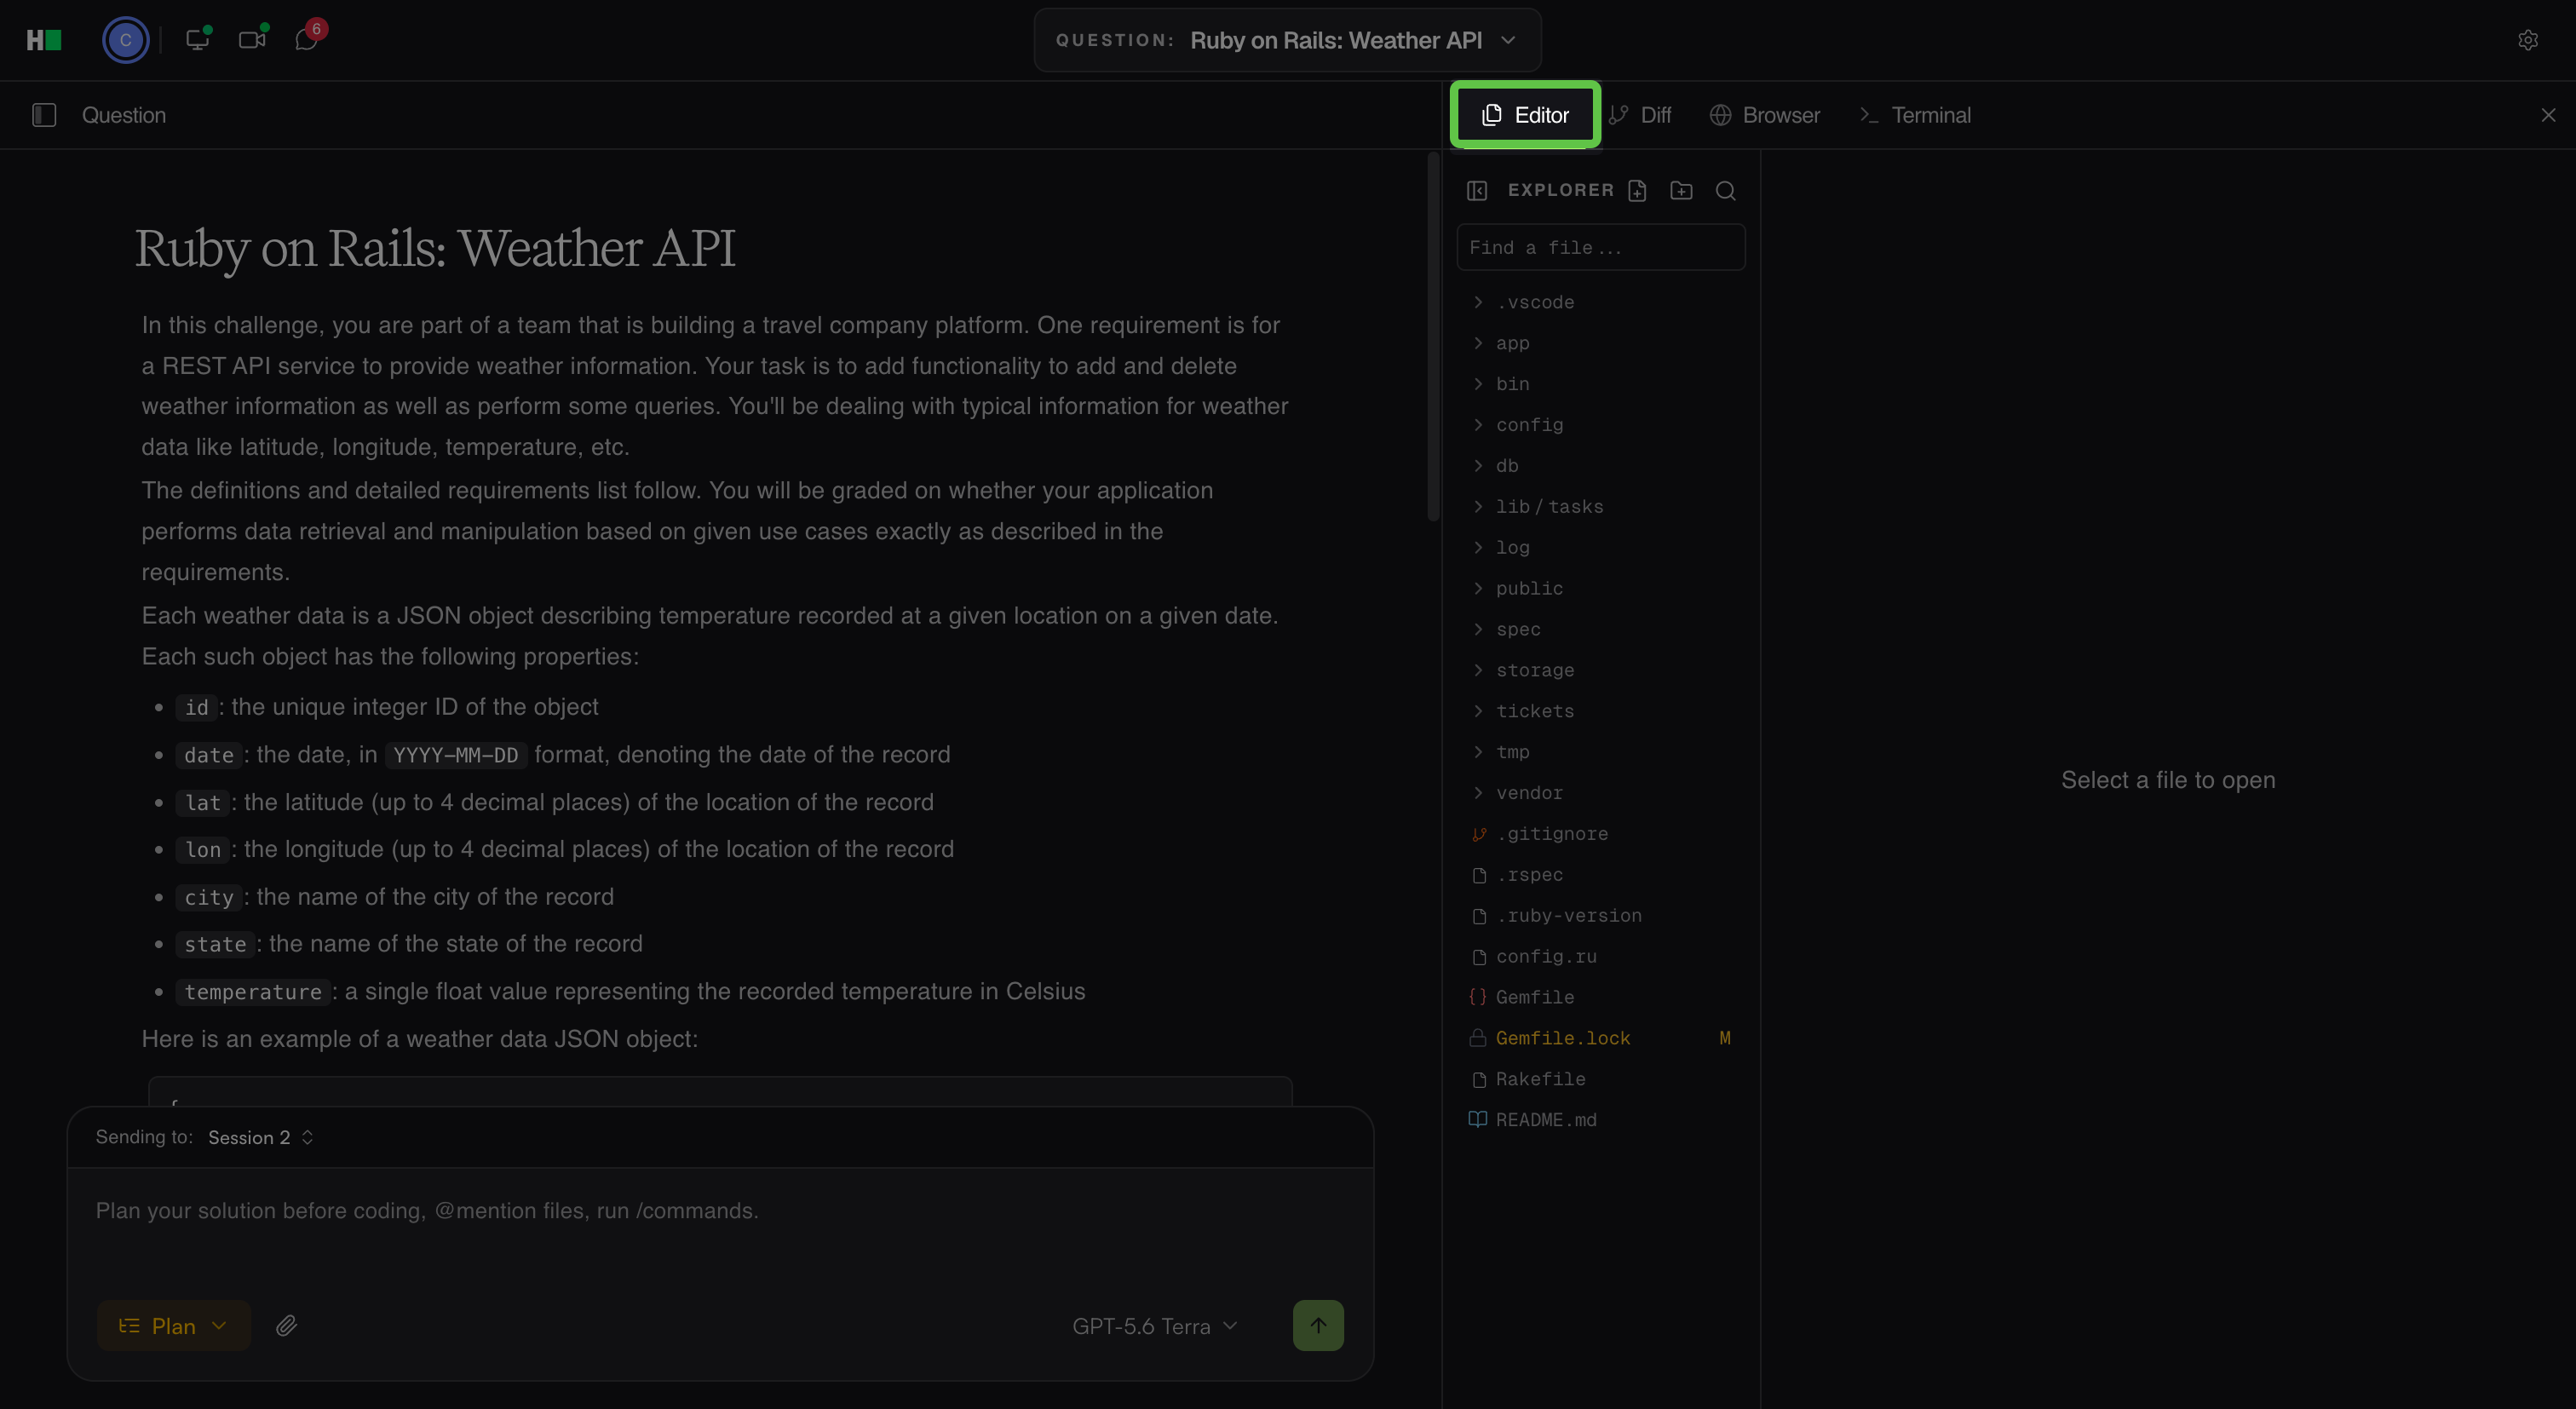
Click the Open editor pane icon in the upper-right corner. The Editor tab displays the repository files and folders in Explorer. You can create files and folders, search the repository, and select a file to open it. Use Find a file to search for a file by name.
Diff view
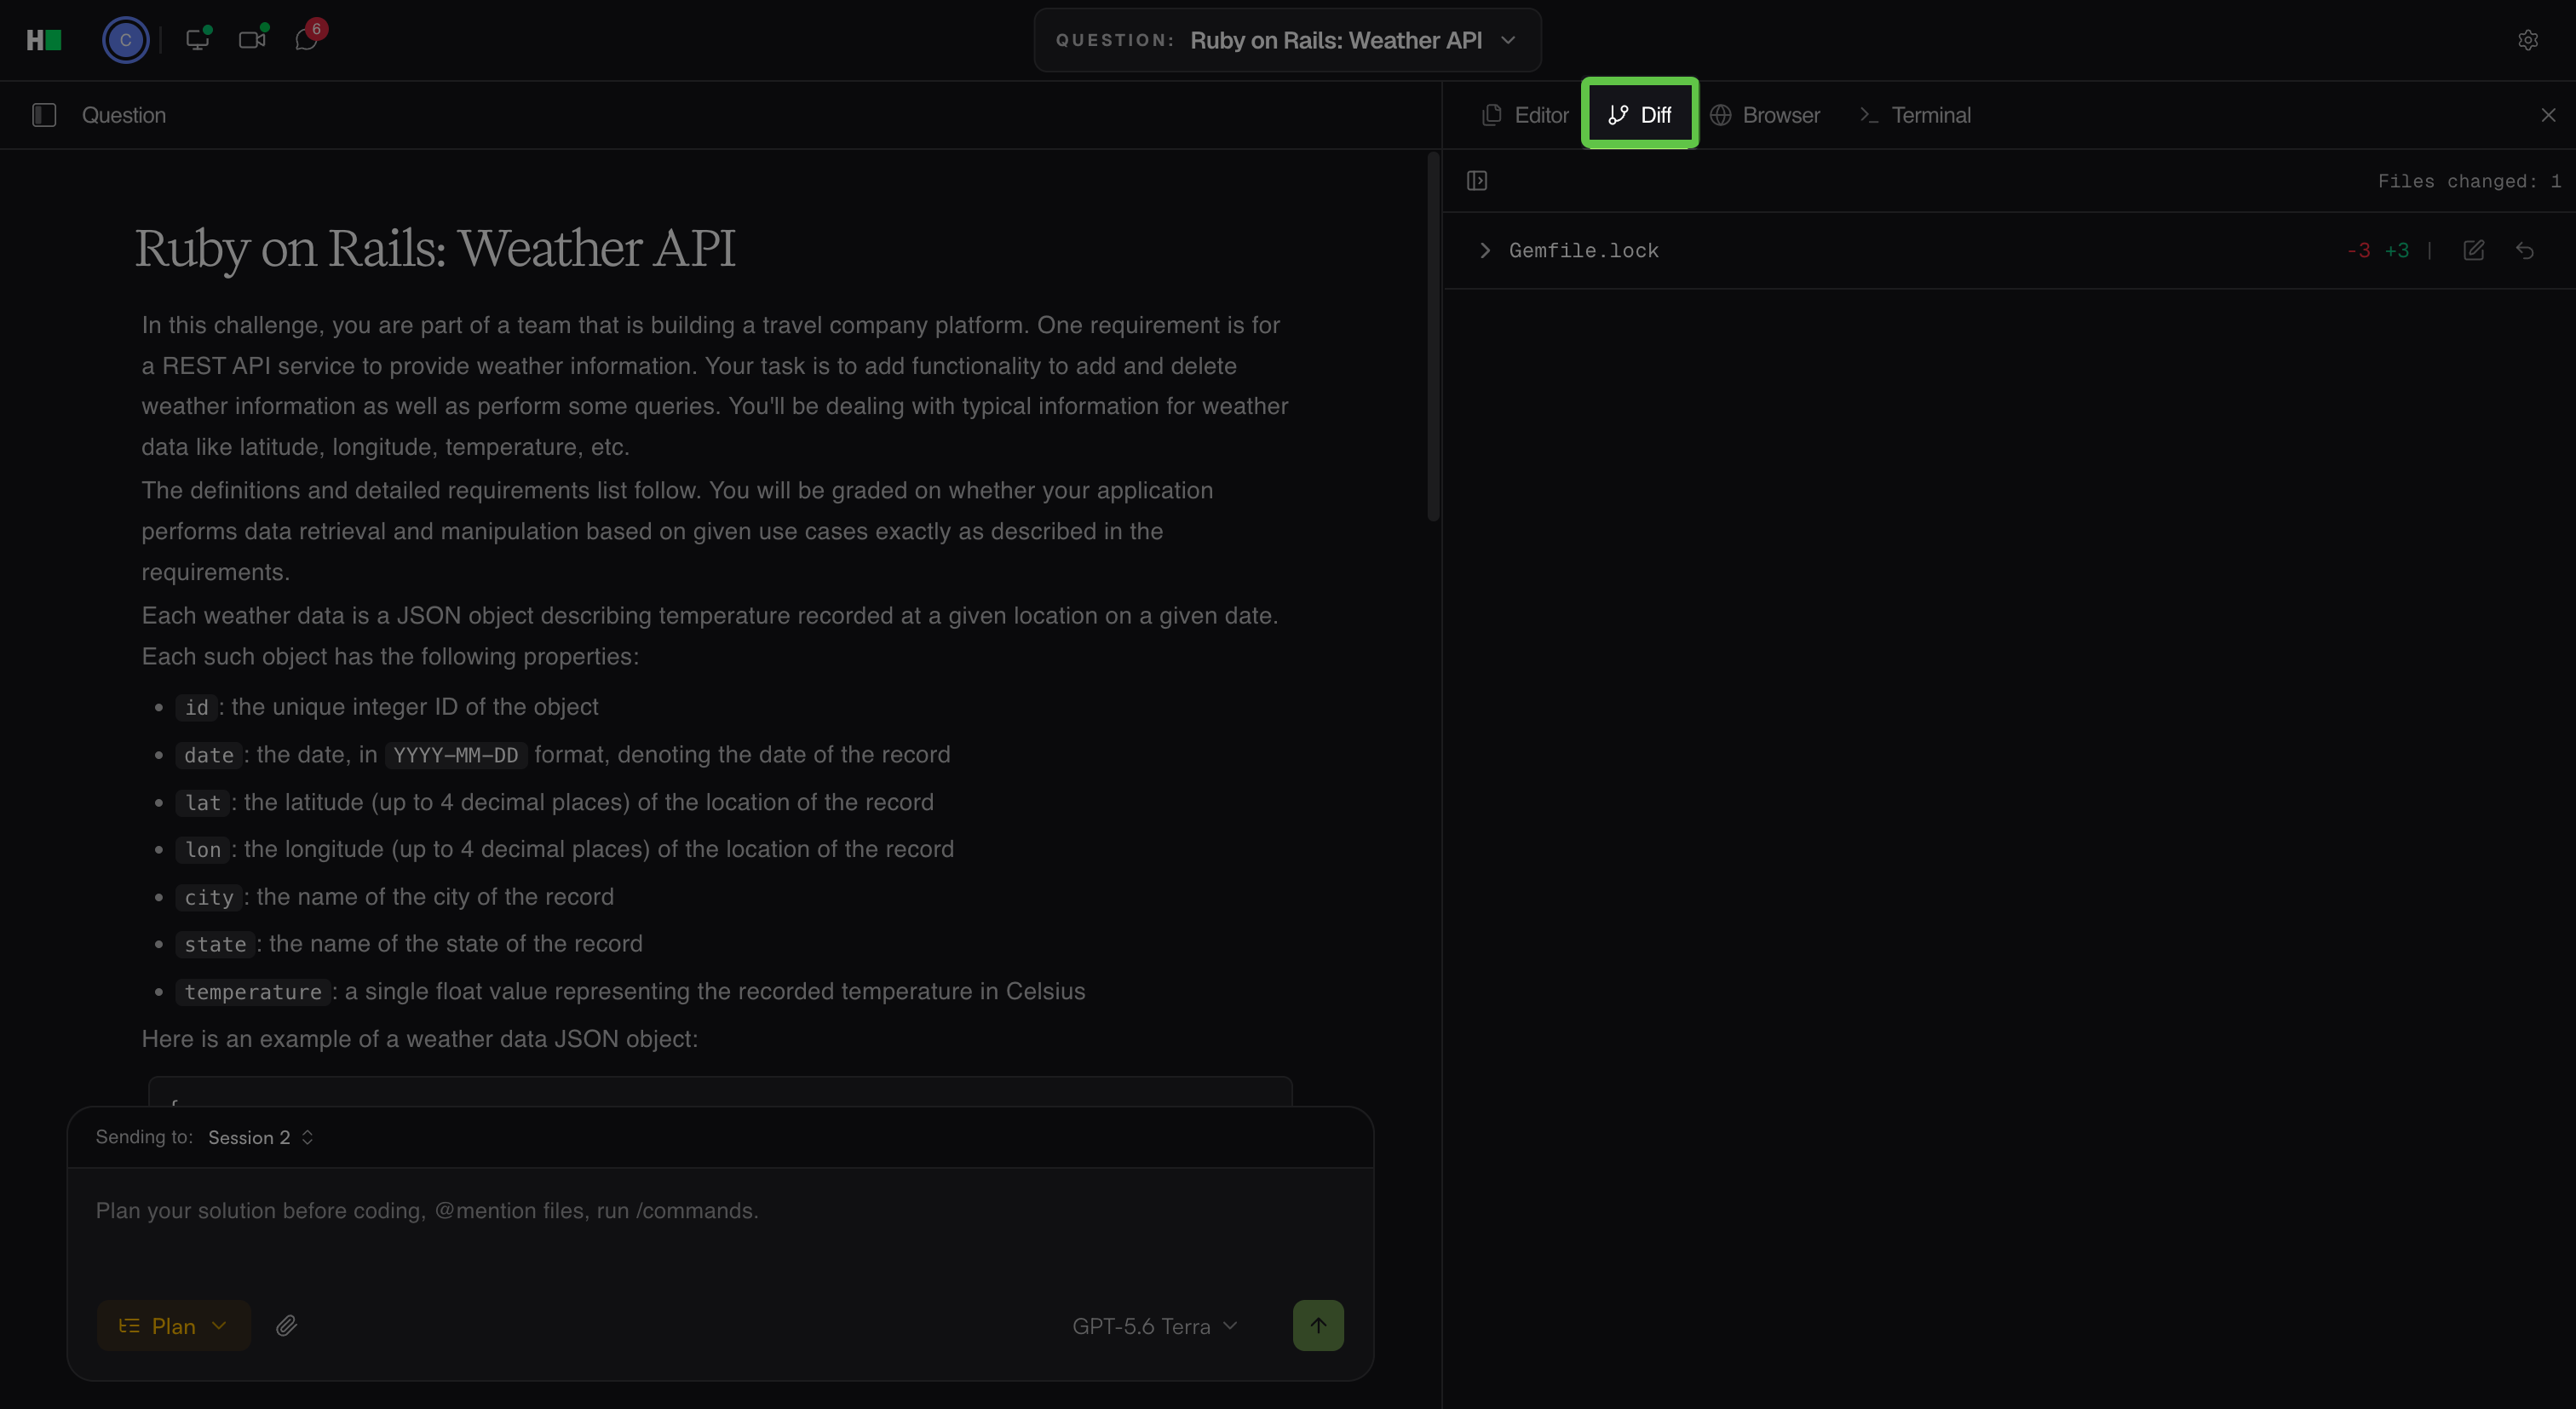
Click the Open diff pane icon in the upper-right corner. The Diff tab displays files that change during the interview and compares them with the repository’s starting state. If no files have changed, the tab displays No changed files yet.
Browser
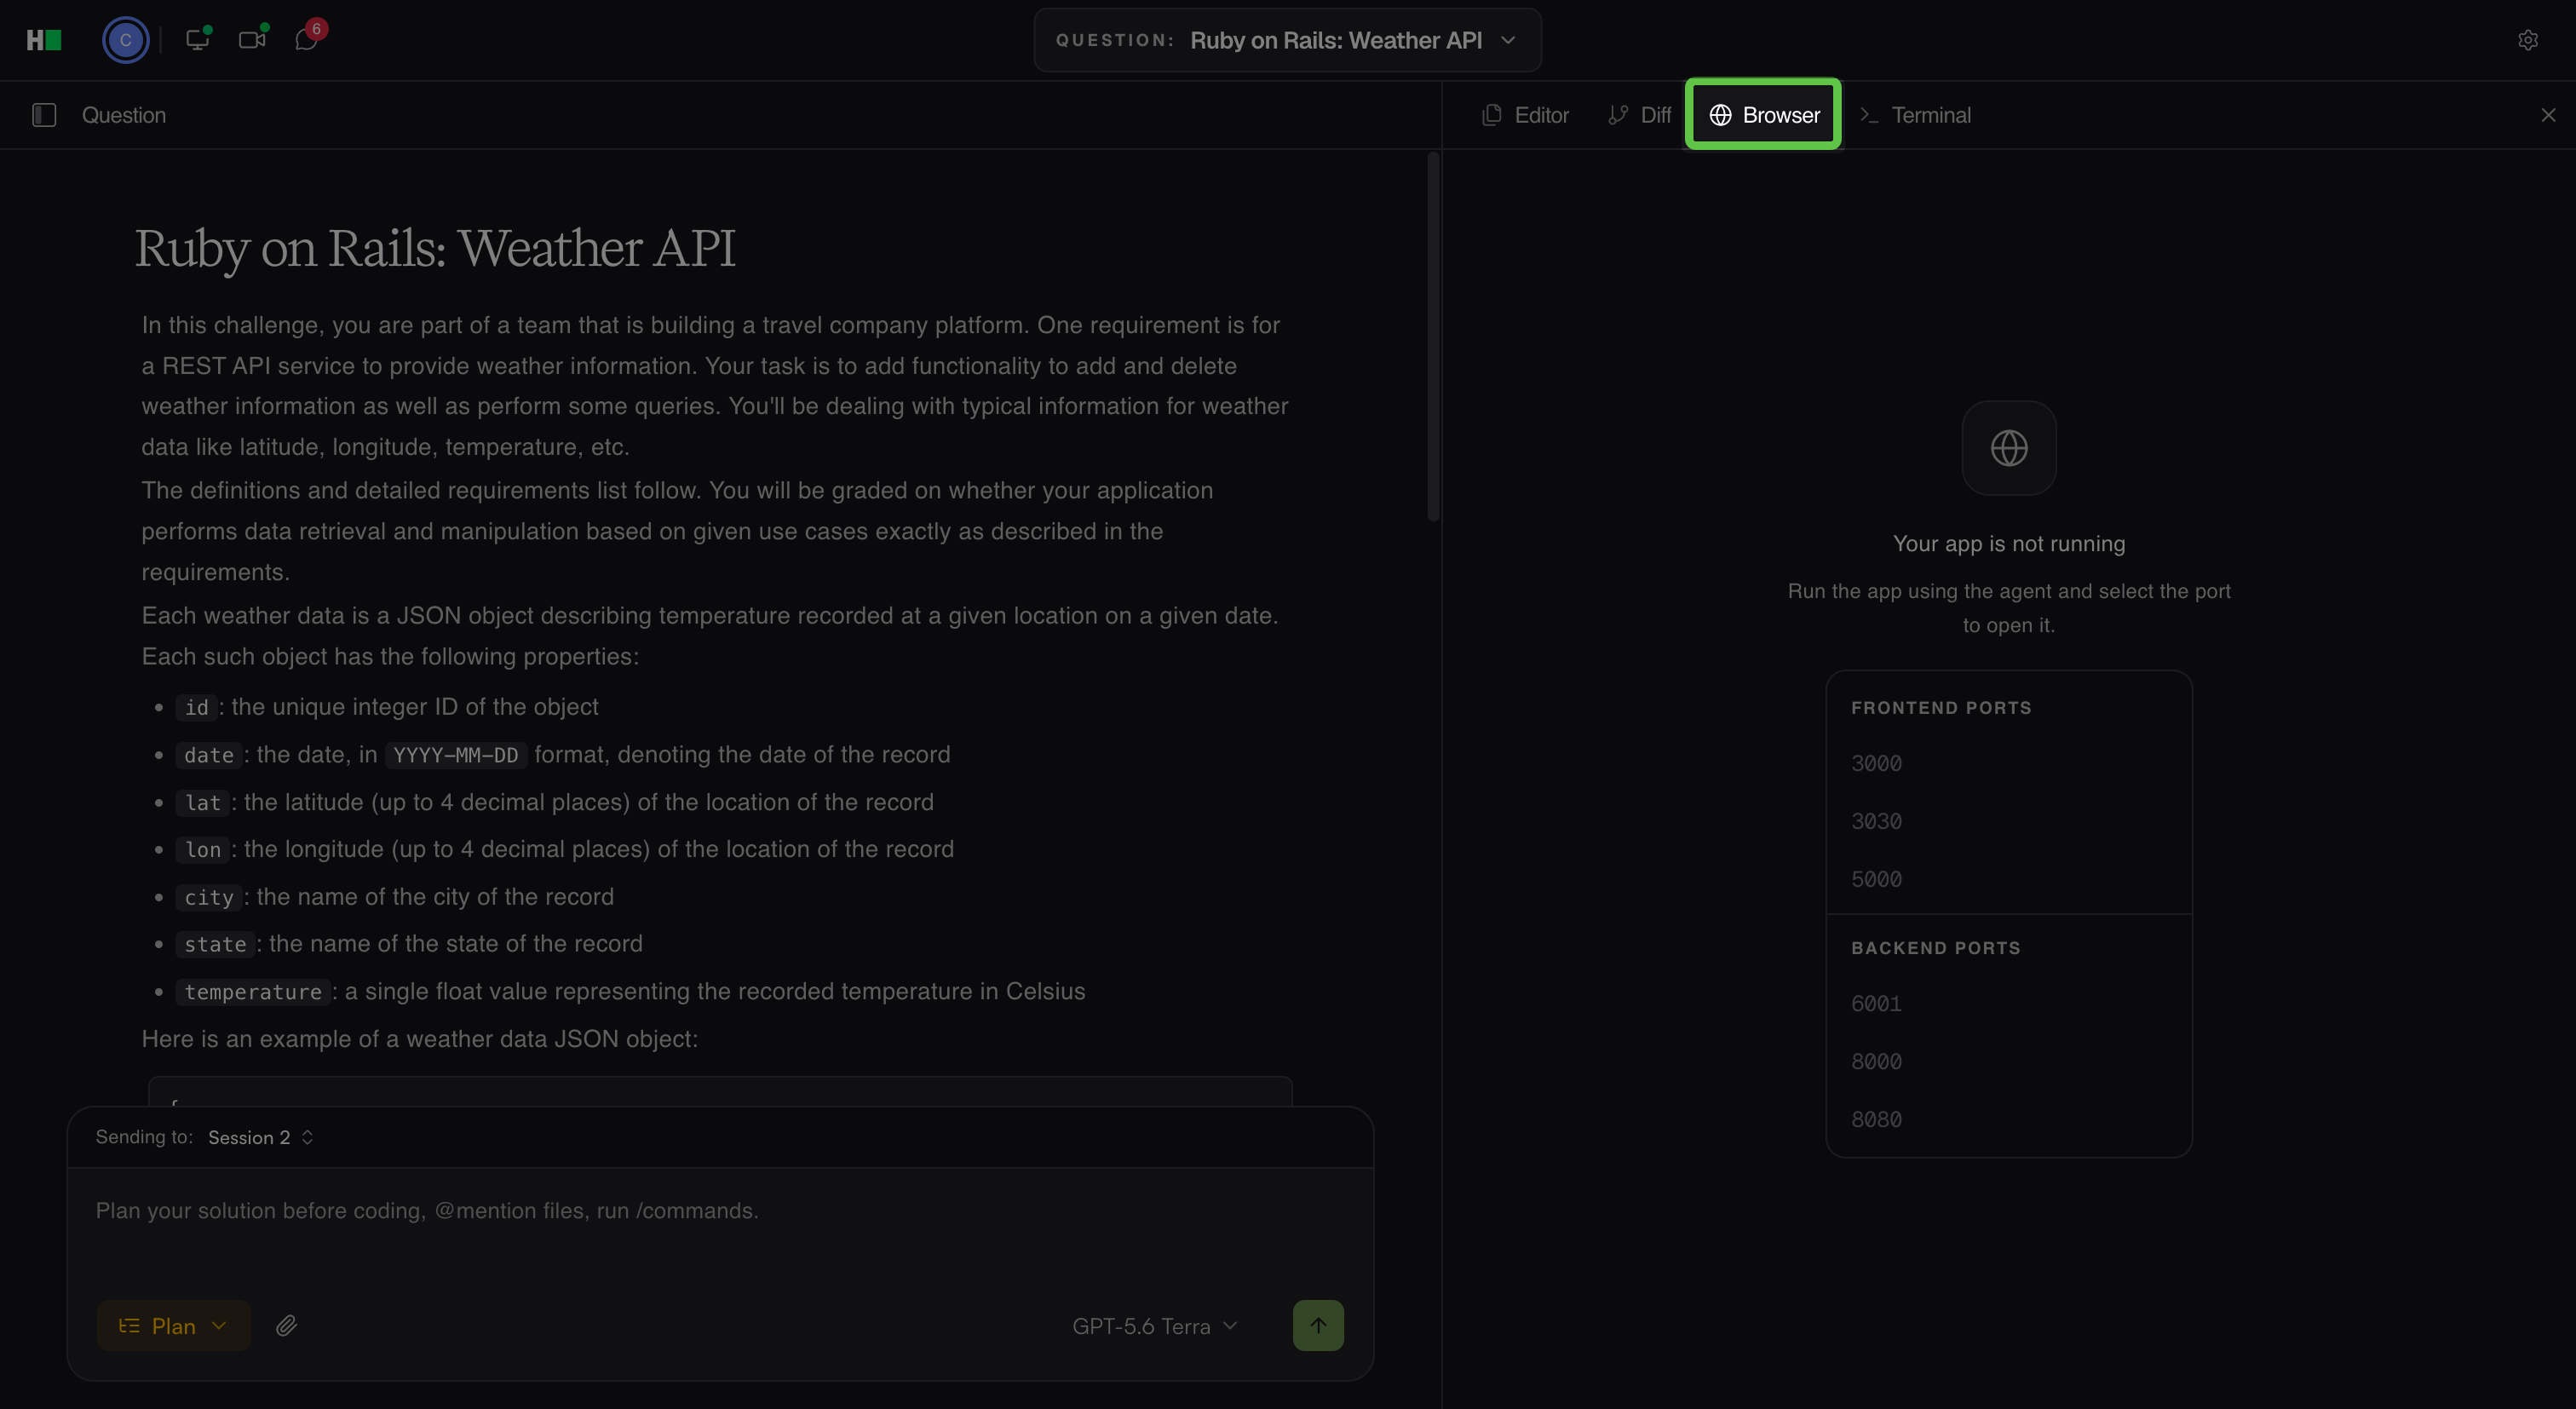
Click the Open browser pane icon in the upper-right corner. The Browser tab runs the application inside the environment. The agent starts the application, and you select a port from the available frontend and backend ports to open it. Until the application is running, the tab prompts you to run it using the agent.
Terminal
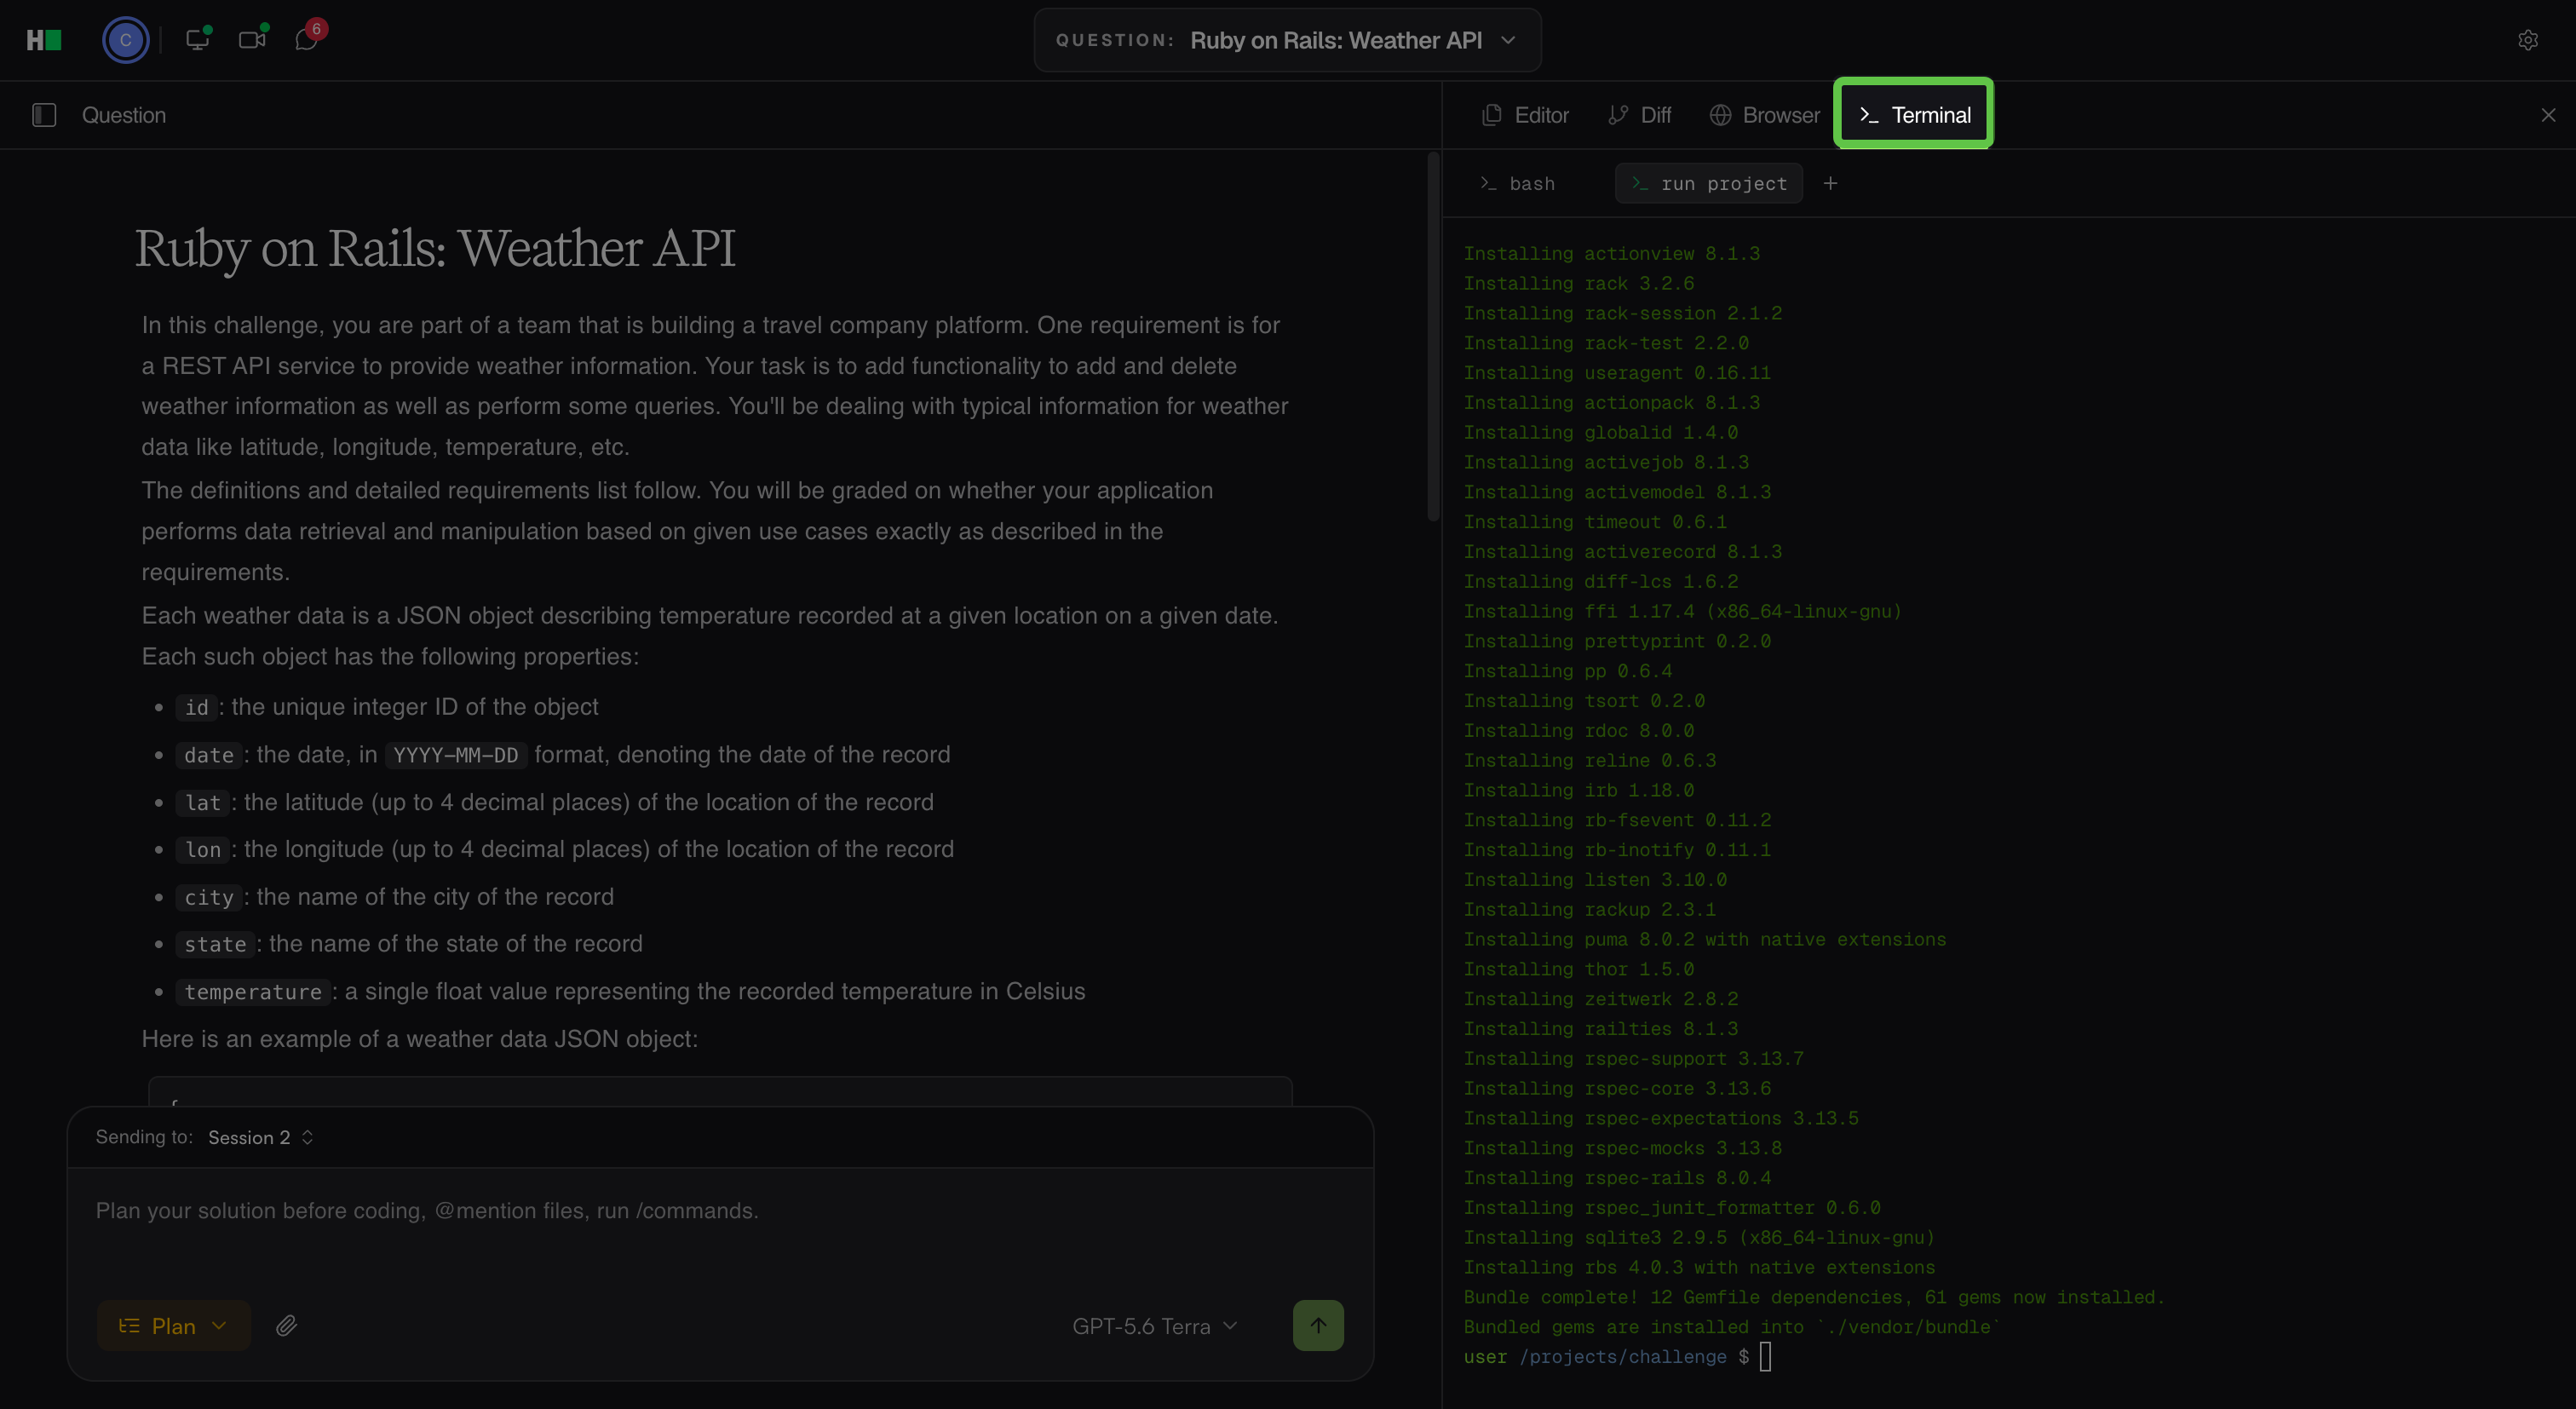
Click the Open terminal pane icon in the upper-right corner. The Terminal tab provides command-line access to the ADE workspace. You can inspect the repository, start services, run tests, and verify application behavior. Select the plus (+) icon to open another terminal tab.
After you open any of the right-side development panes, you can switch between the Editor, Diff, Browser, and Terminal tabs. Select the close (×) icon in the upper-right corner to close the pane.
ADE settings
Use ADE settings to control how the AI Assistant displays its work and uses skills, subagents, and MCP servers.
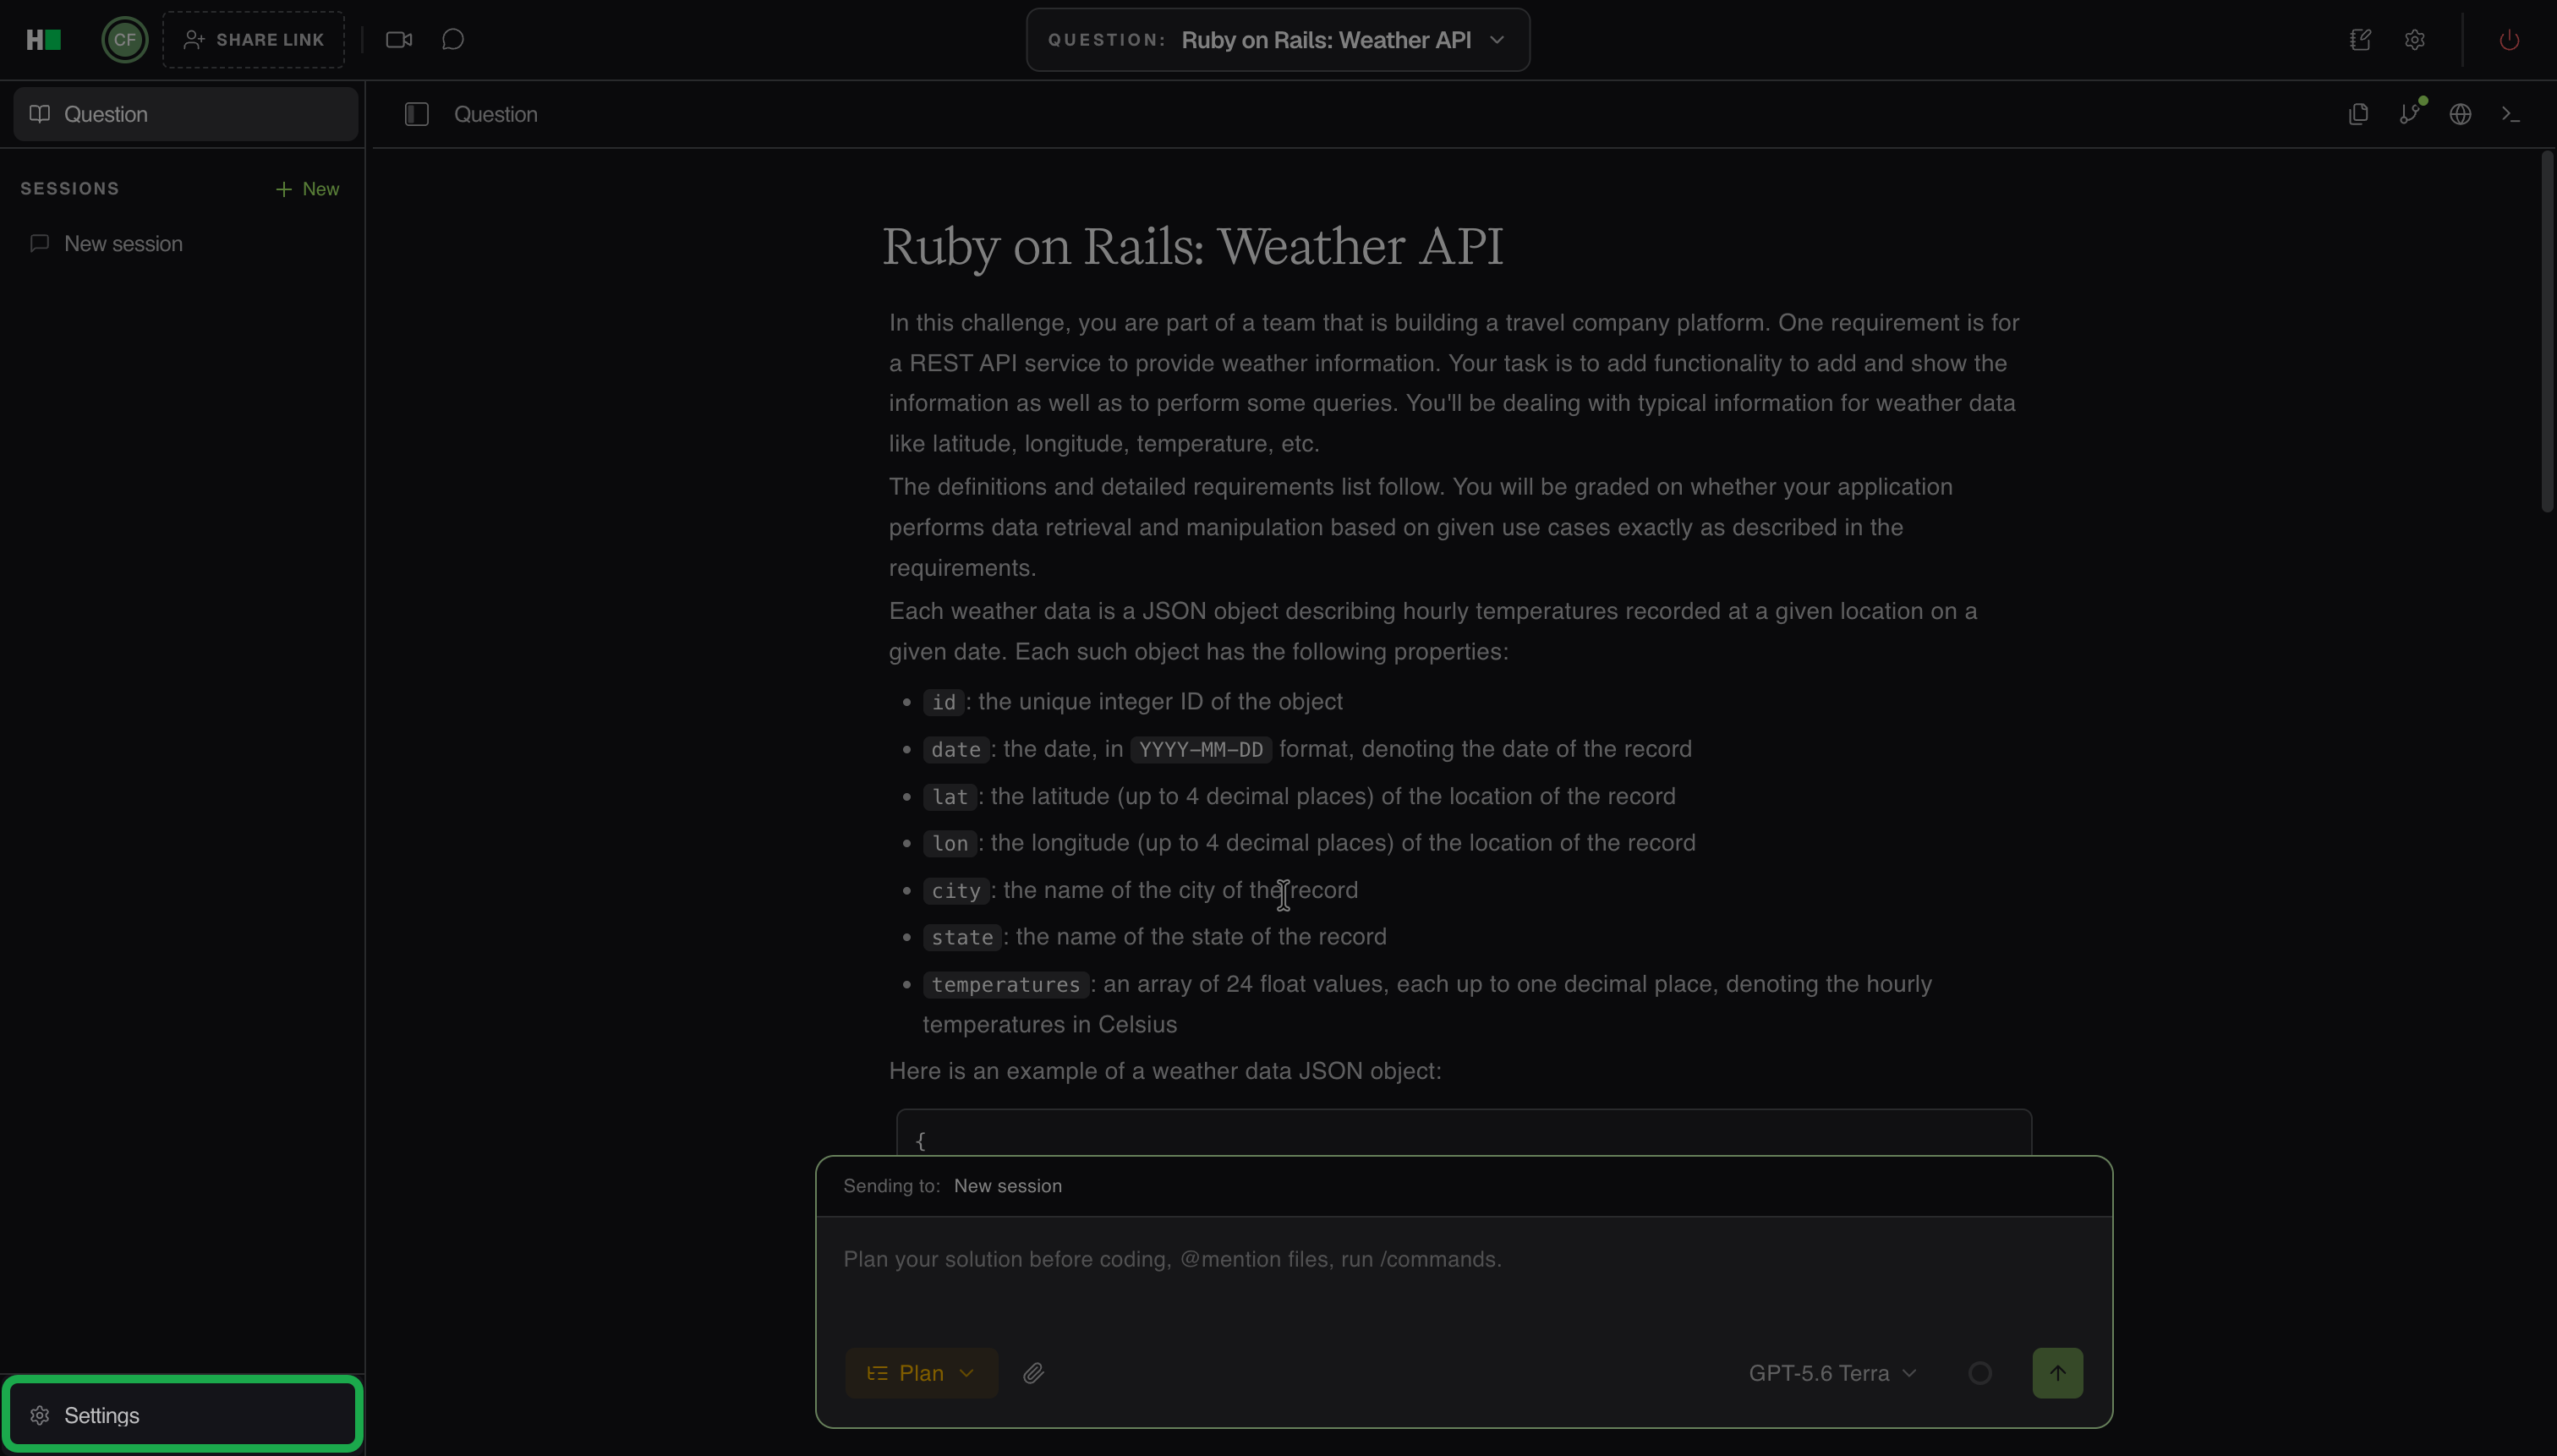
To open ADE settings, click Settings at the bottom of the left panel.
Important Note: Changes to ADE settings apply to both you and the interviewer, only for the current question in your interview.
General
The General tab controls the display of thinking blocks across chats.
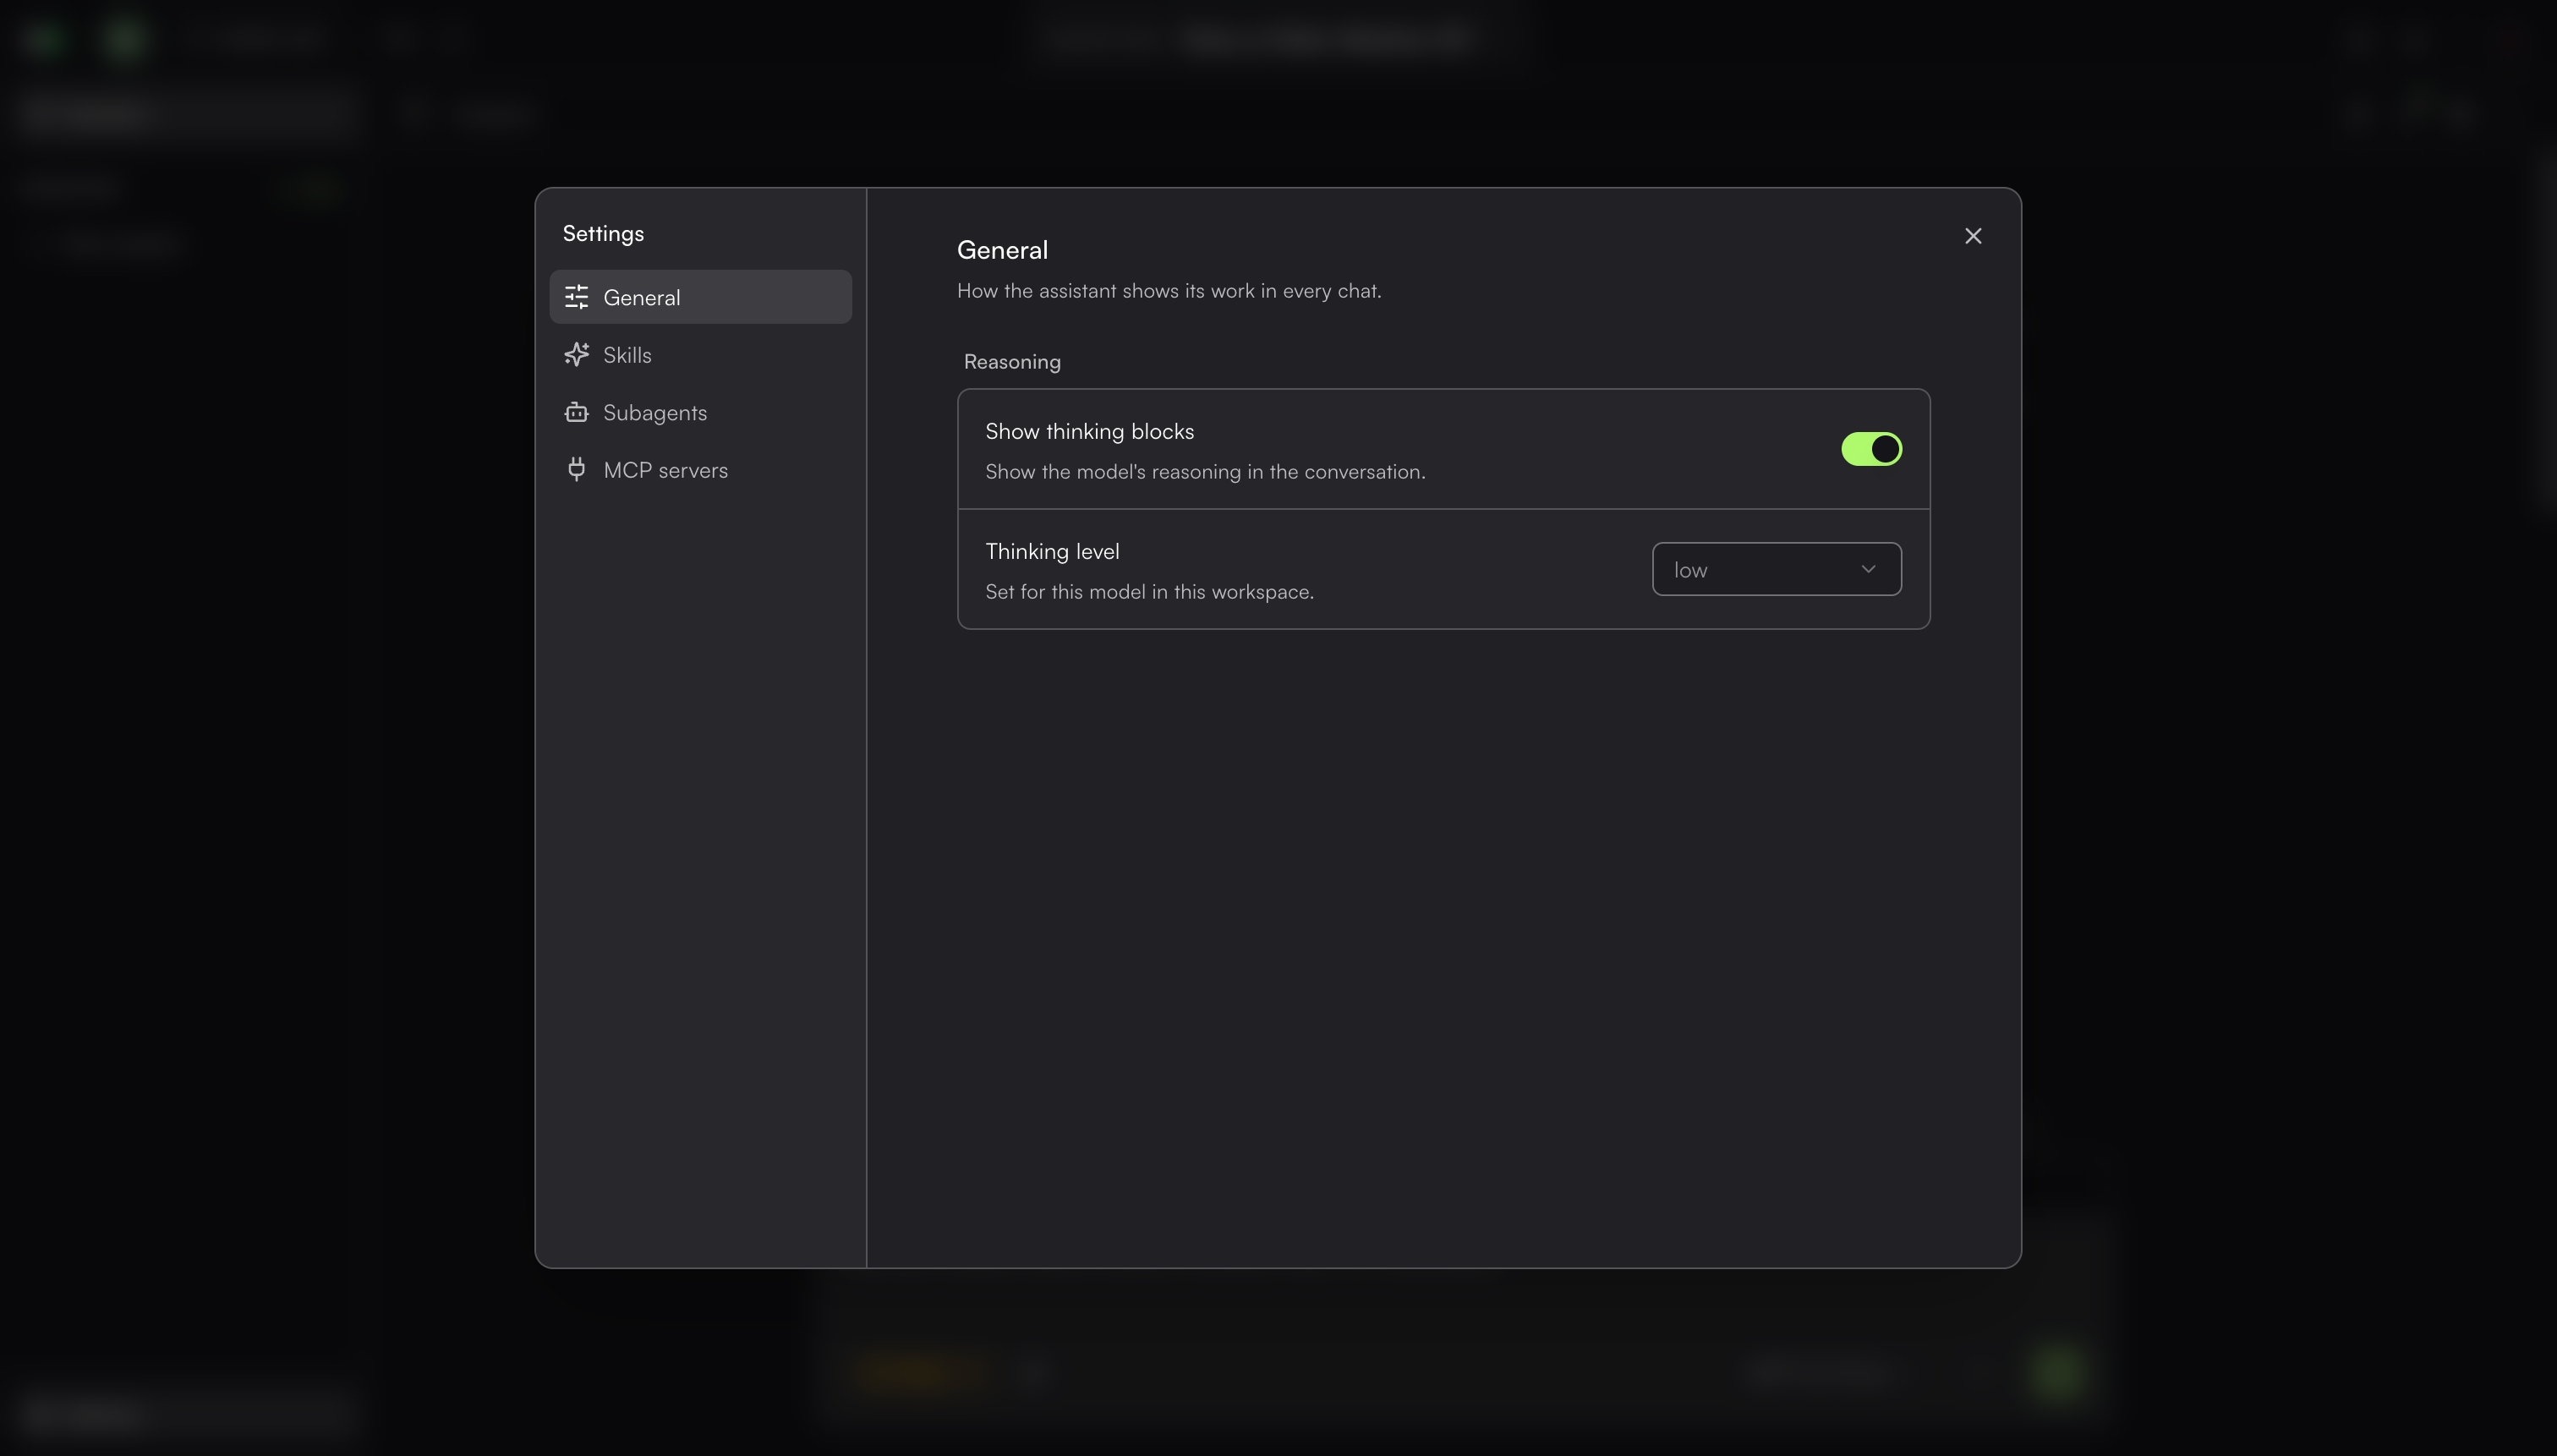
Turn on the Show thinking blocks toggle to display the model’s reasoning in the conversations. Turn it off to hide the reasoning.
Note: By default, the thinking level set to low for all interviews. You cannot change it.
Skills
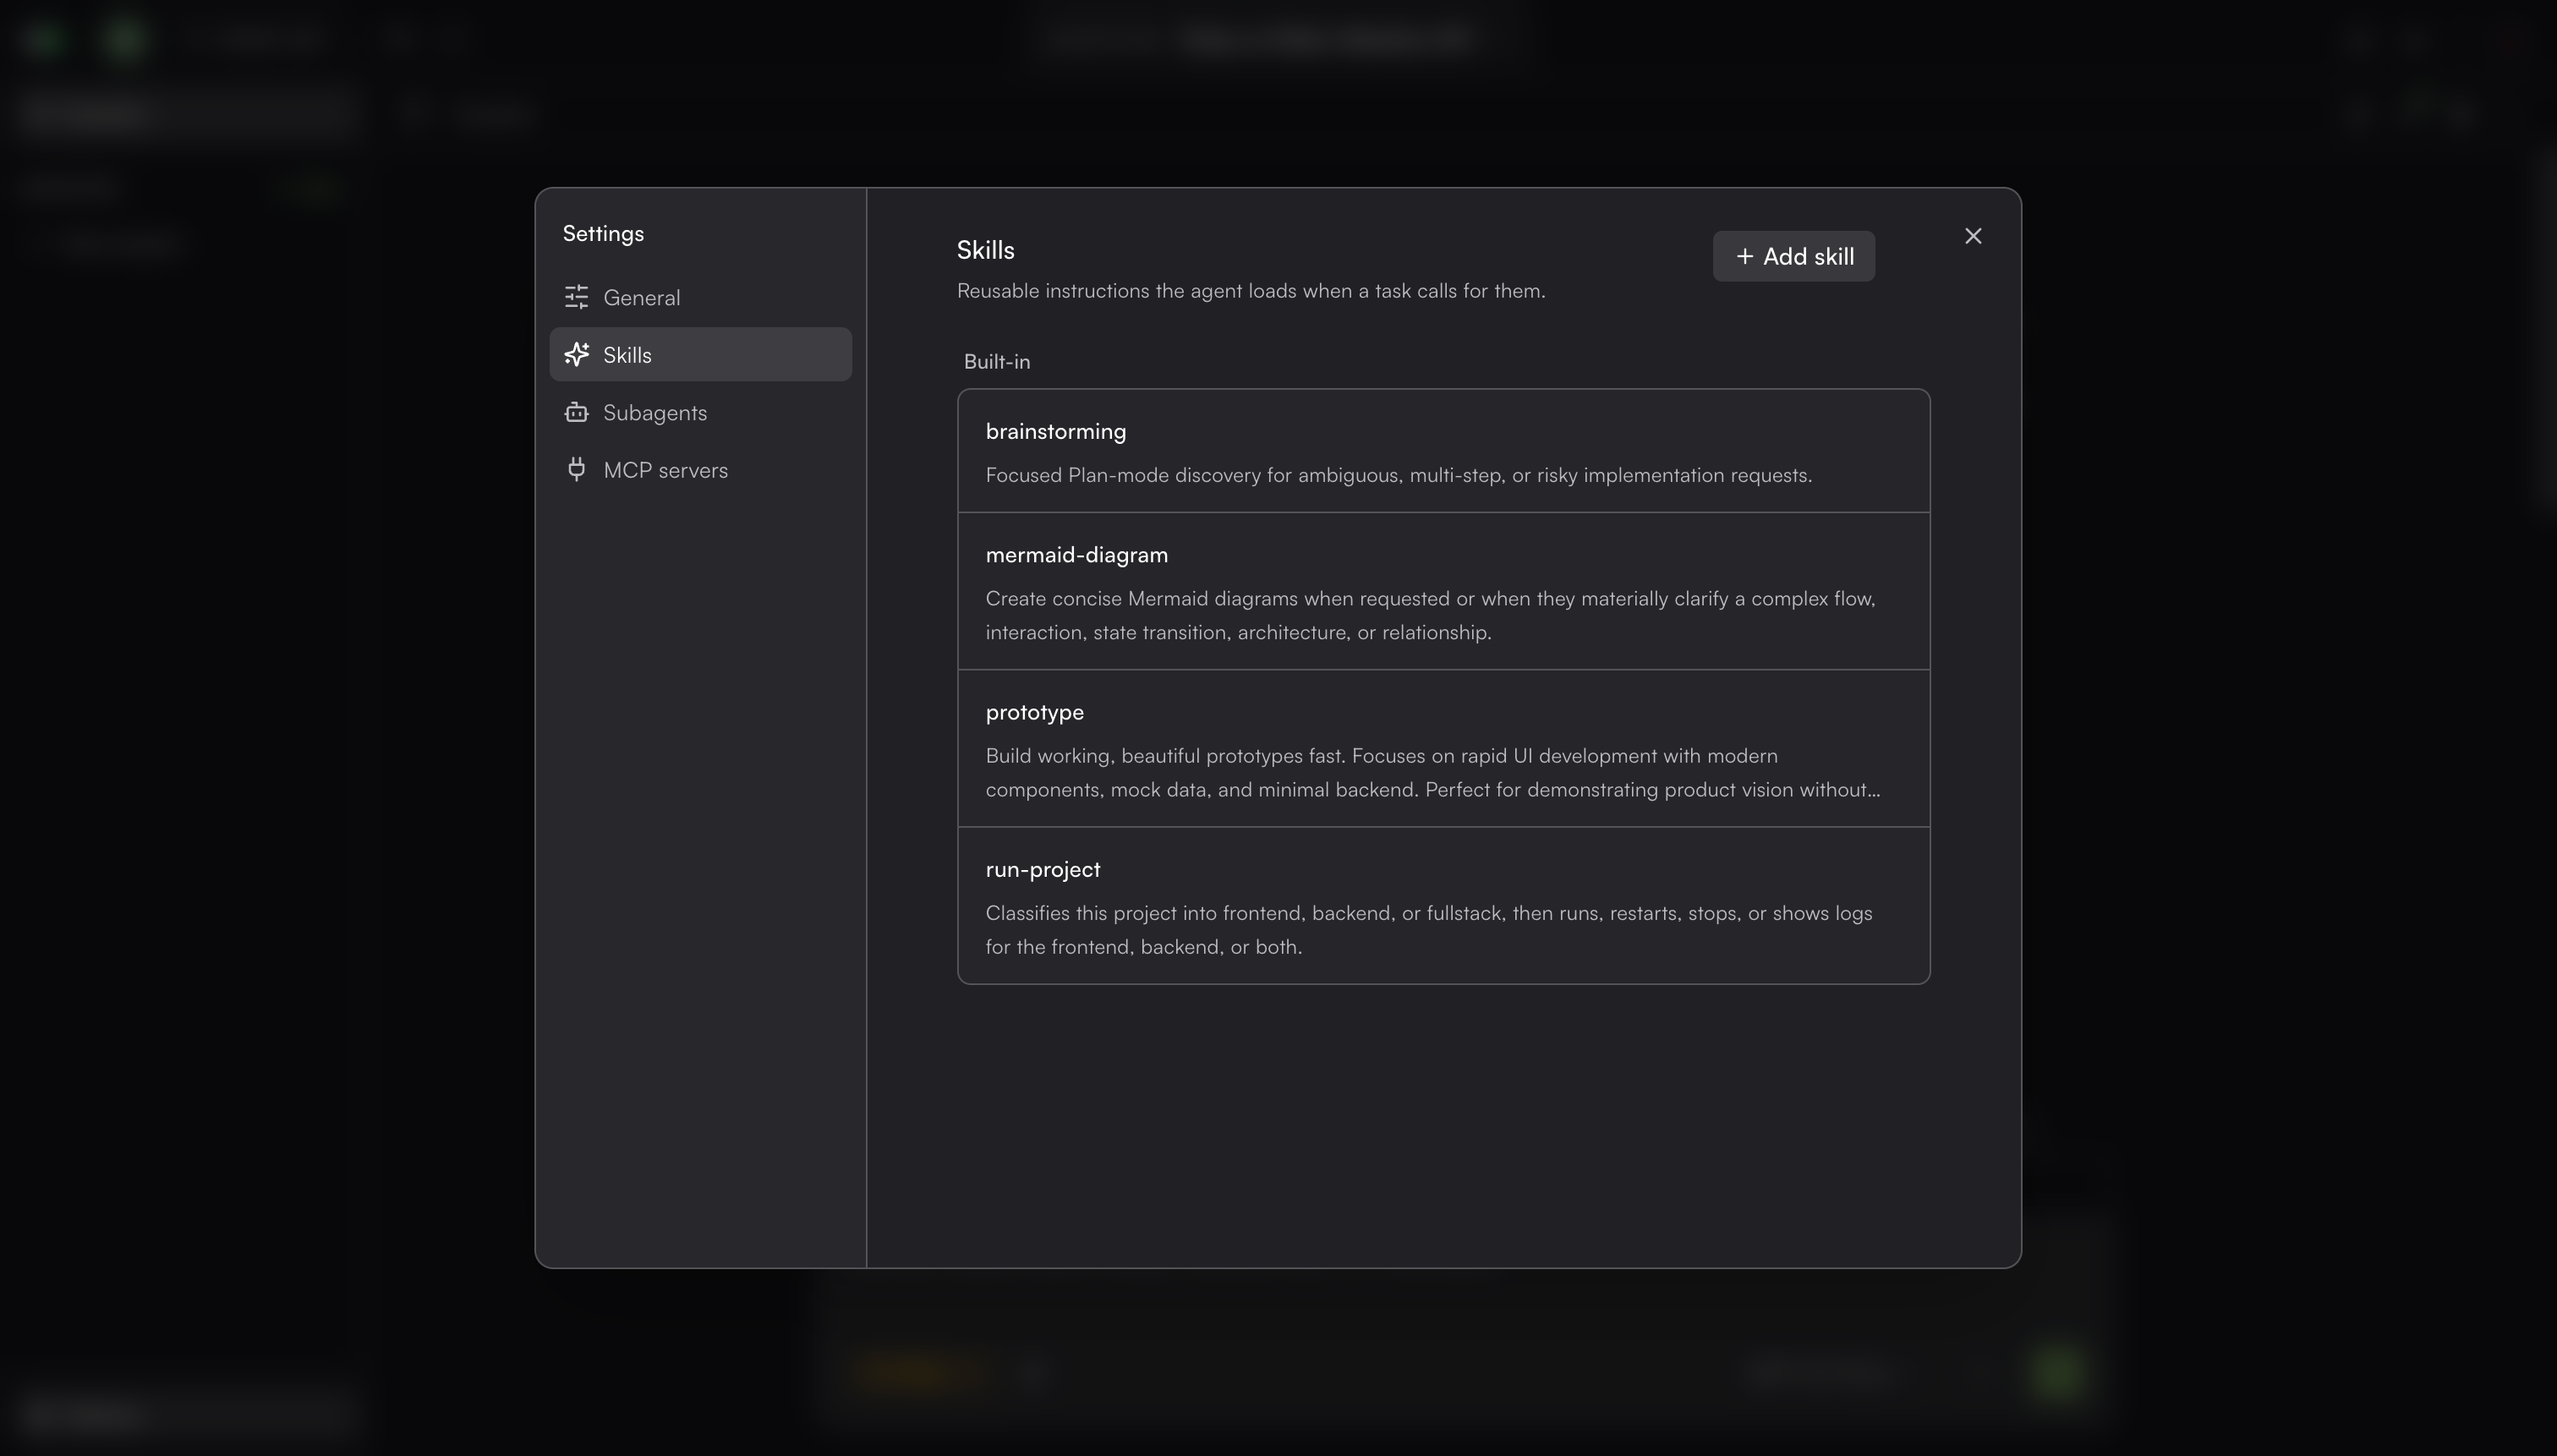
Skills are reusable Markdown instructions that the AI Assistant loads when a task calls for them.
To use a skill directly, enter / followed by its name in the prompt field. For example, enter /brainstorming.
Built-in skills
The ADE includes the following built-in skills.
Skill | Description |
|---|---|
brainstorming | Helps clarify requirements and explore an approach in Plan Mode for ambiguous, complex, or risky implementation tasks. |
mermaid-diagram | Creates Mermaid diagrams to explain workflows, interactions, state transitions, architecture, and relationships. |
prototype | Builds working prototypes with UI components, mock data, and a minimal backend. |
run-project | Identifies the project type, starts, restarts, or stops frontend and backend services, and displays their logs. |
Click a skill to view its description and instructions.
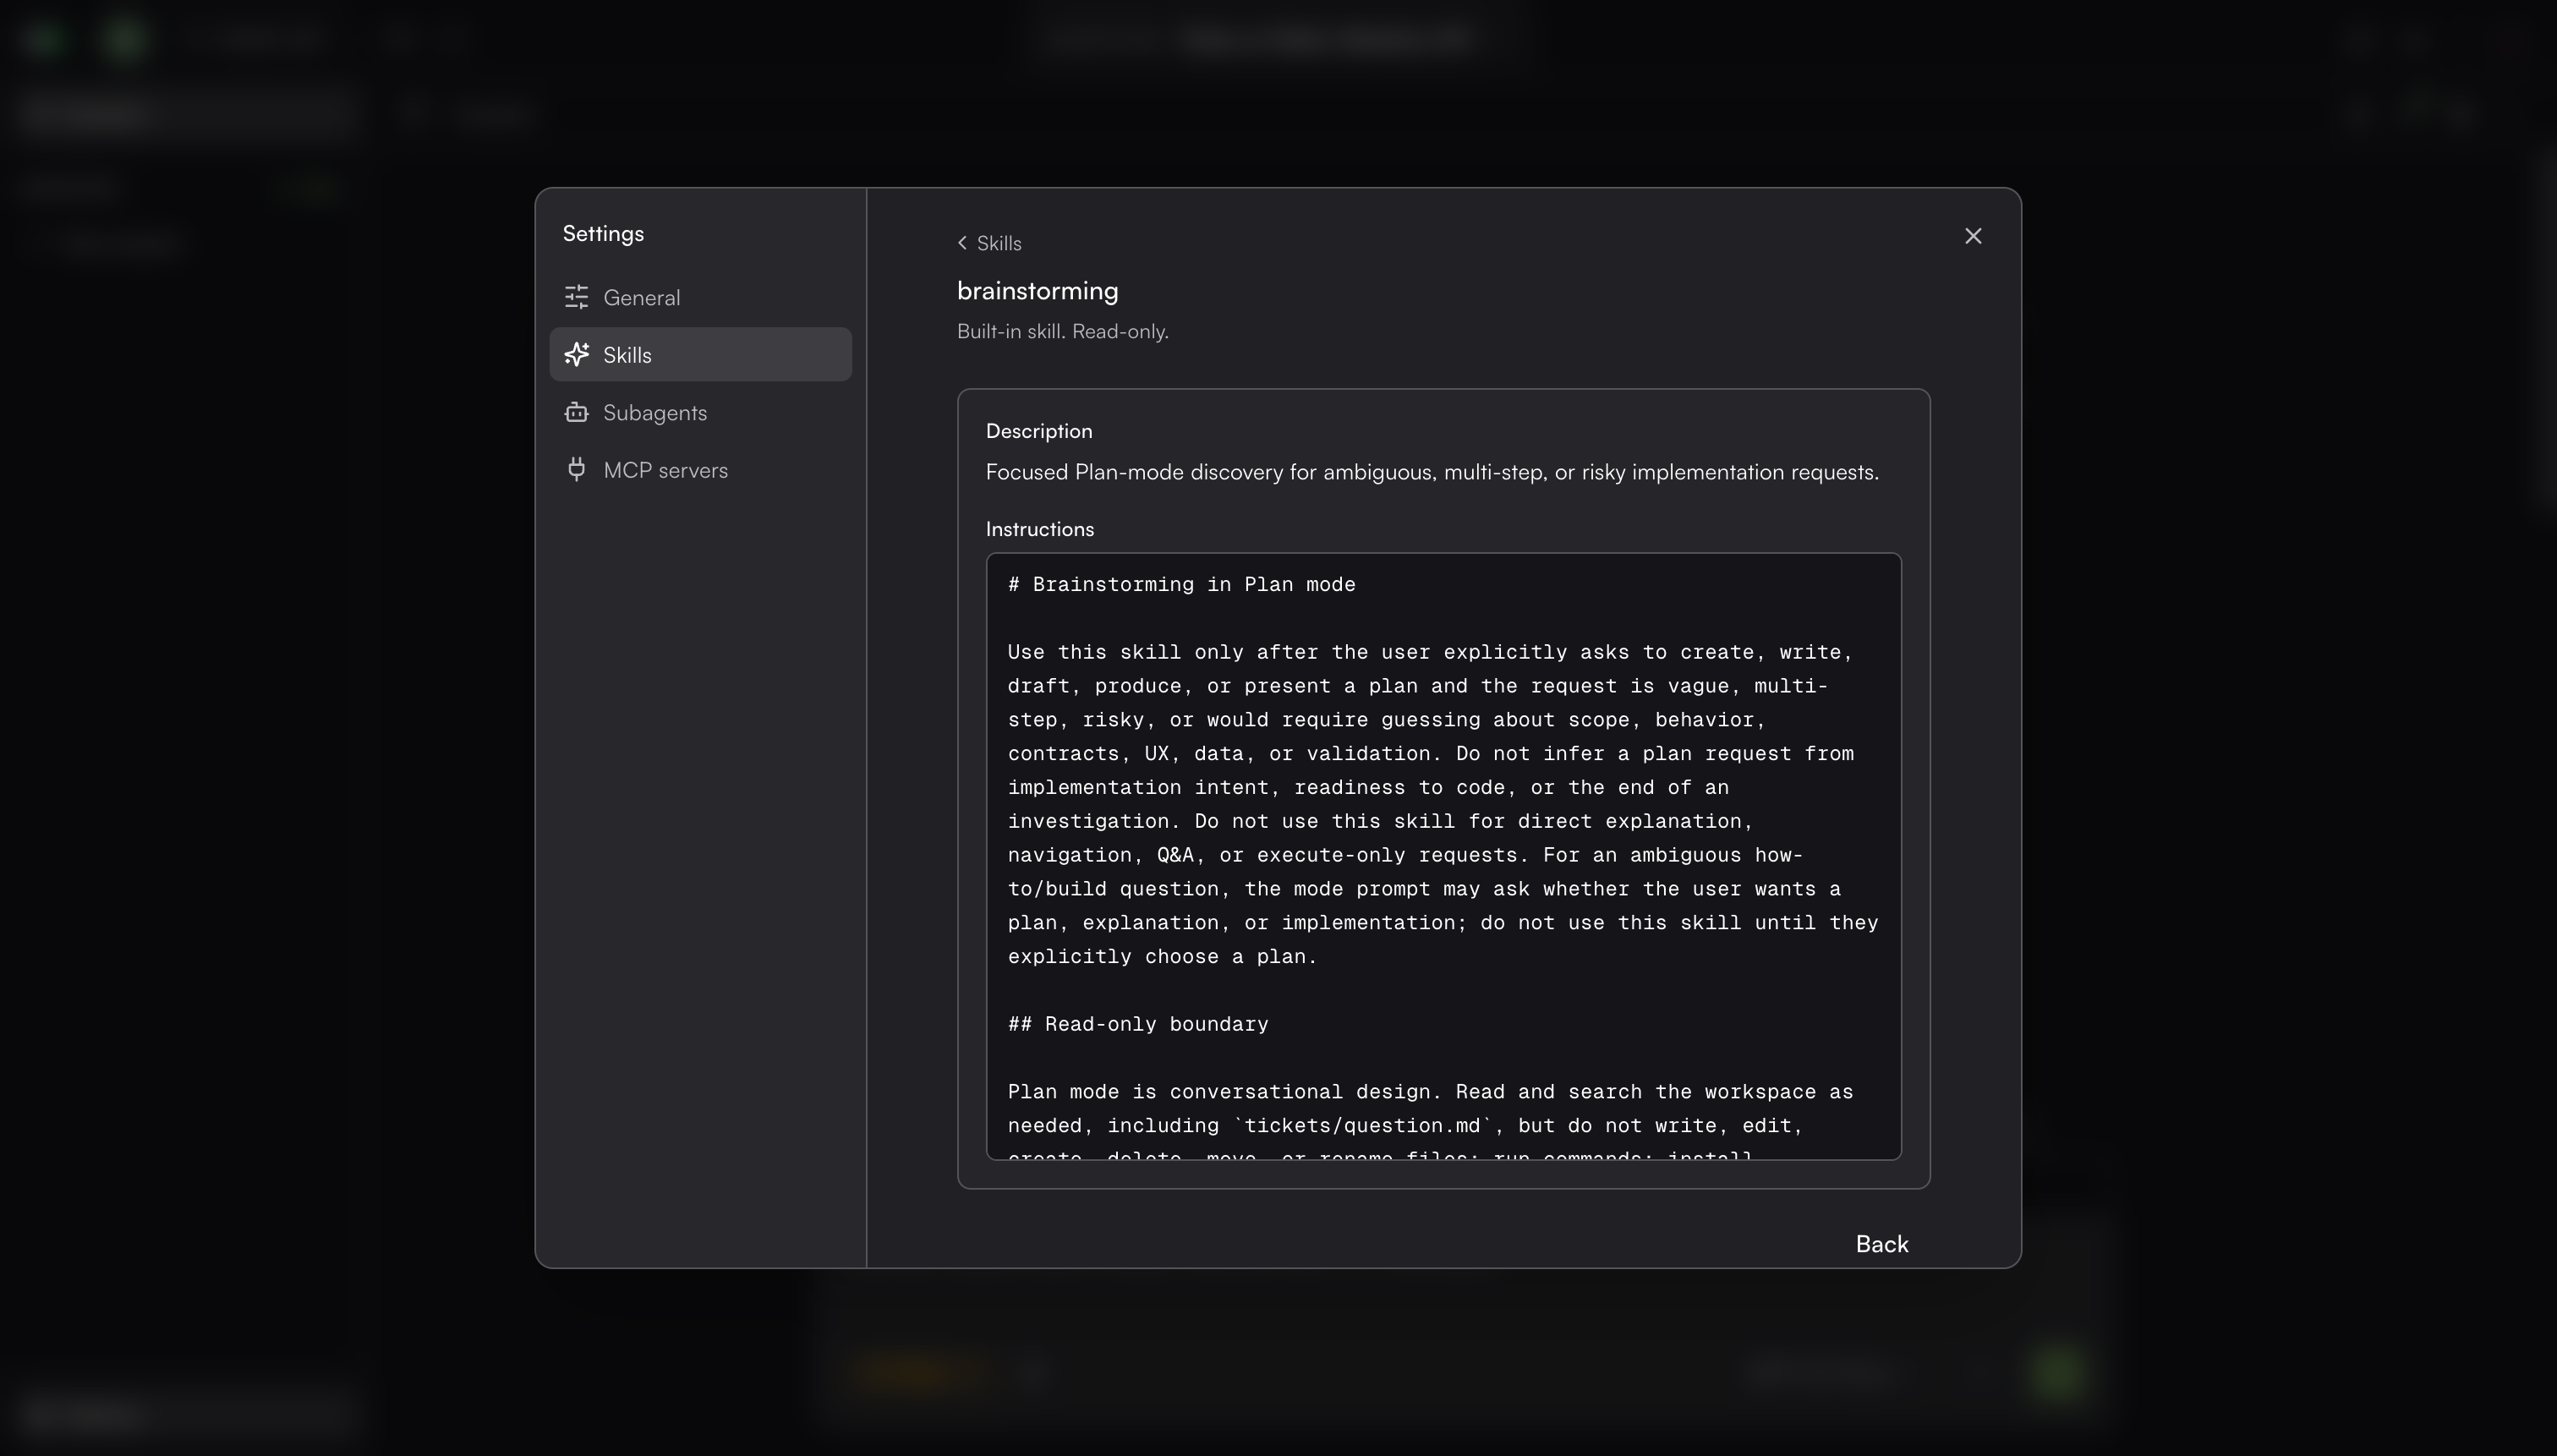
Note: You can edit custom skills. You cannot edit built-in skills.
Adding a custom skill
You can write a skill, add one from GitHub, or ask the AI Assistant to create one.
To add a custom skill in ADE:
Go to Settings > Skills.
Click Add skill.
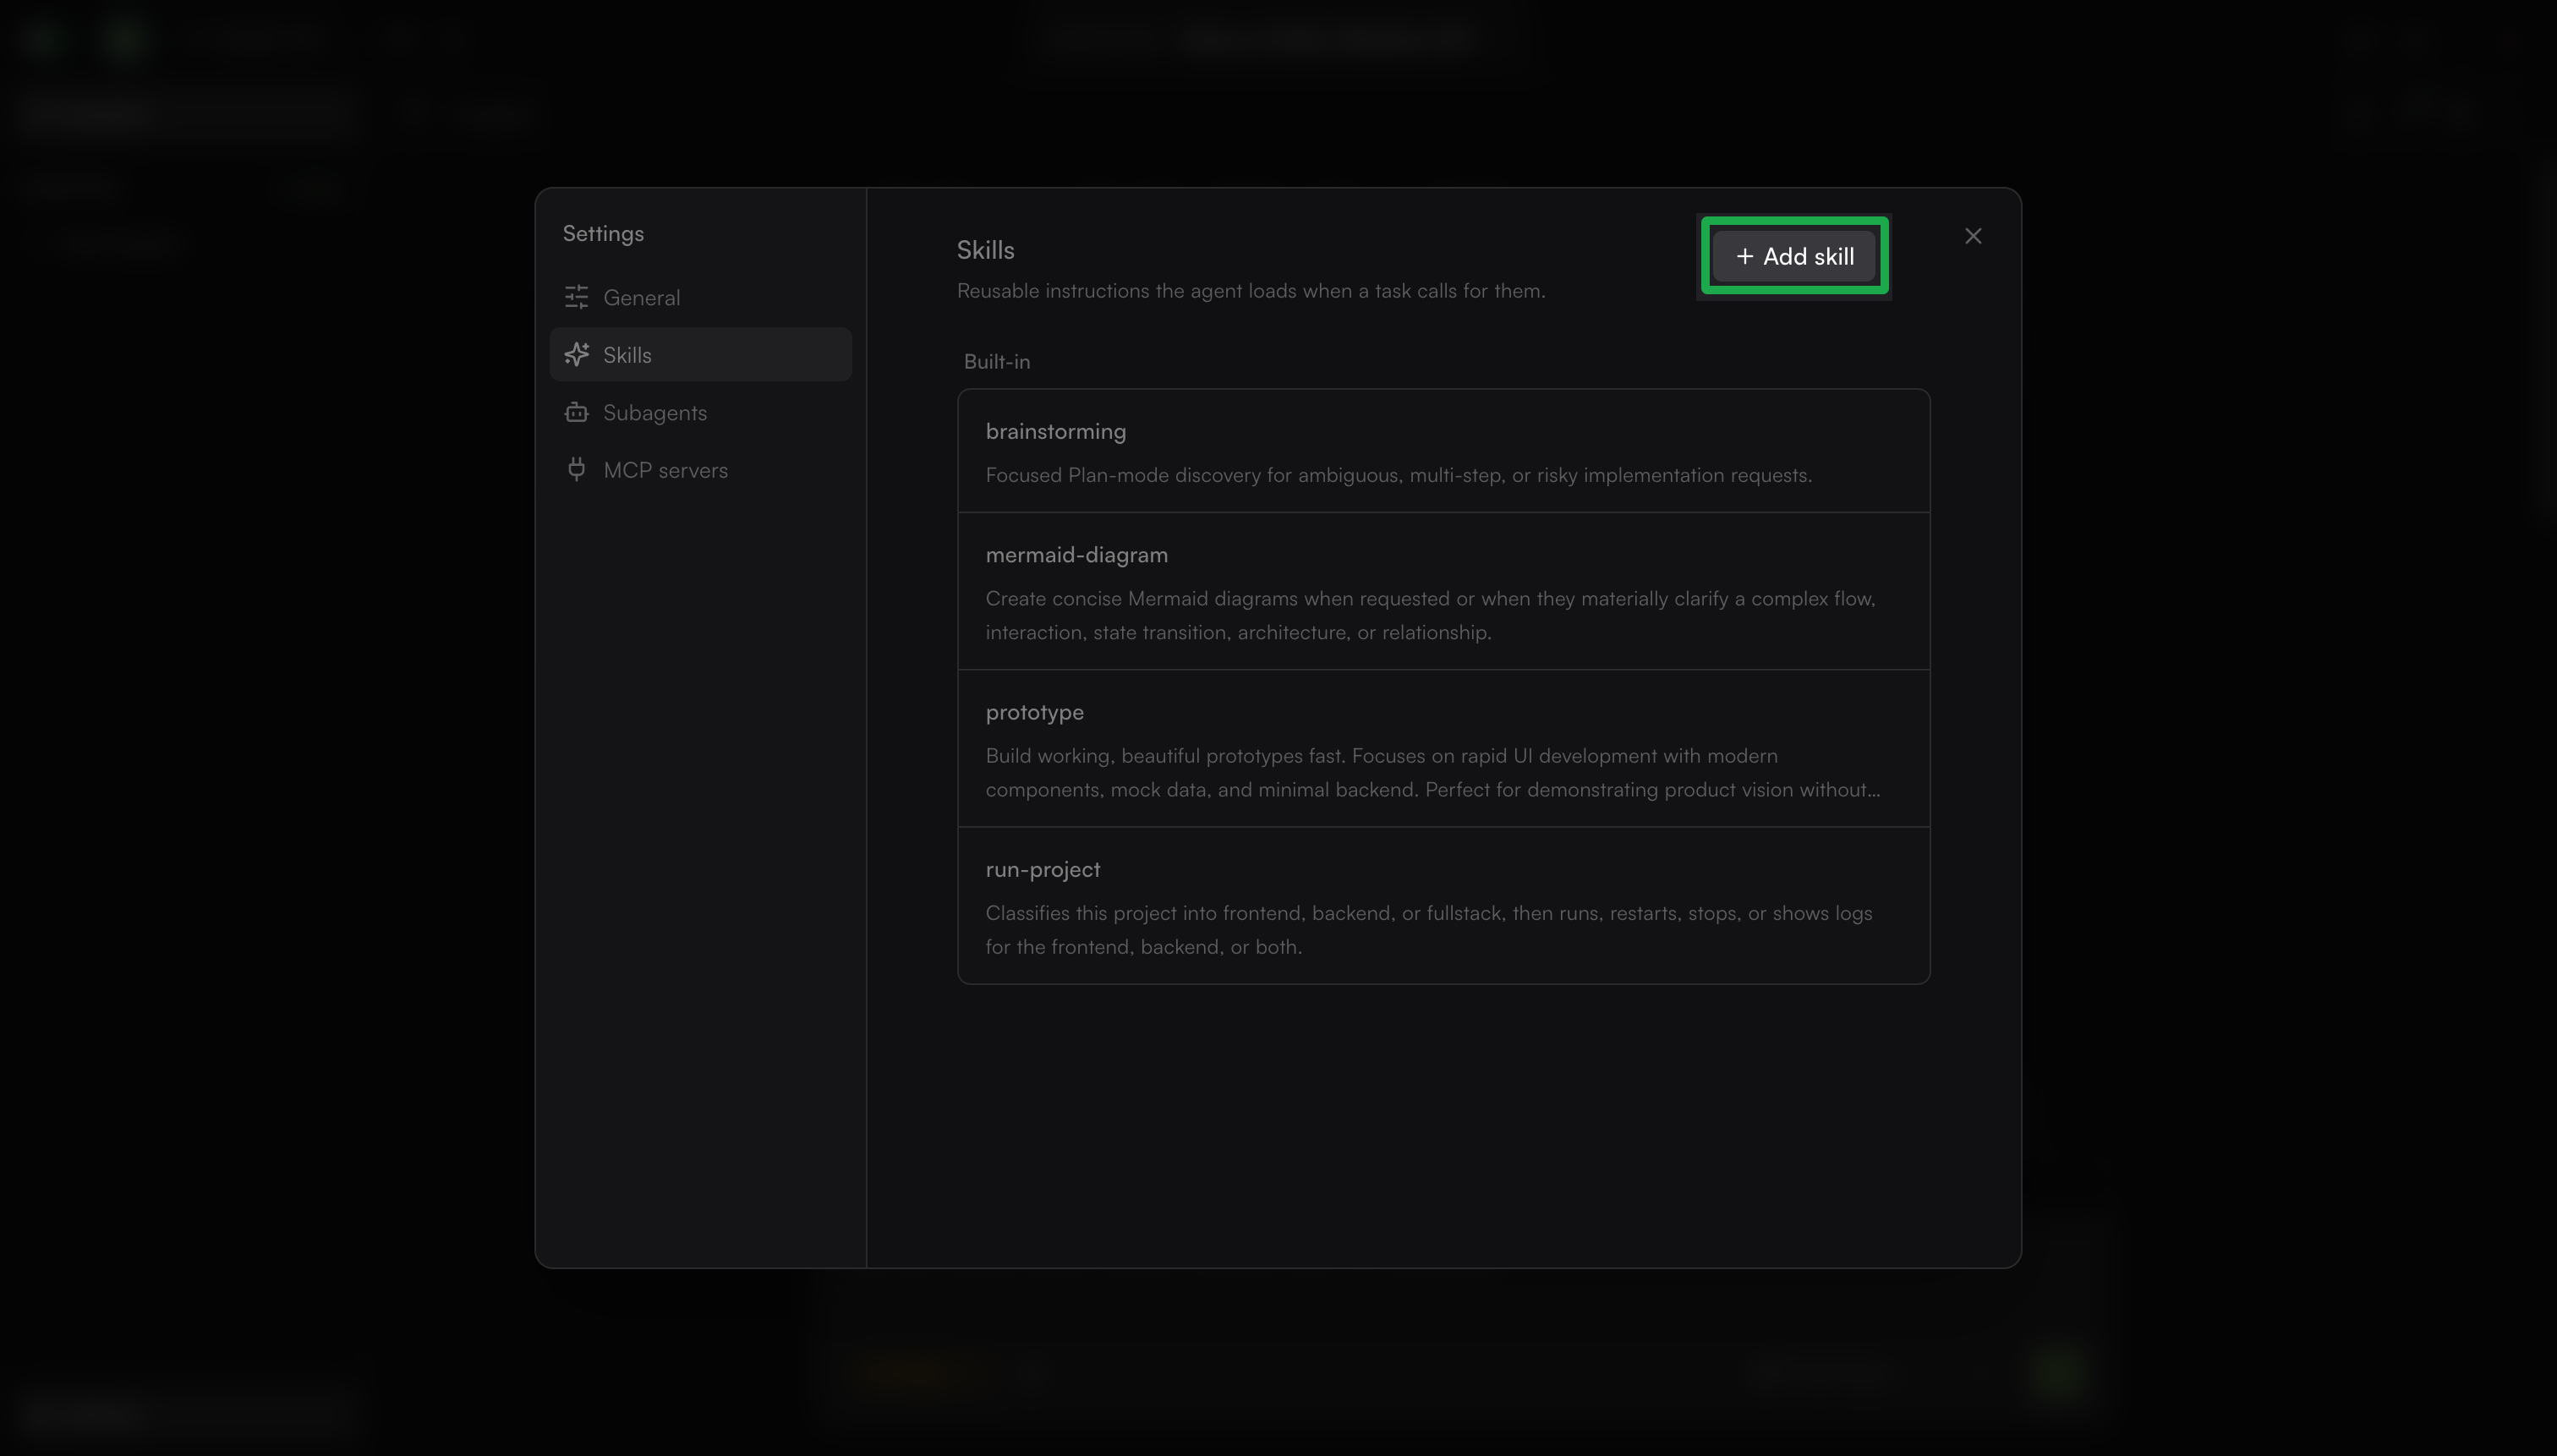
In Source, select one of the following:
Write:
Enter the skill details:
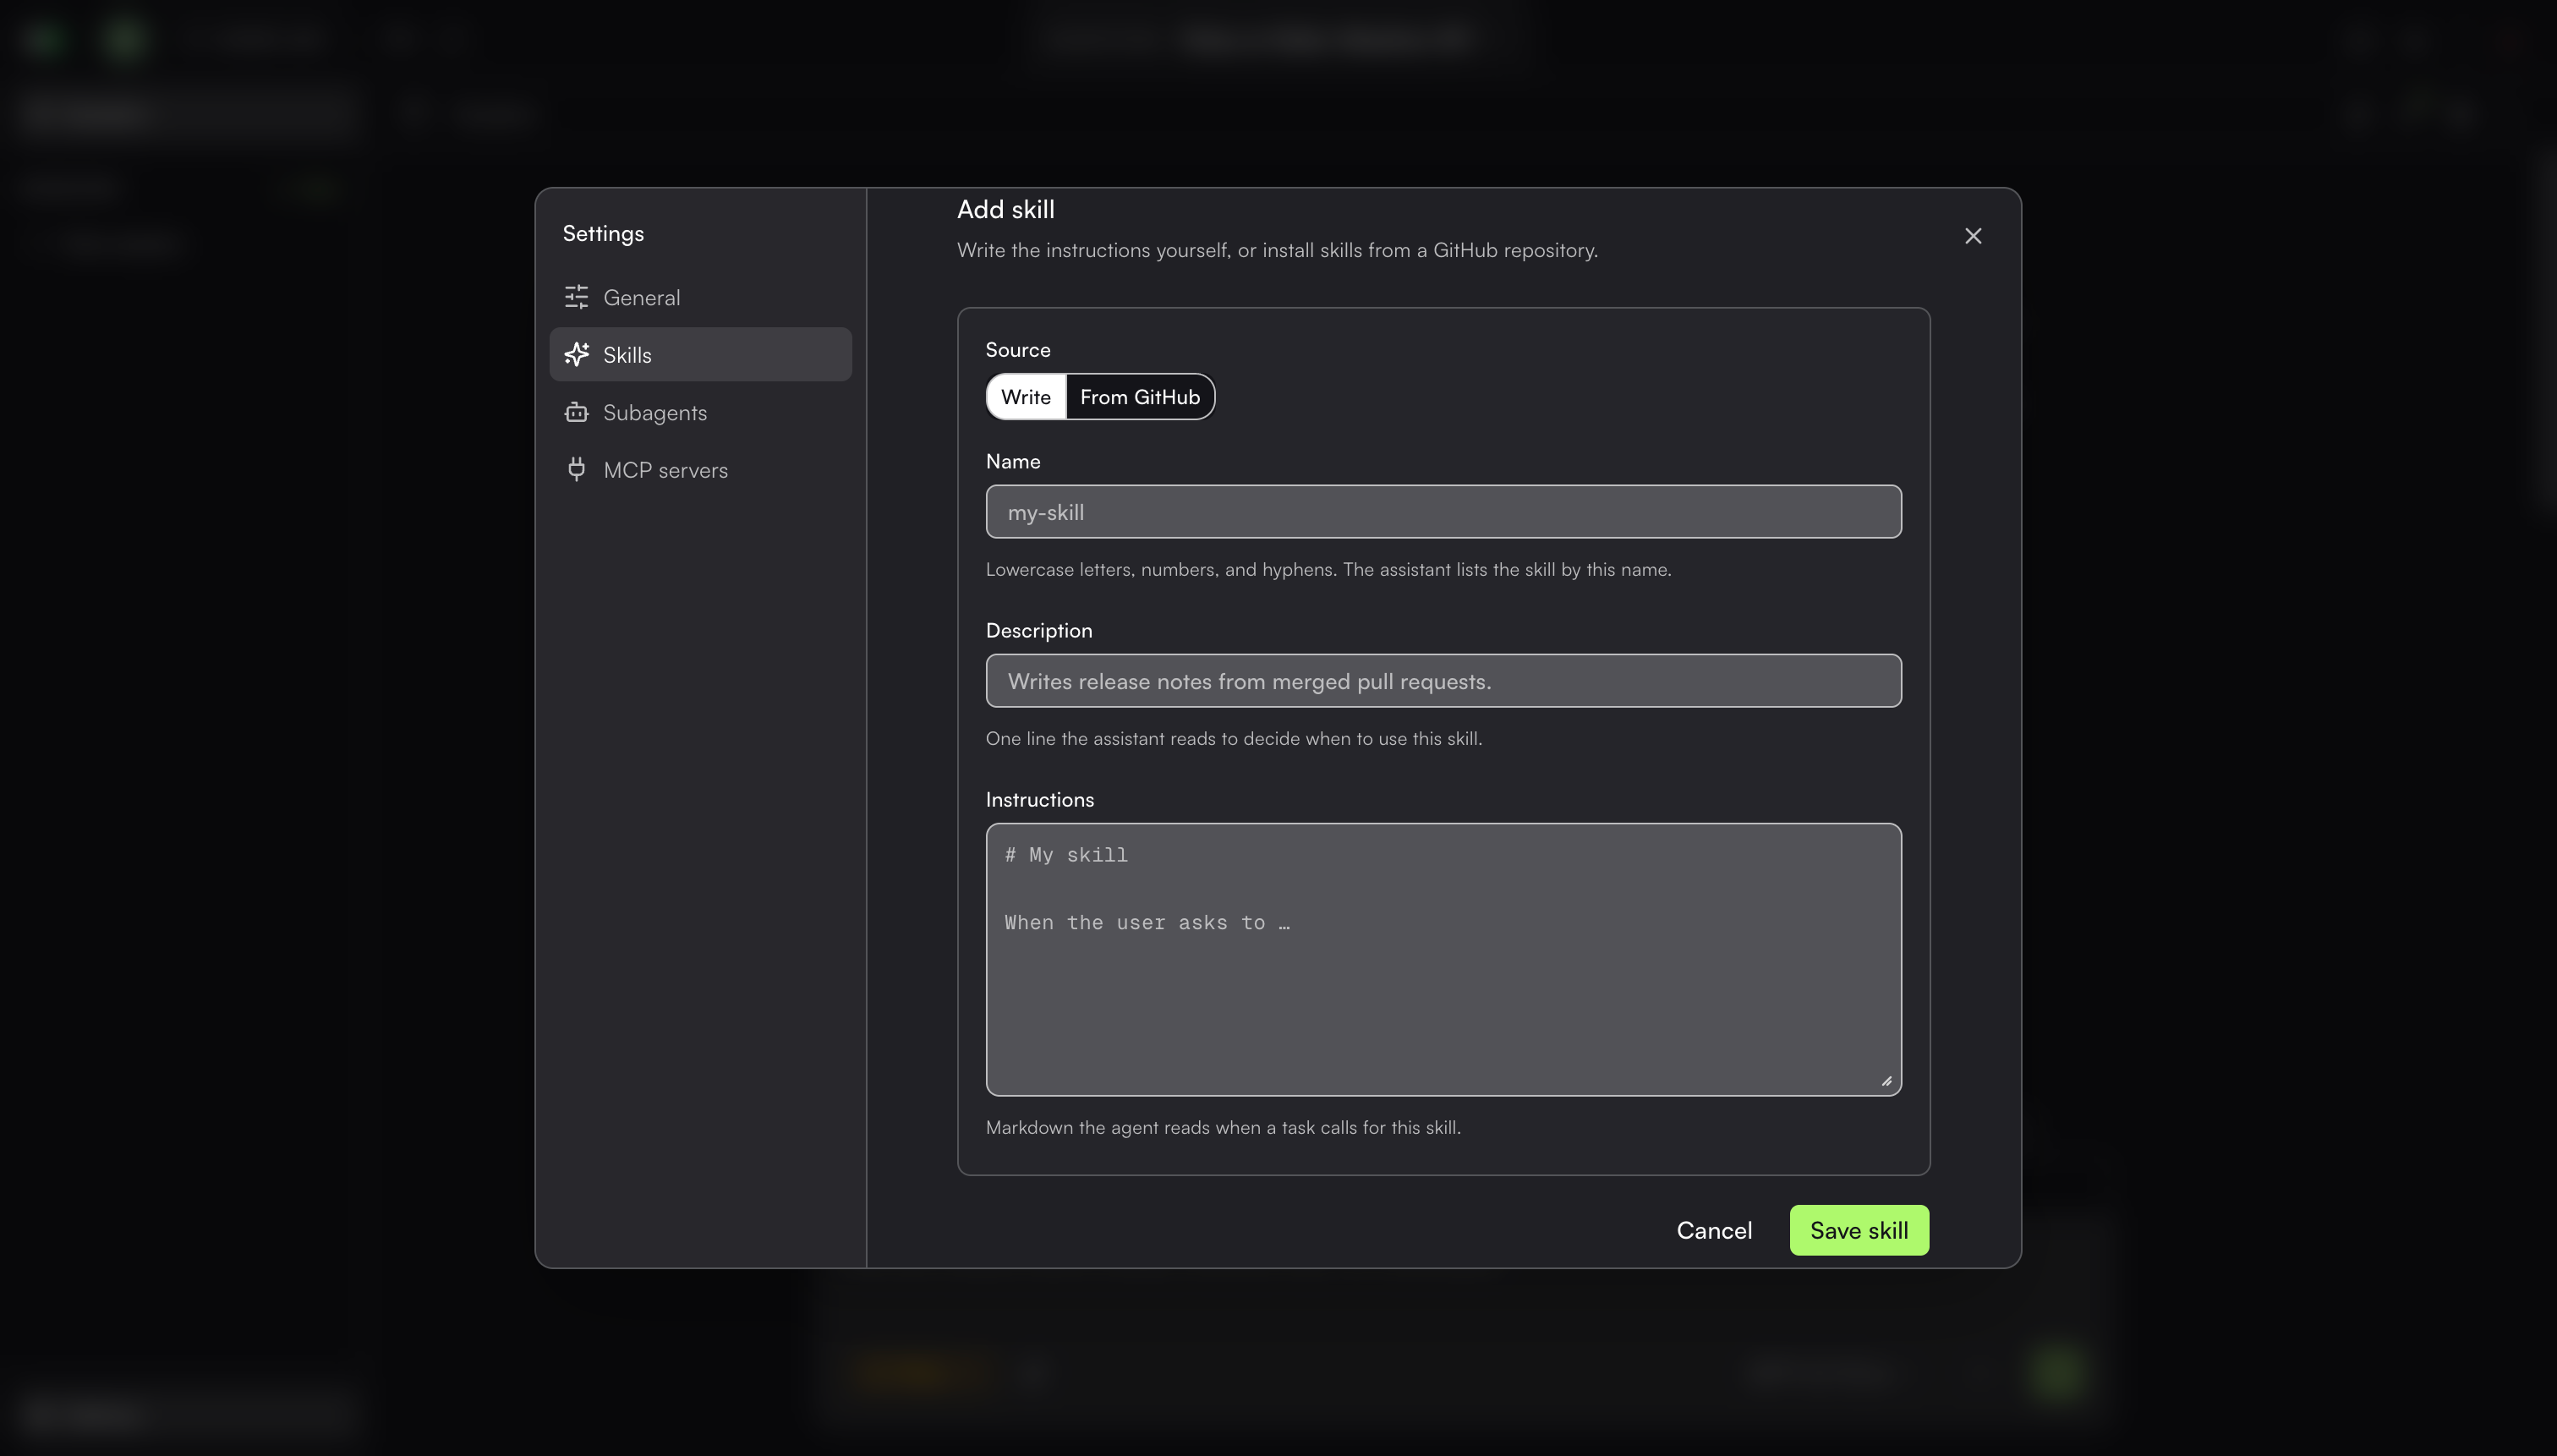
Name: Enter a name using lowercase letters, numbers, and hyphens. The AI Assistant lists the skill by this name.
Description: Enter a one-line description. The AI Assistant reads the description to decide when to use the skill.
Instructions: Enter the instructions in Markdown.
Click Save skill.
From GitHub:
Enter the URL of a public GitHub repository or a folder within it that contains the skill.
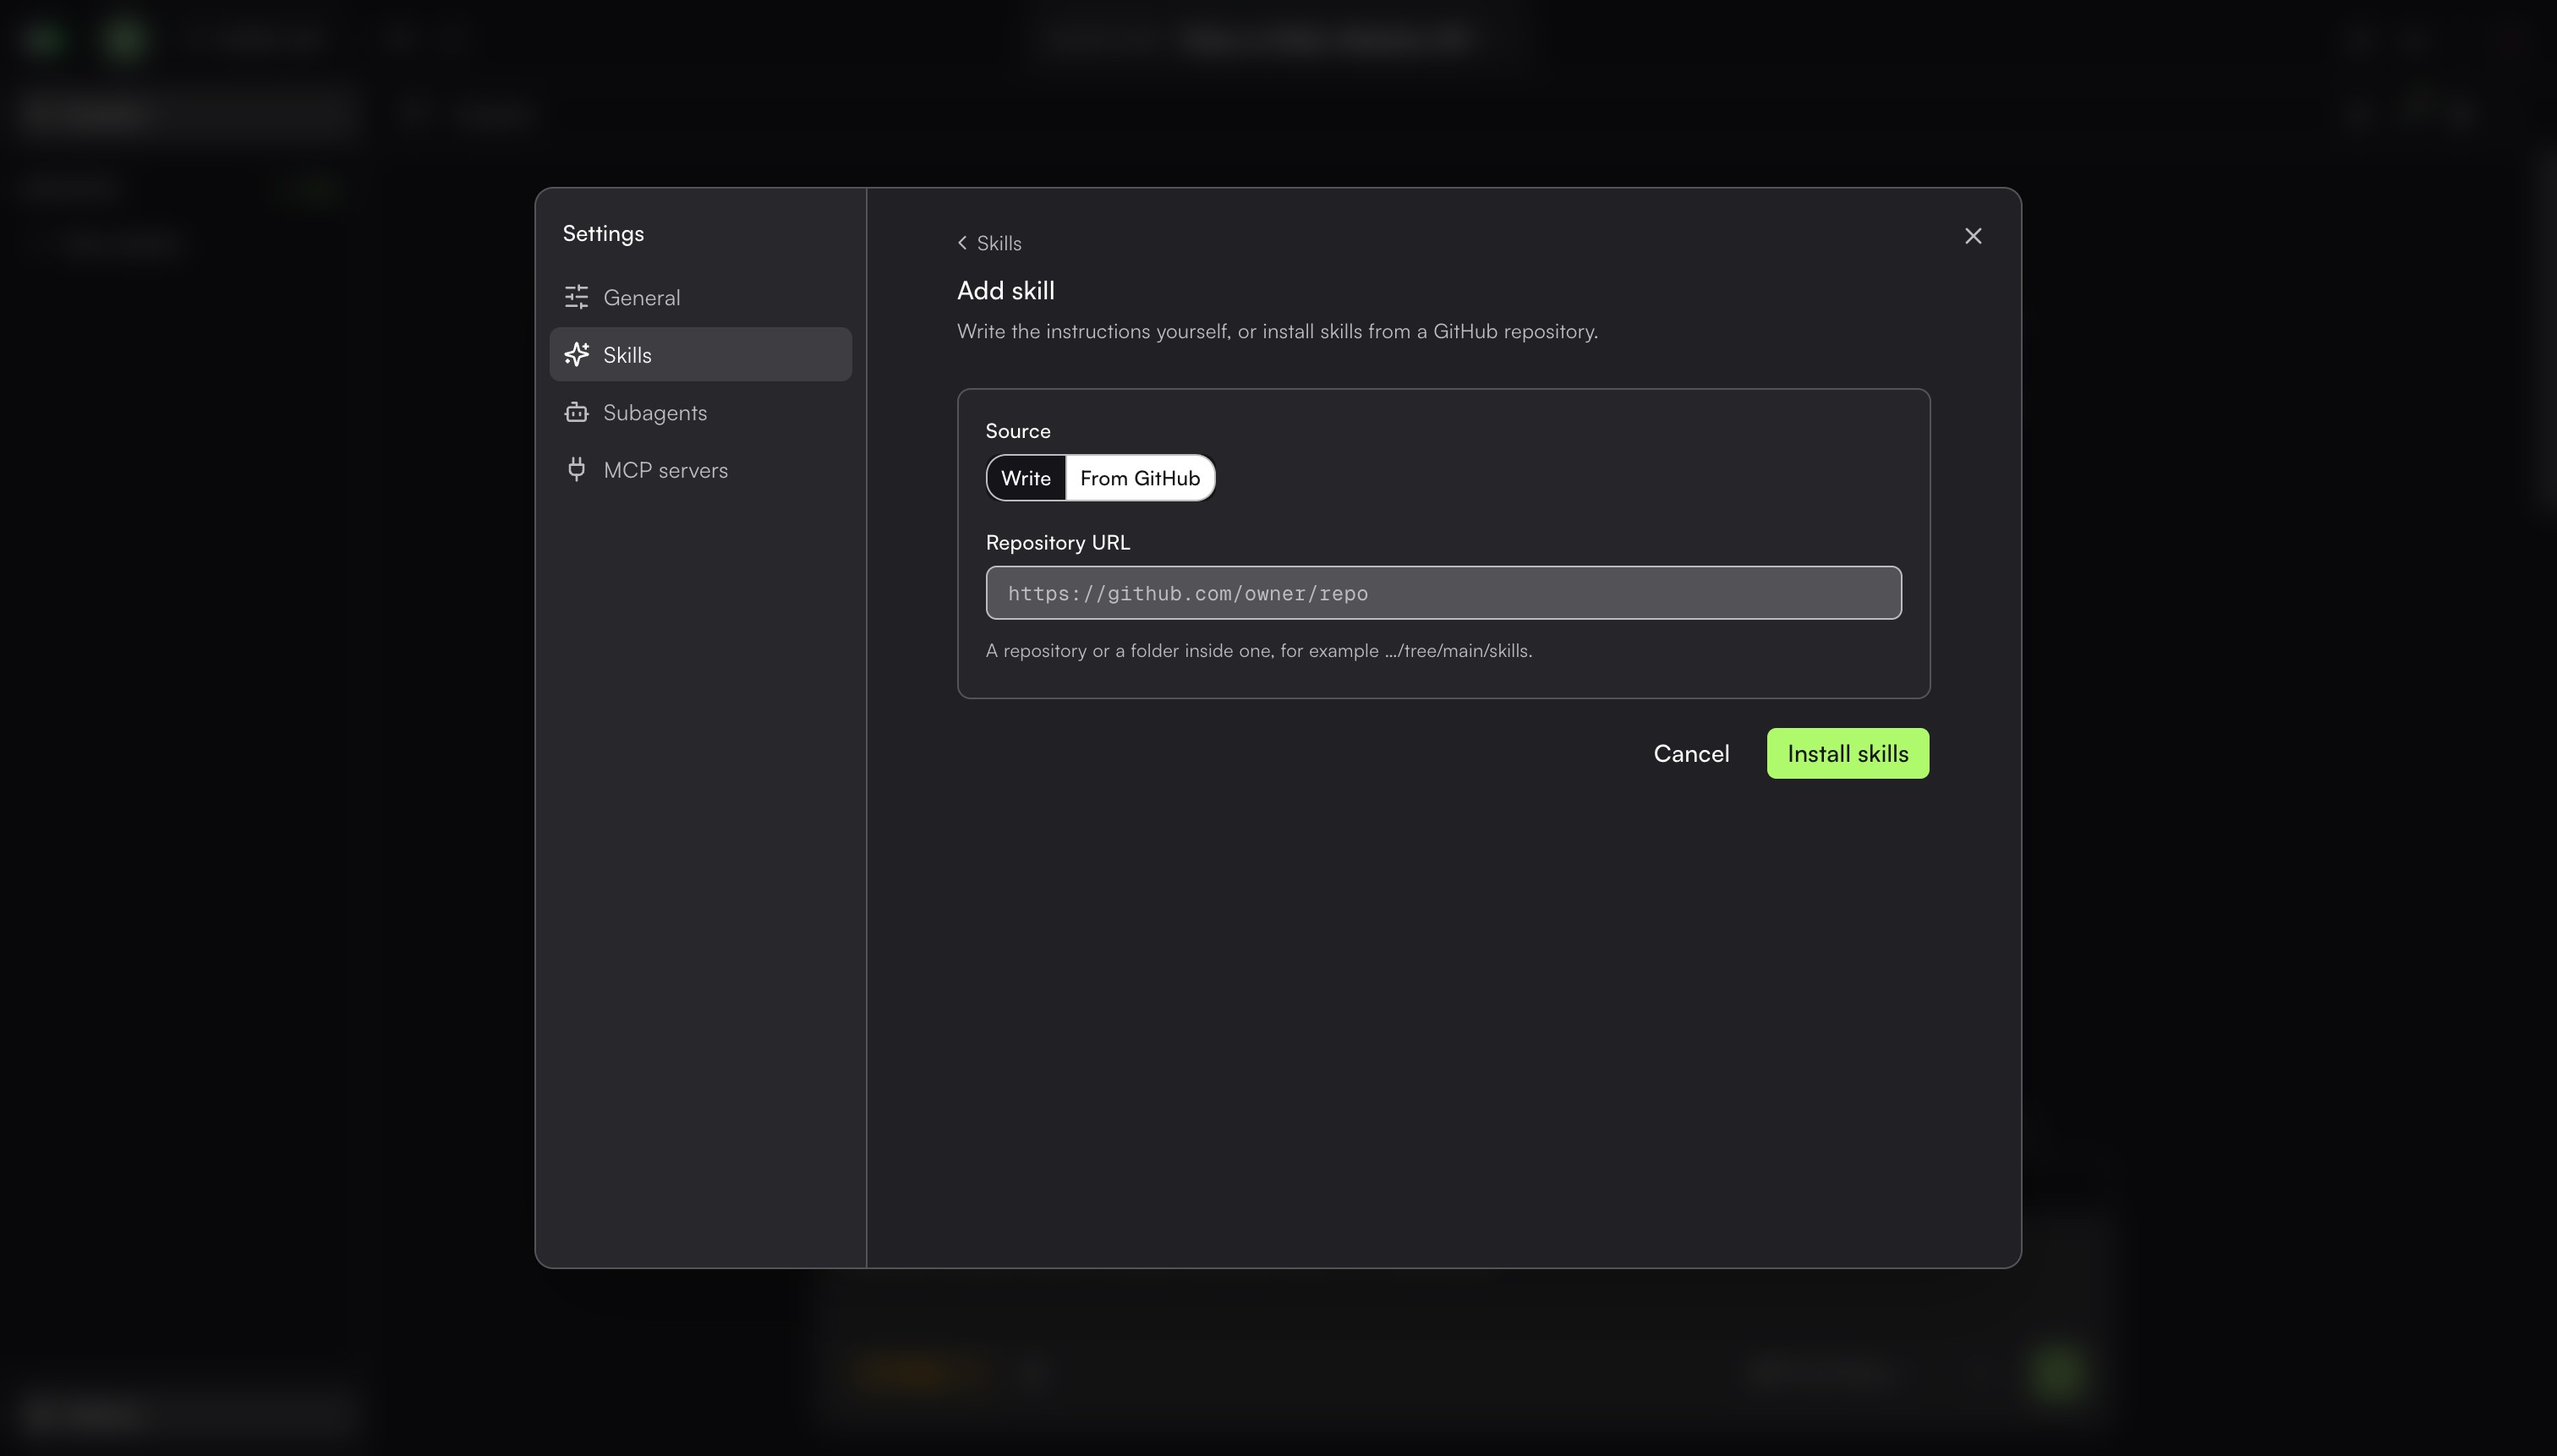
Click Install skills.
Note: You can also ask the AI Assistant to create a skill. Switch to Agent Mode and enter a prompt that describes what the skill should do. The new skill appears in Settings > Skills.
Subagents
Subagents handle self-contained tasks for the AI Assistant. Each subagent runs in its own context and returns only its answer to the main chat. This helps keep detailed task activity out of the main chat’s context.
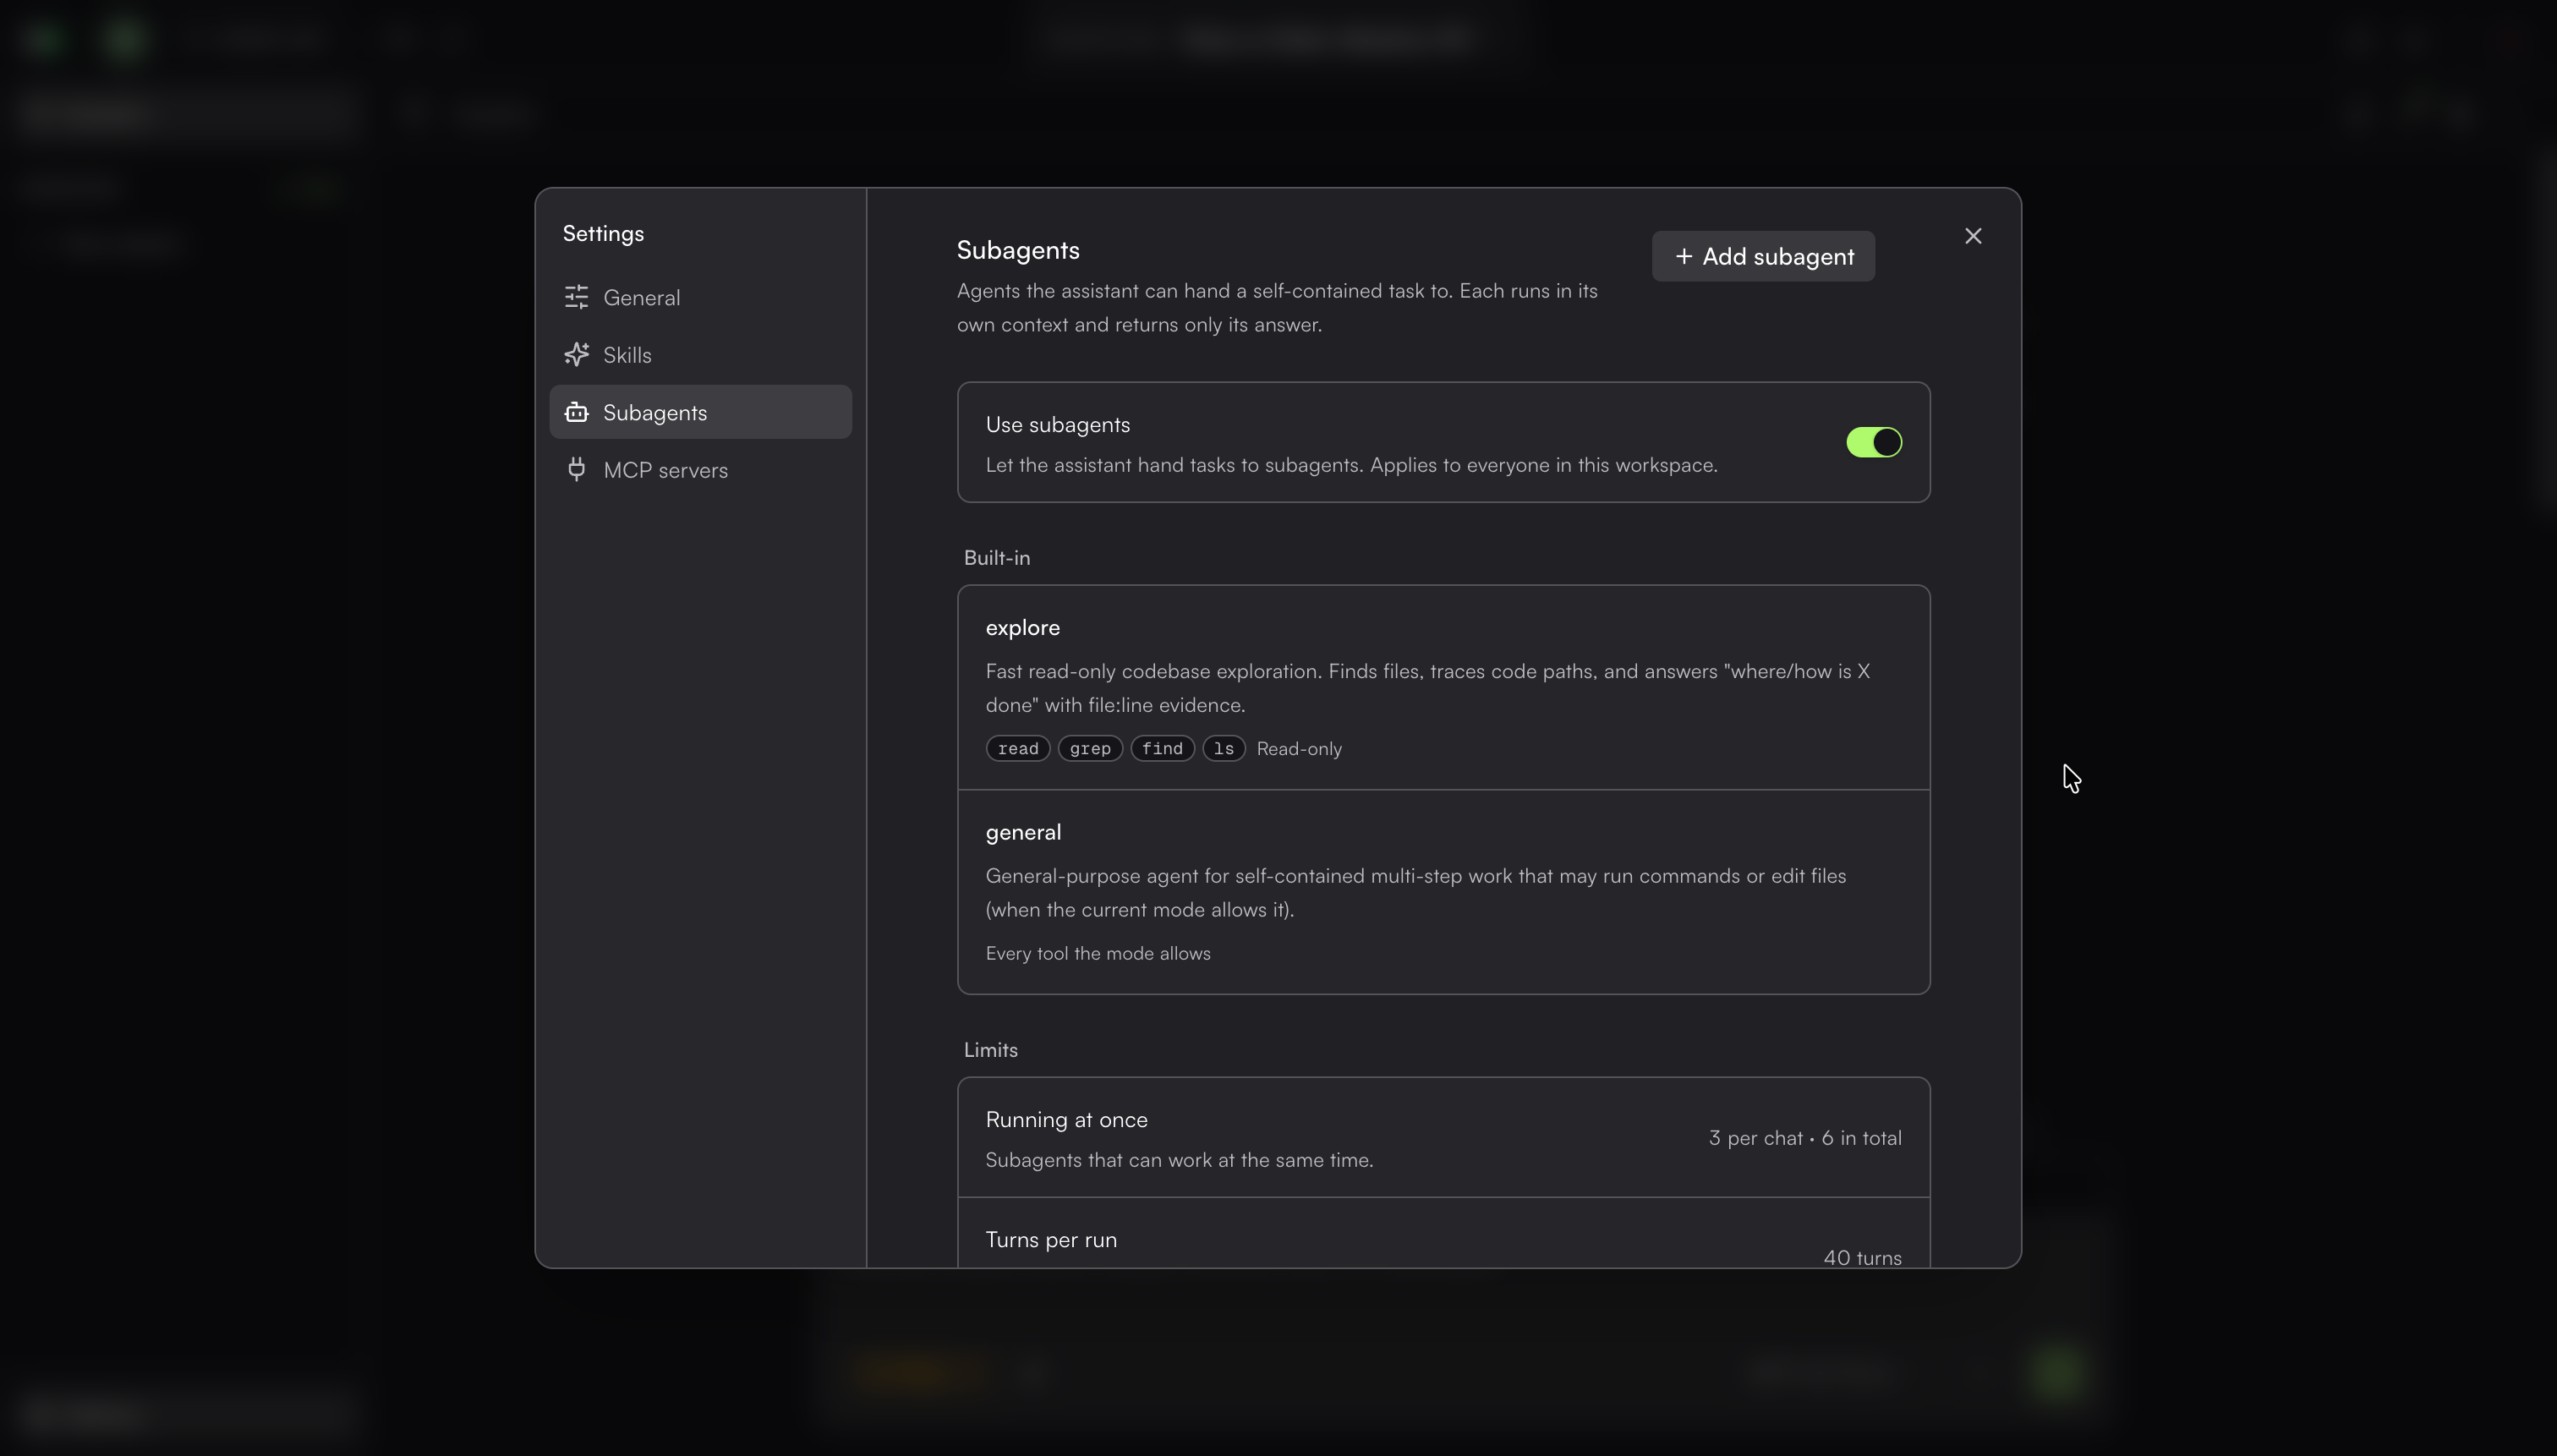
Subagents are turned off by default. In Settings > Subagents, turn on Use subagents to enable them.
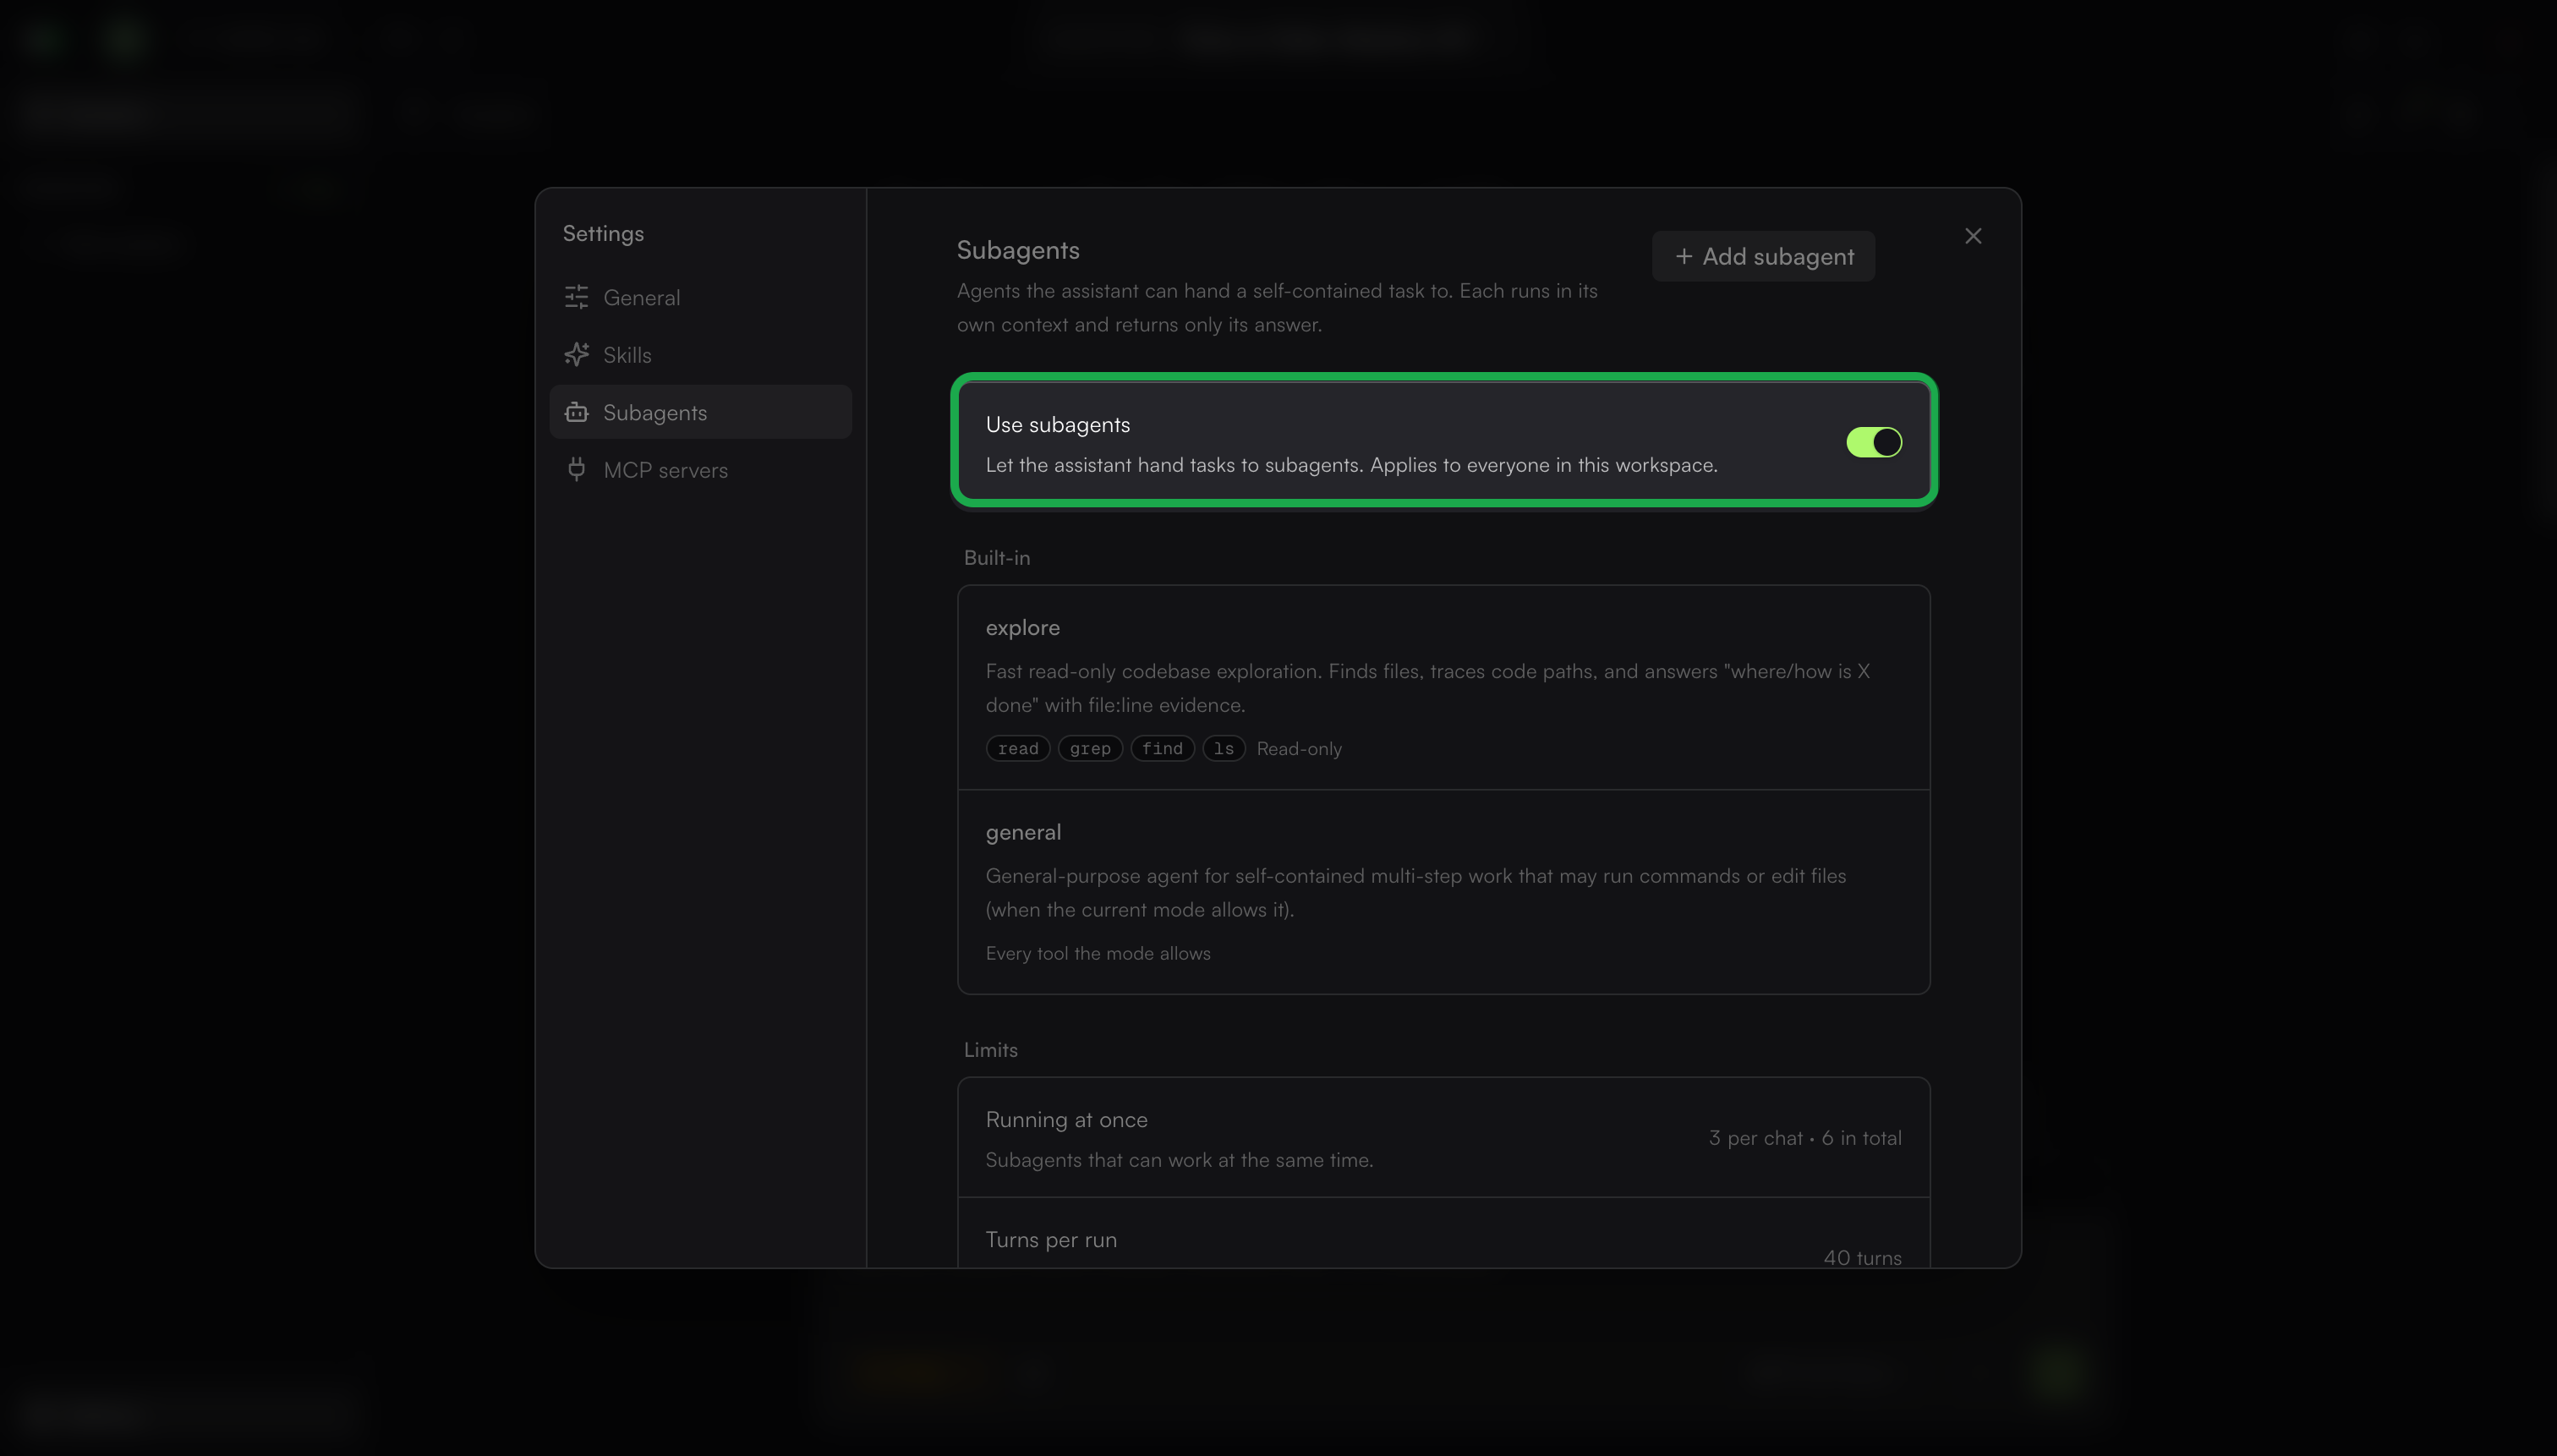
Built-in subagents
The ADE includes the following built-in subagents:
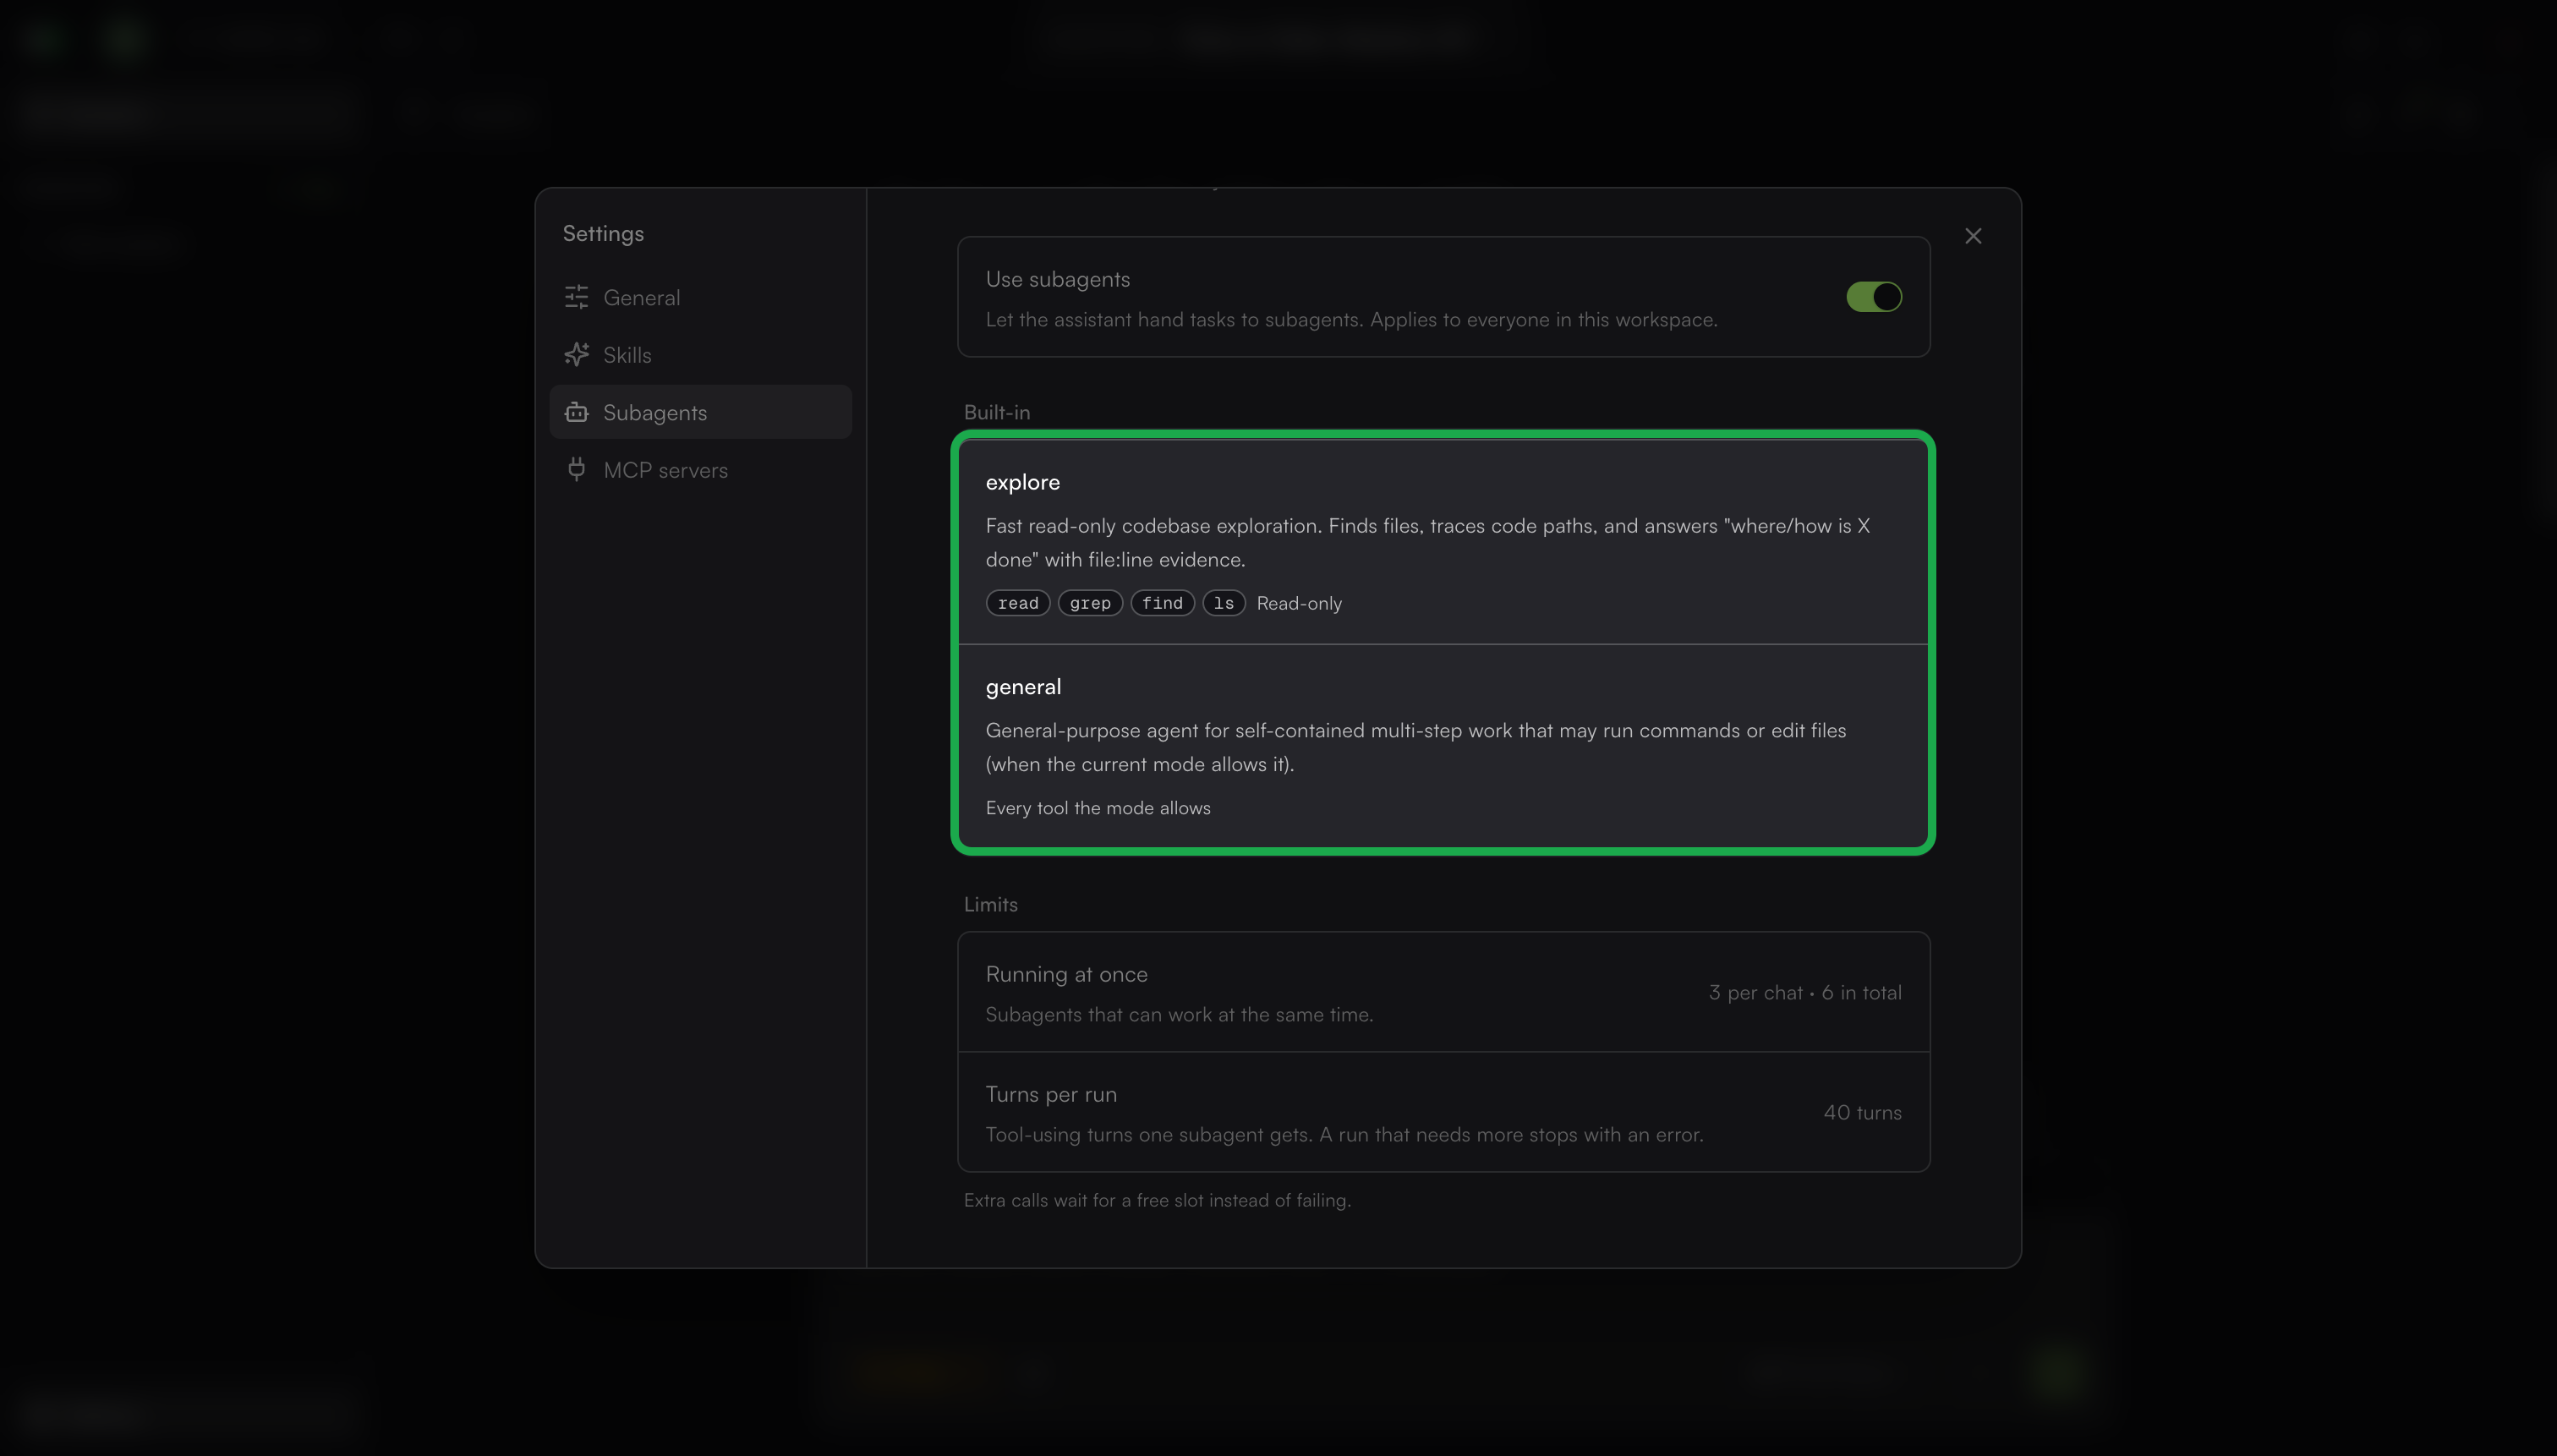
Subagent | Description | Tools |
|---|---|---|
explore | Fast, read-only codebase exploration. Finds files, traces code paths, and answers where or how something is done, with file and line references. |
|
general | General-purpose agent for self-contained, multi-step work that may run commands or edit files when the current mode allows it. | Every tool the mode allows |
Subagent limits
The ADE applies the following limits to subagents:
Running at once: Up to 3 subagents per chat and 6 in total run at the same time.
Turns per run: Each subagent run allows up to 40 tool-using turns.
Adding a subagent
To add a subagent:
Go to Settings > Subagents.
Click Add subagent.
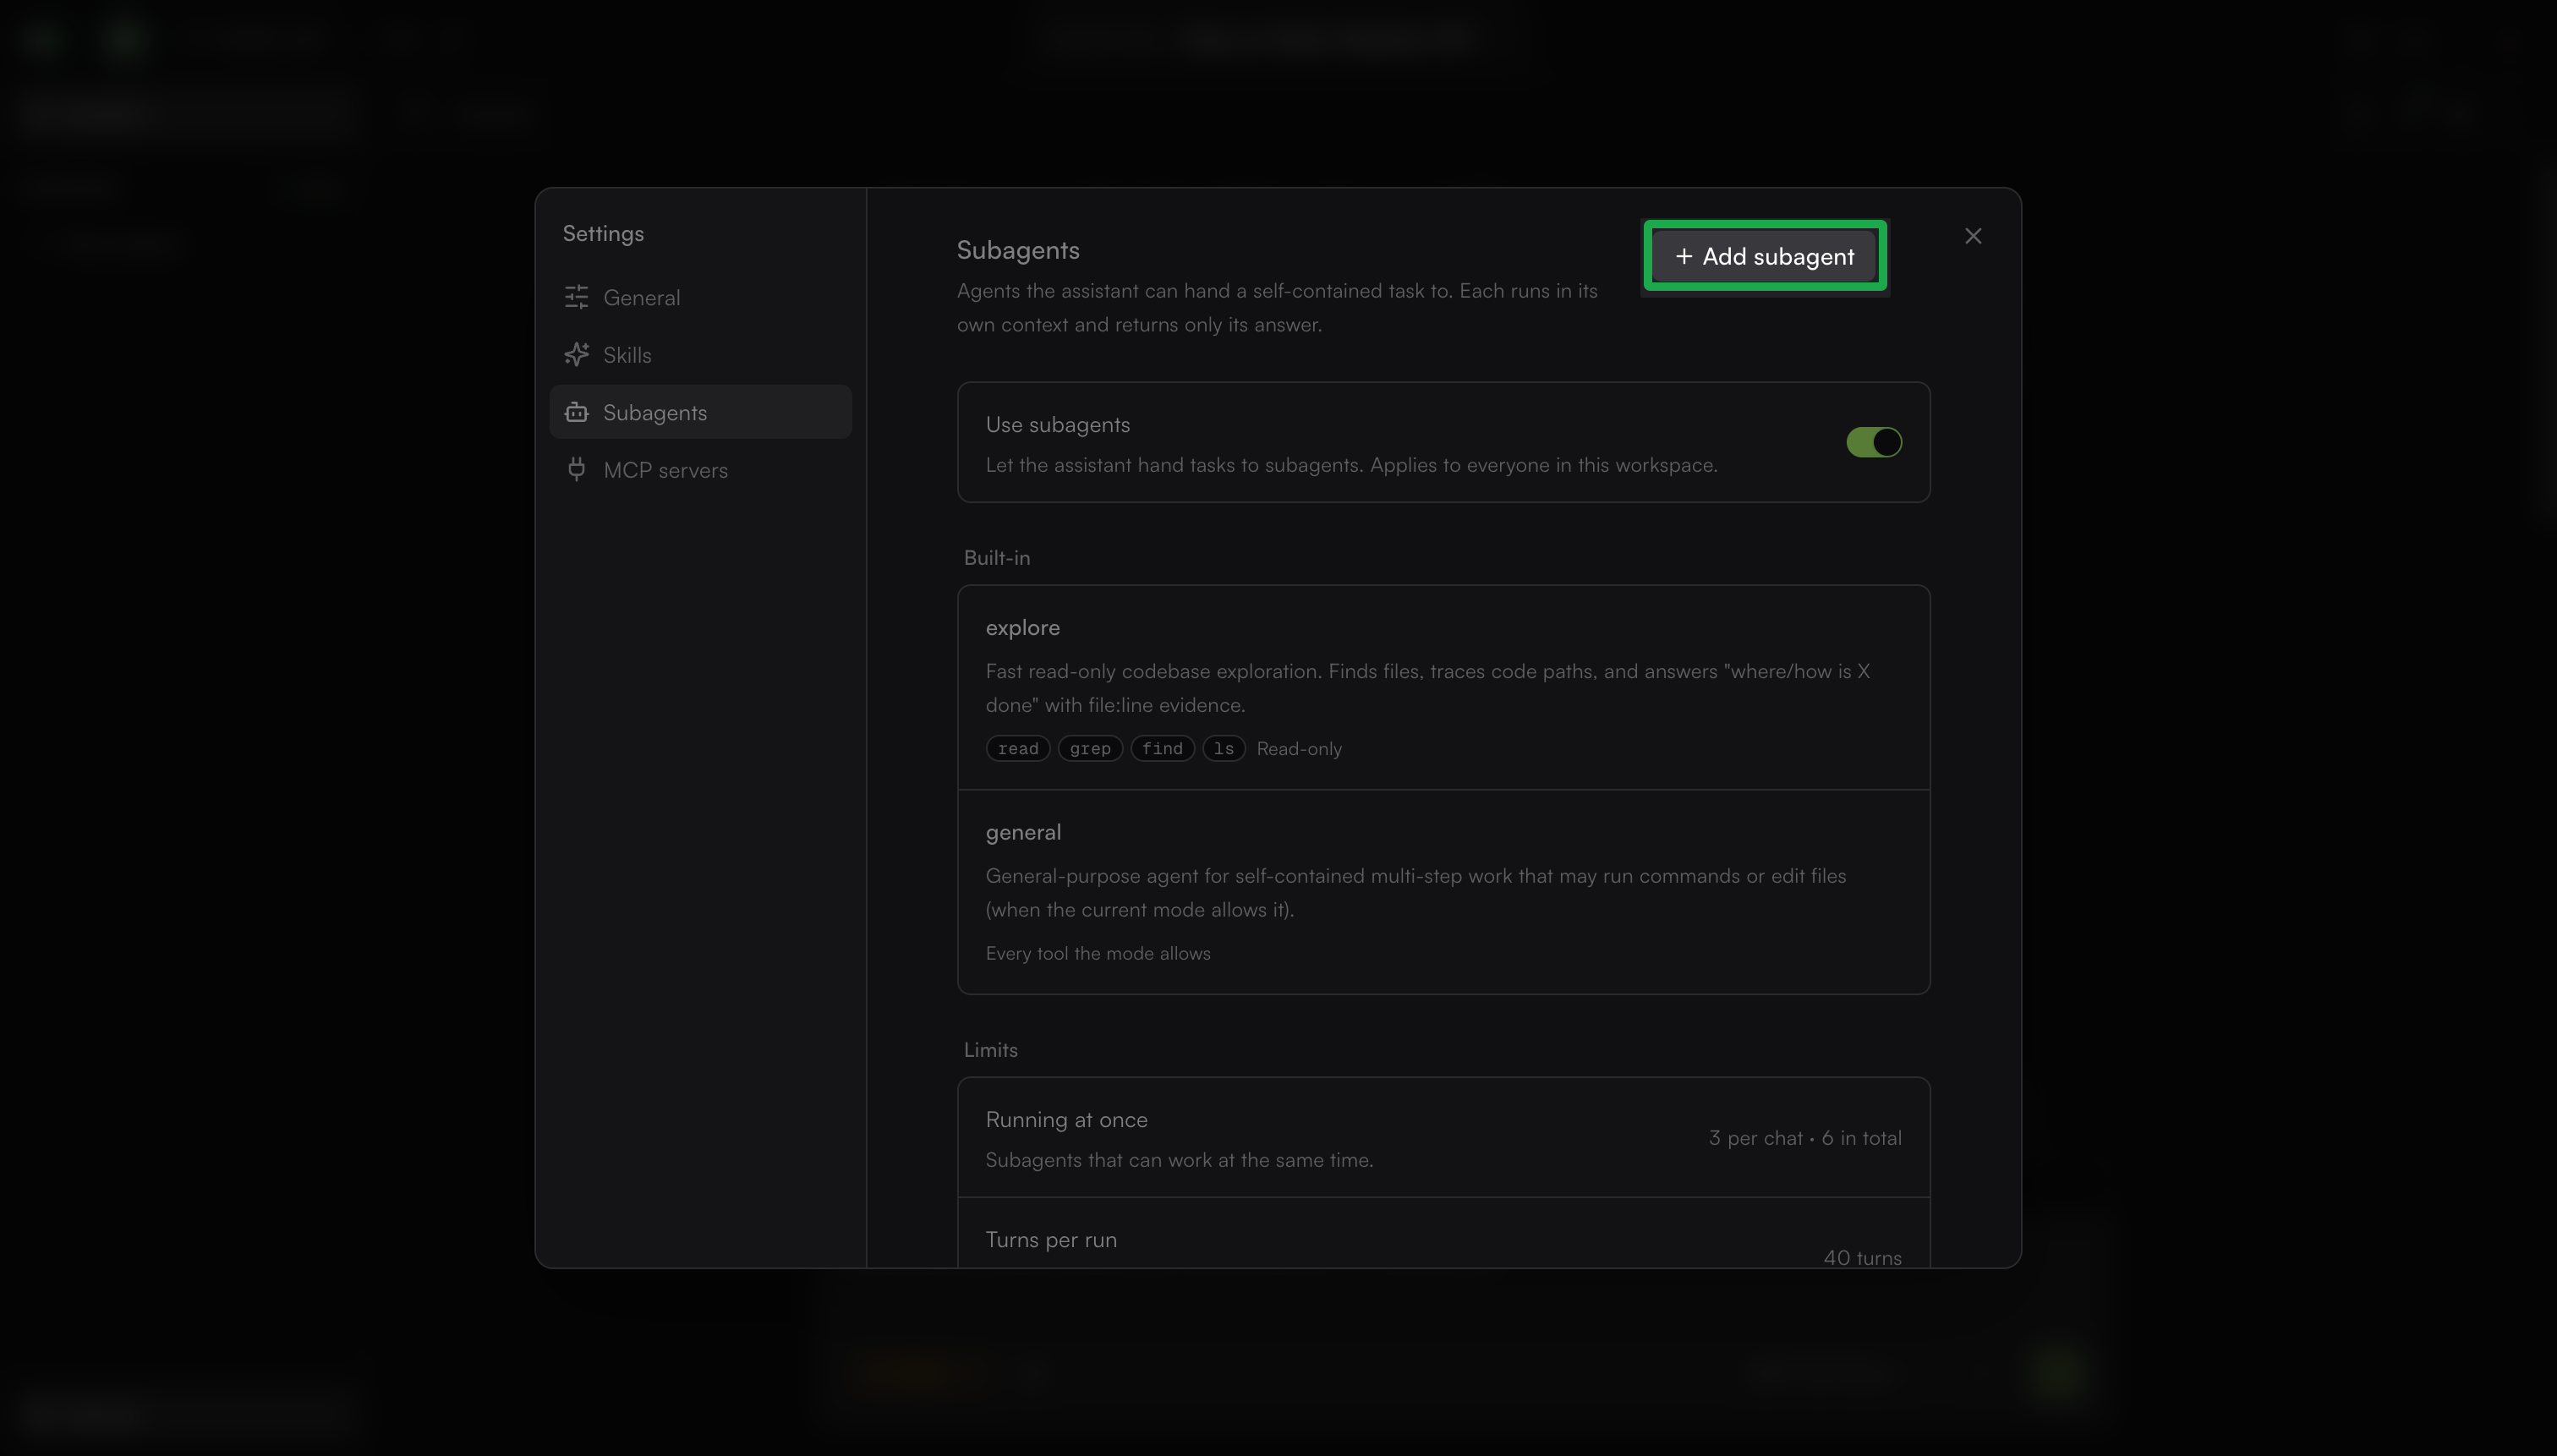
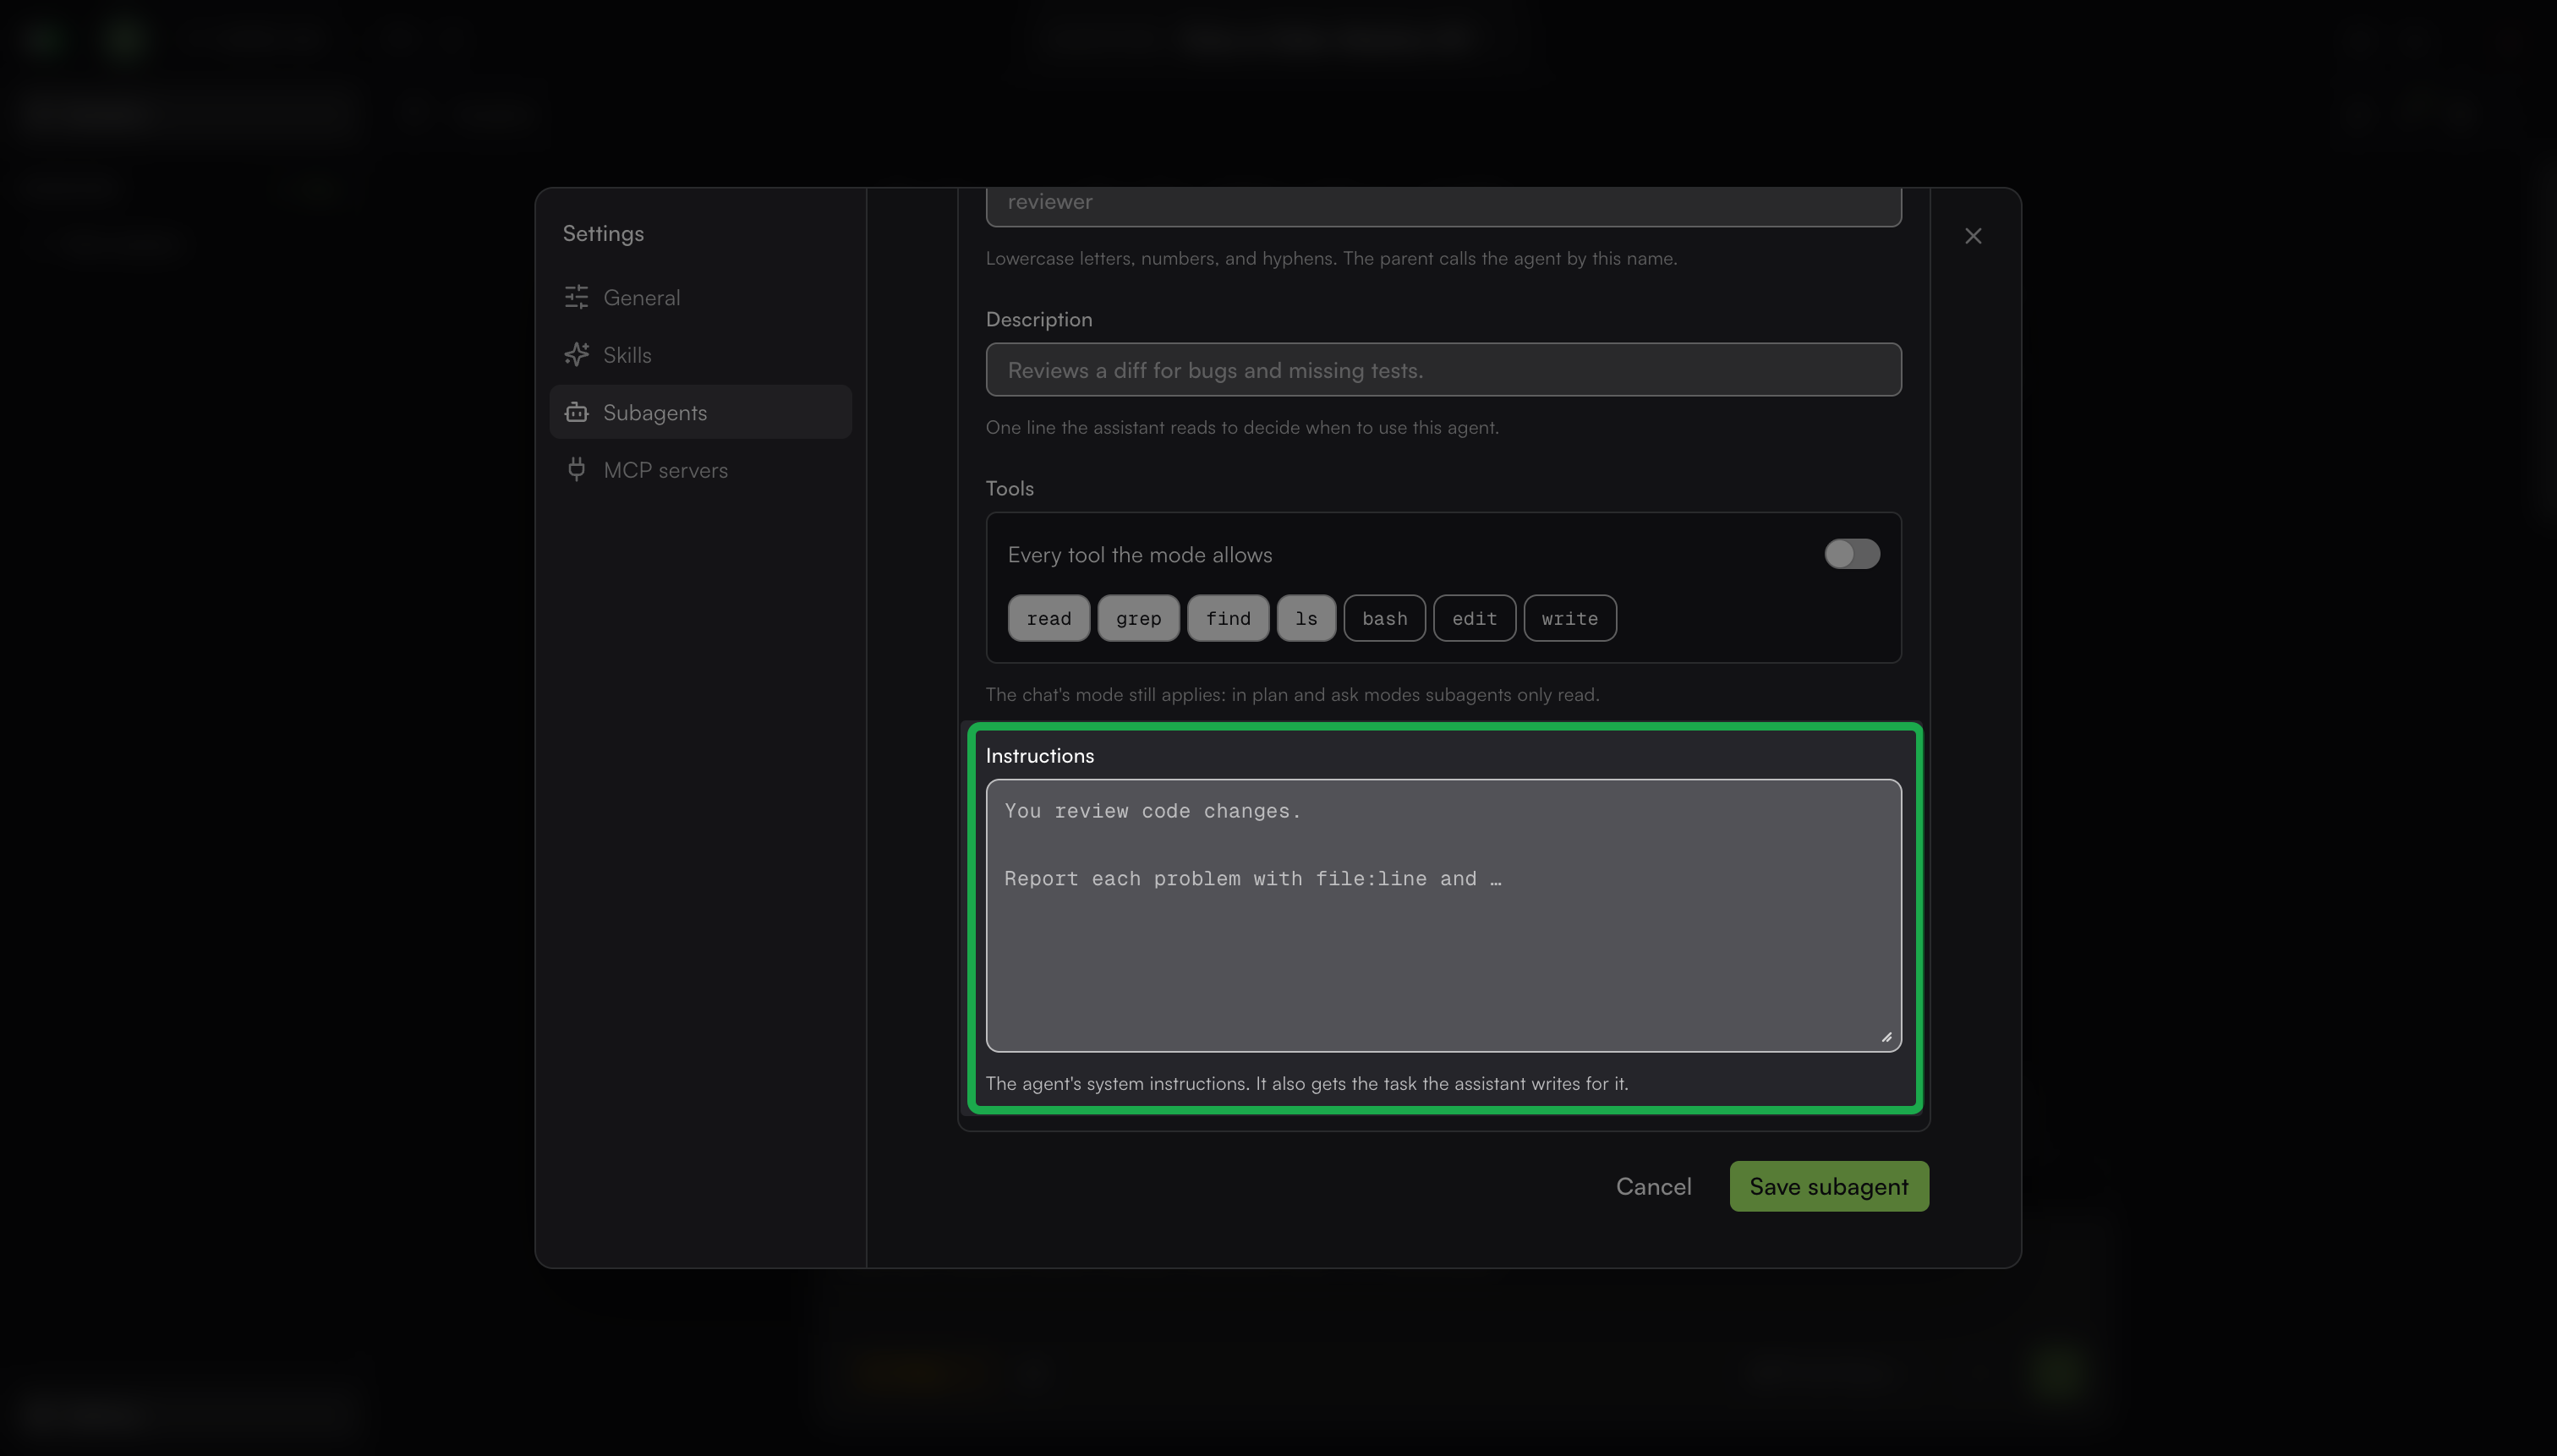
Enter the subagent details:
Name: Enter a name using lowercase letters, numbers, and hyphens. The AI Assistant uses this name to call the subagent.
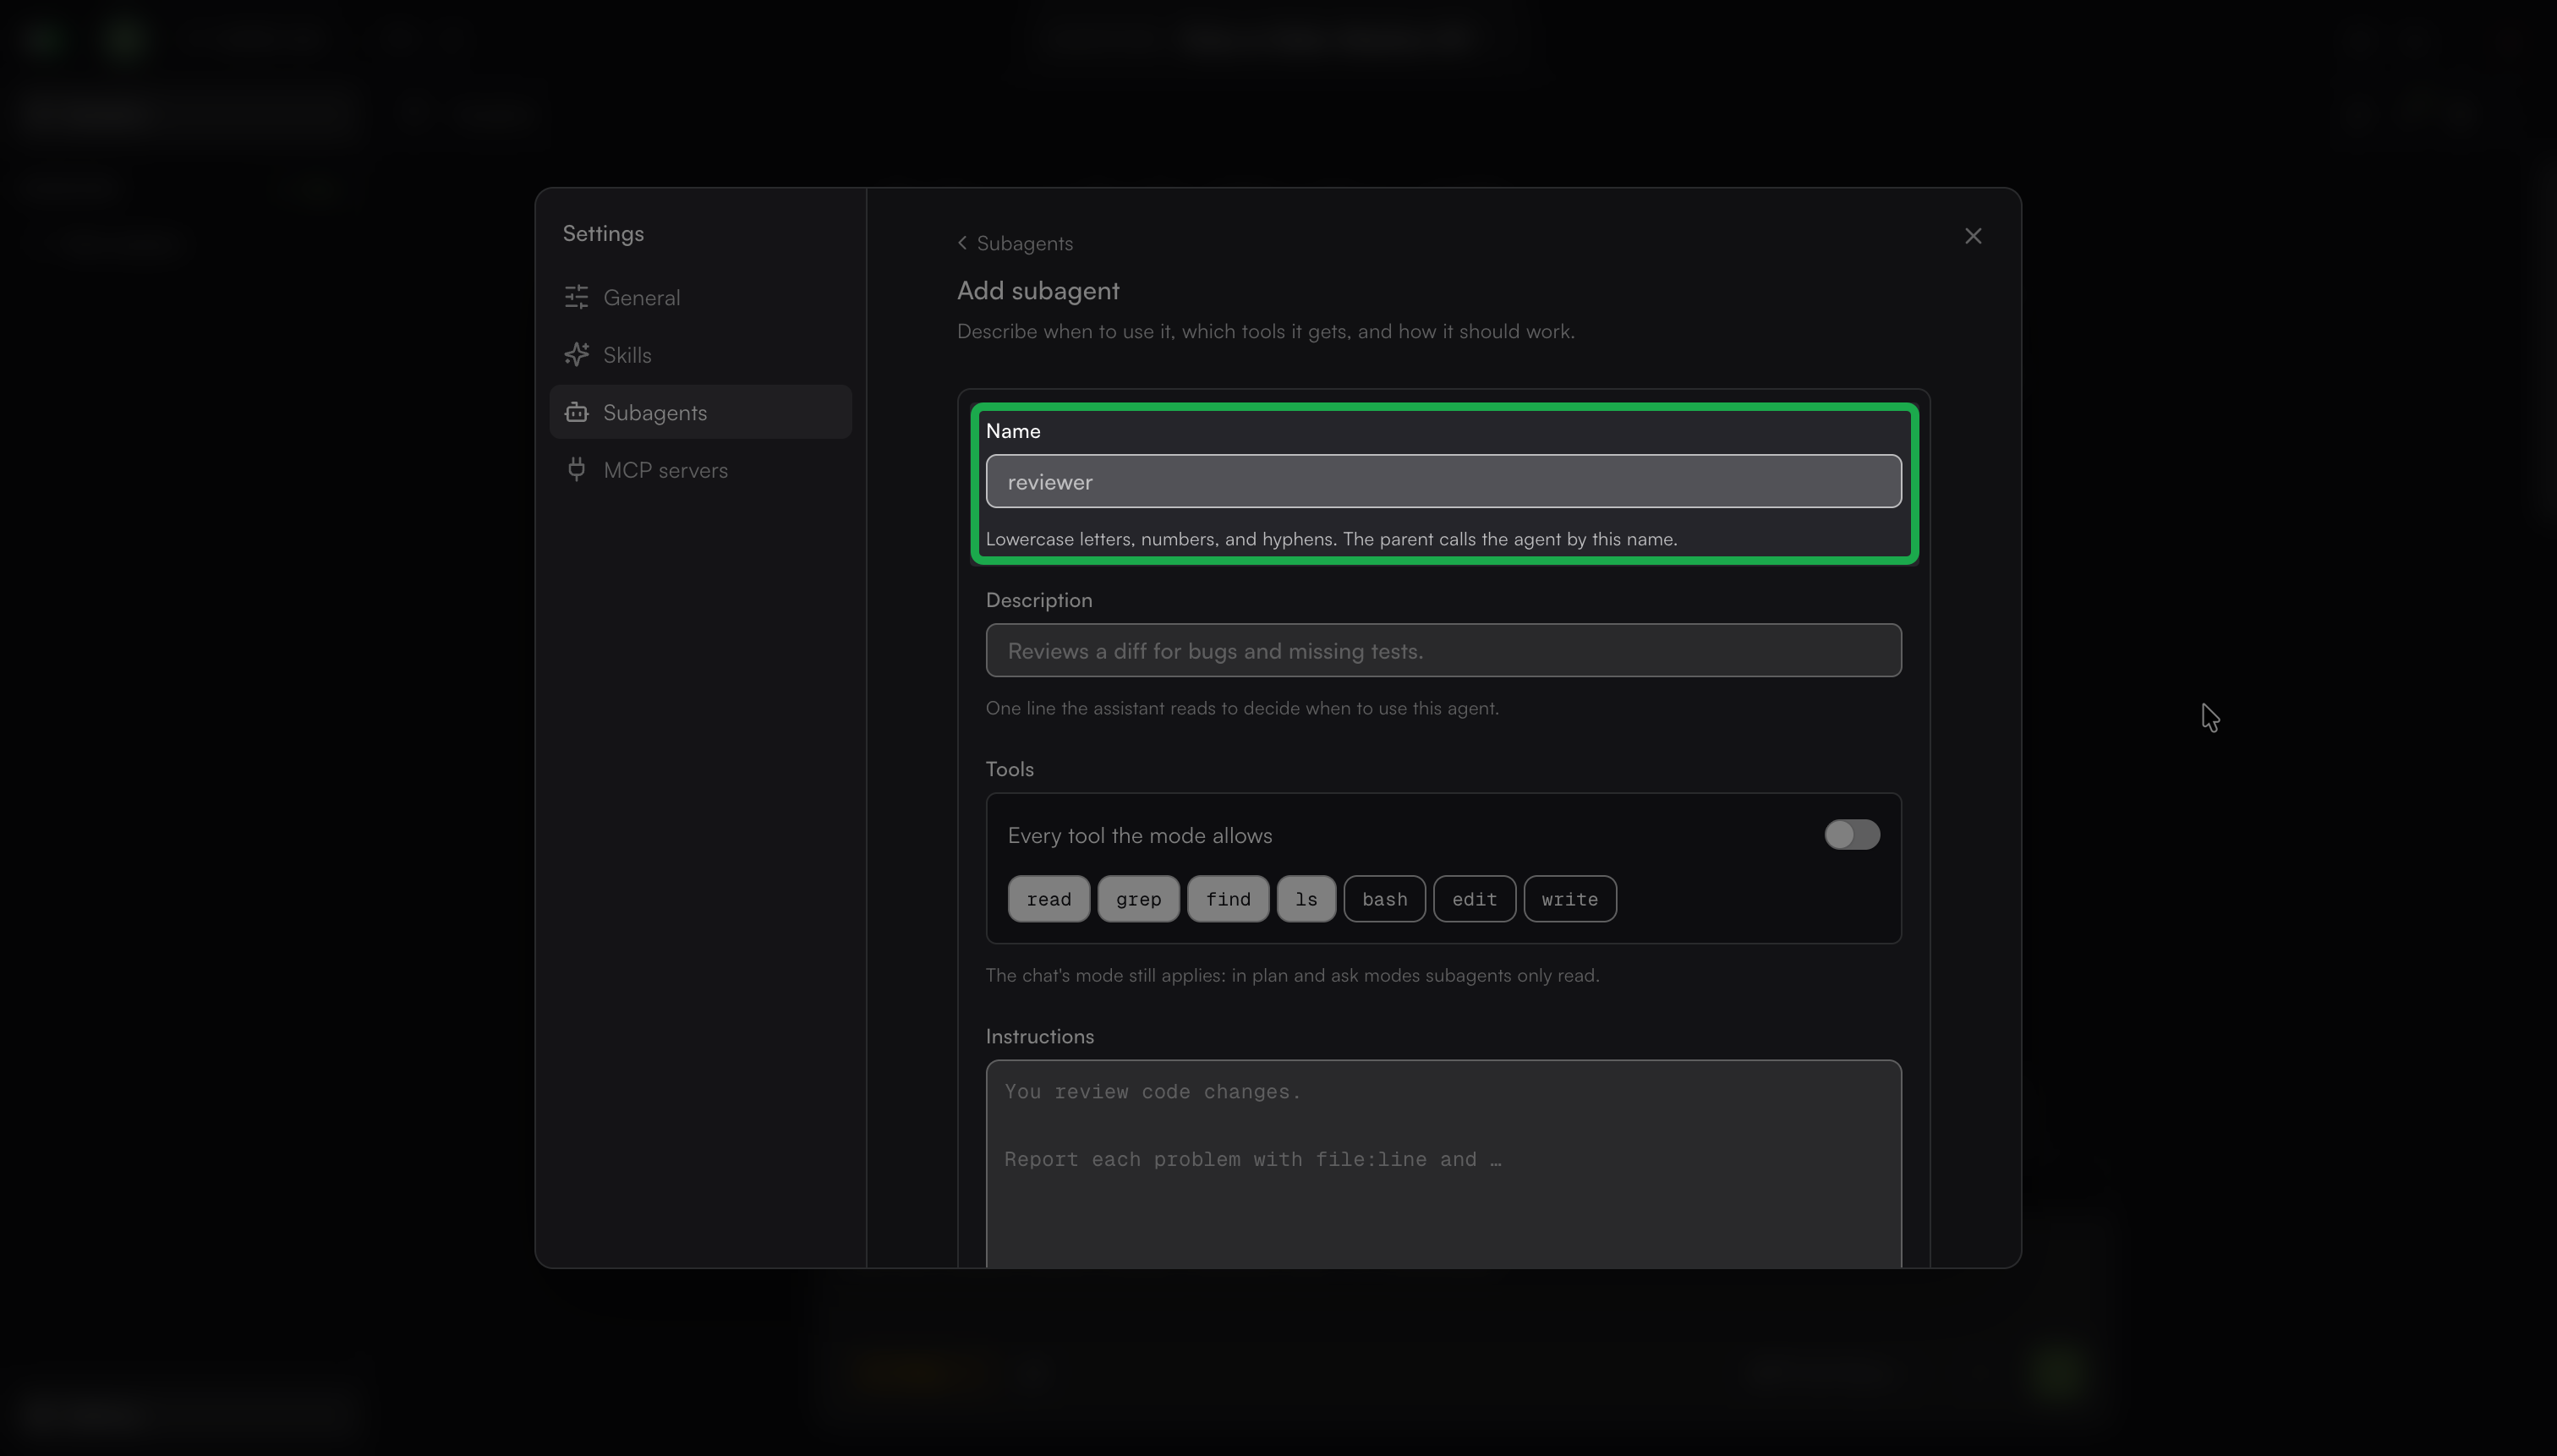
Description: Enter a one-line description. The AI Assistant reads the description to decide when to use the subagent.
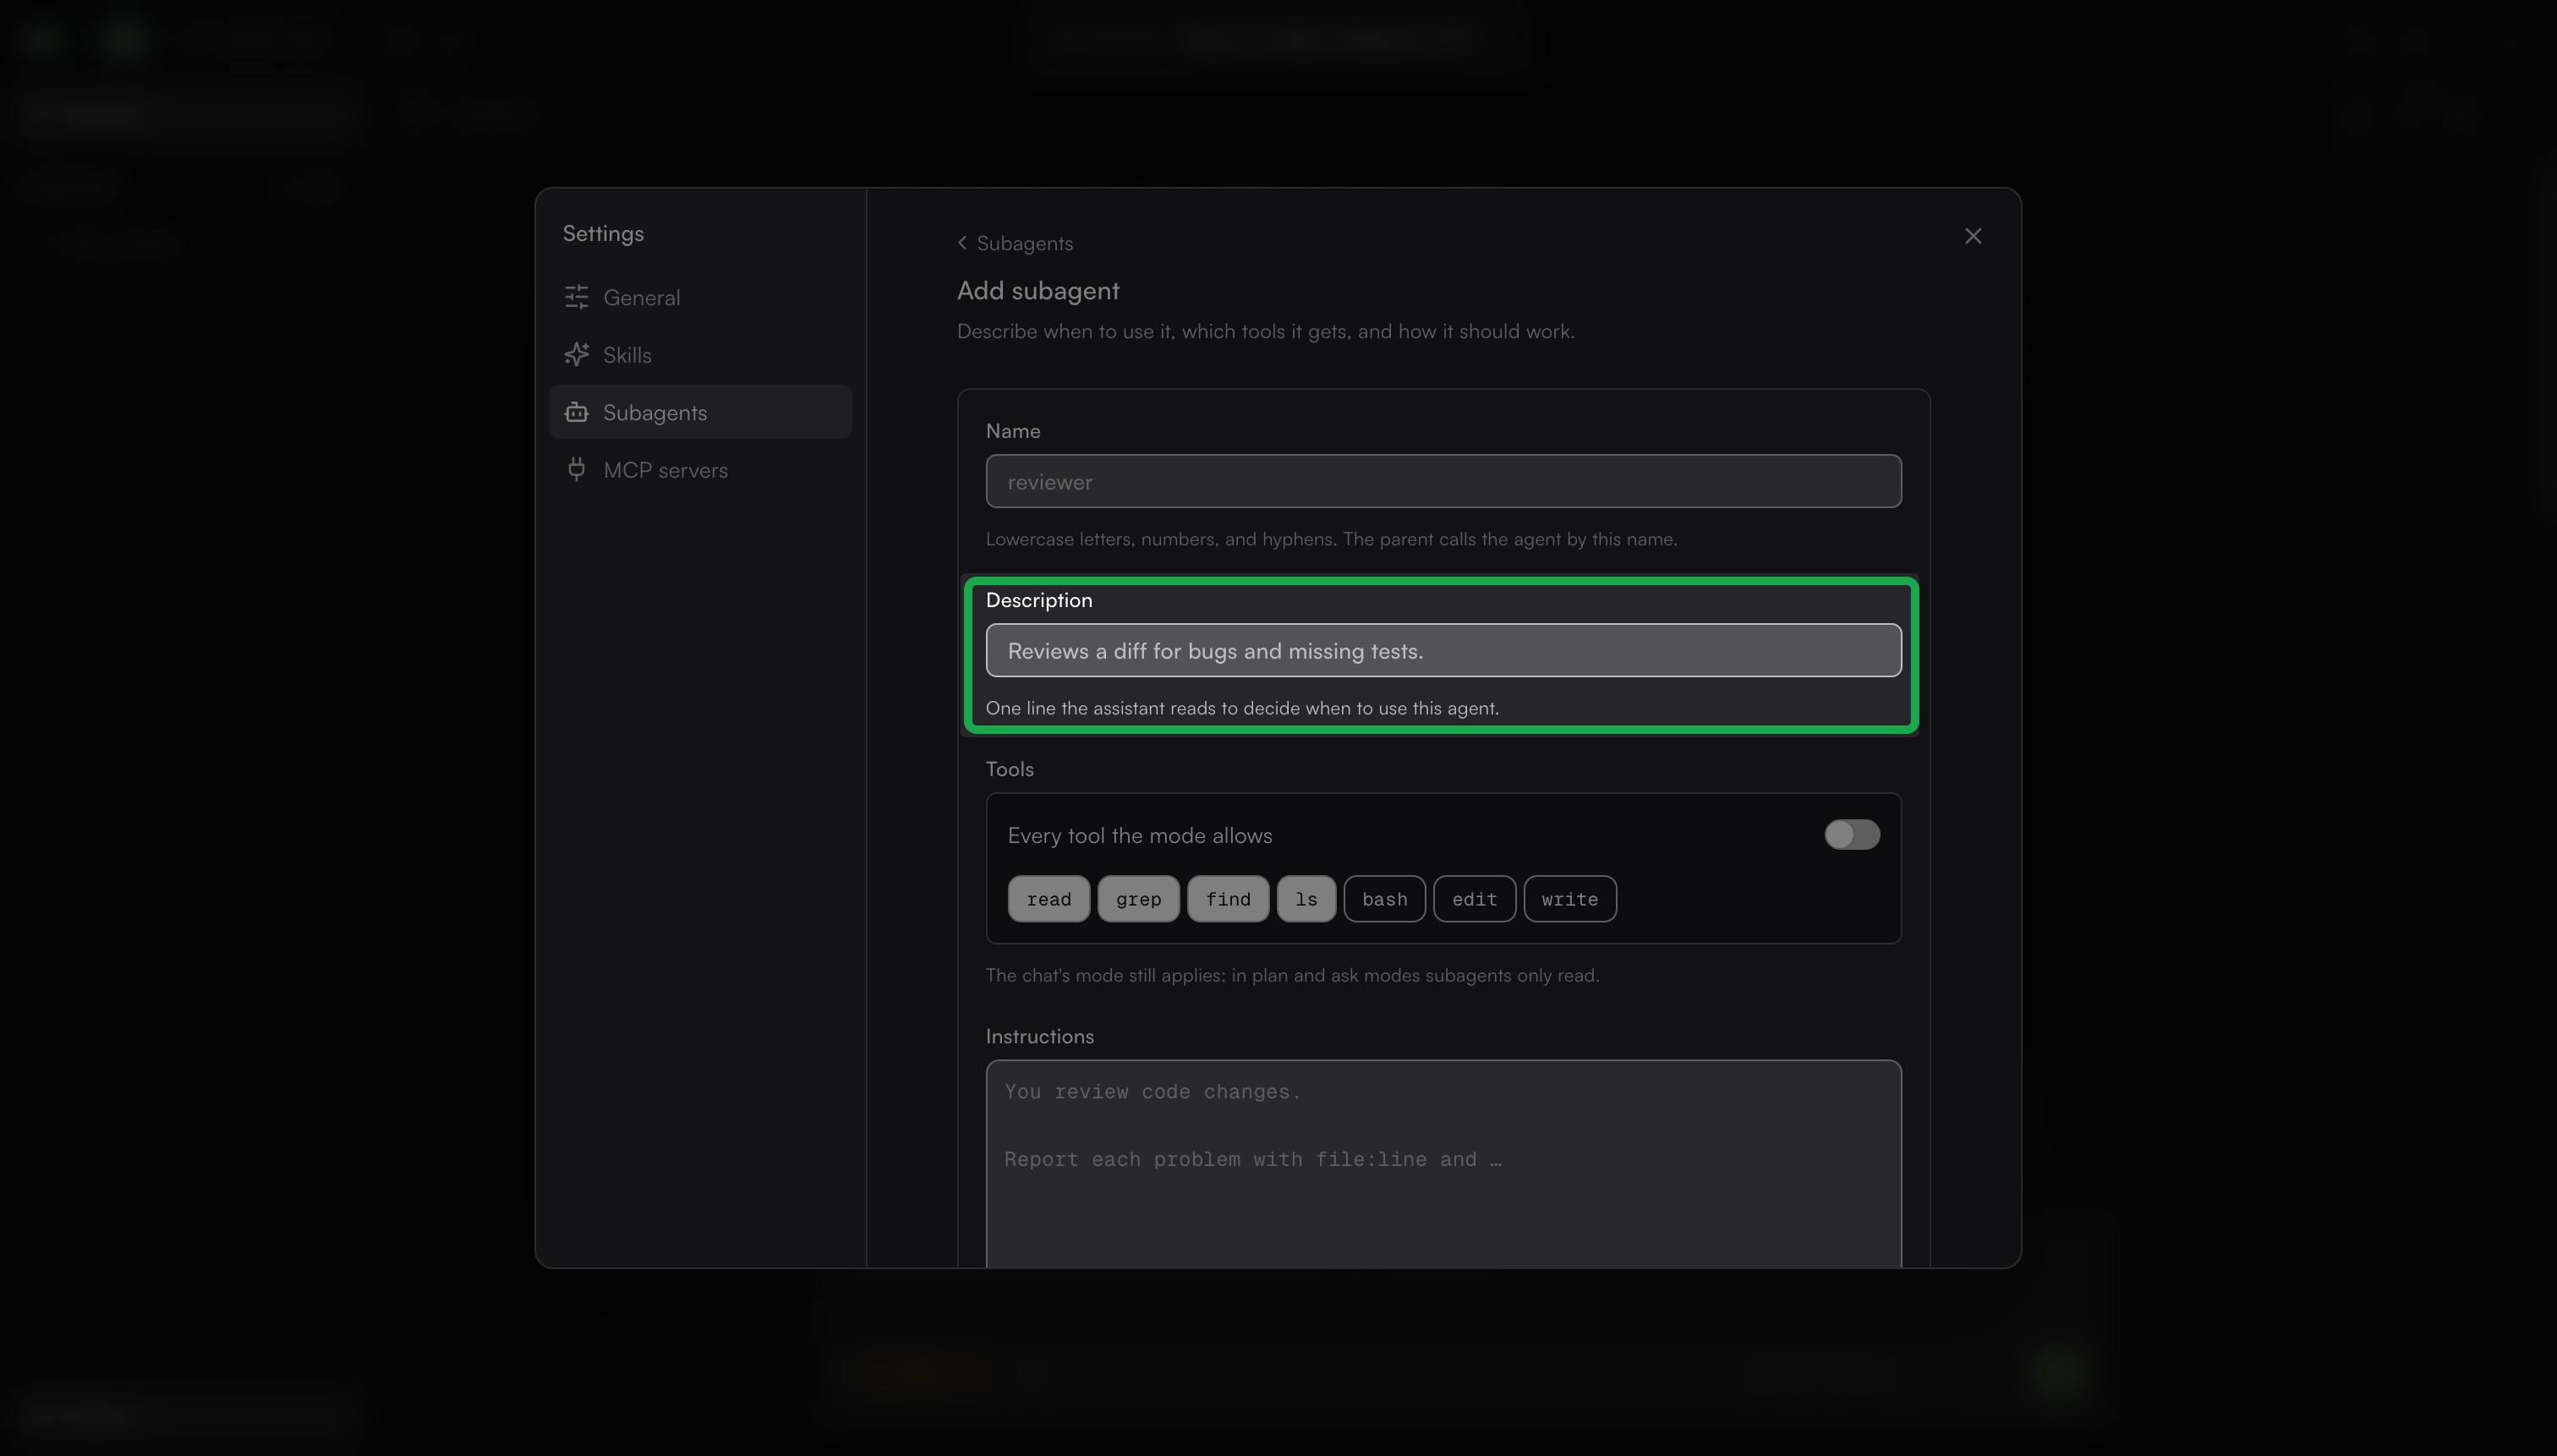
Tools: Select the tools the subagent can use:
read,grep,find,ls,bash,edit, andwrite. To allow all tools, turn on the toggle.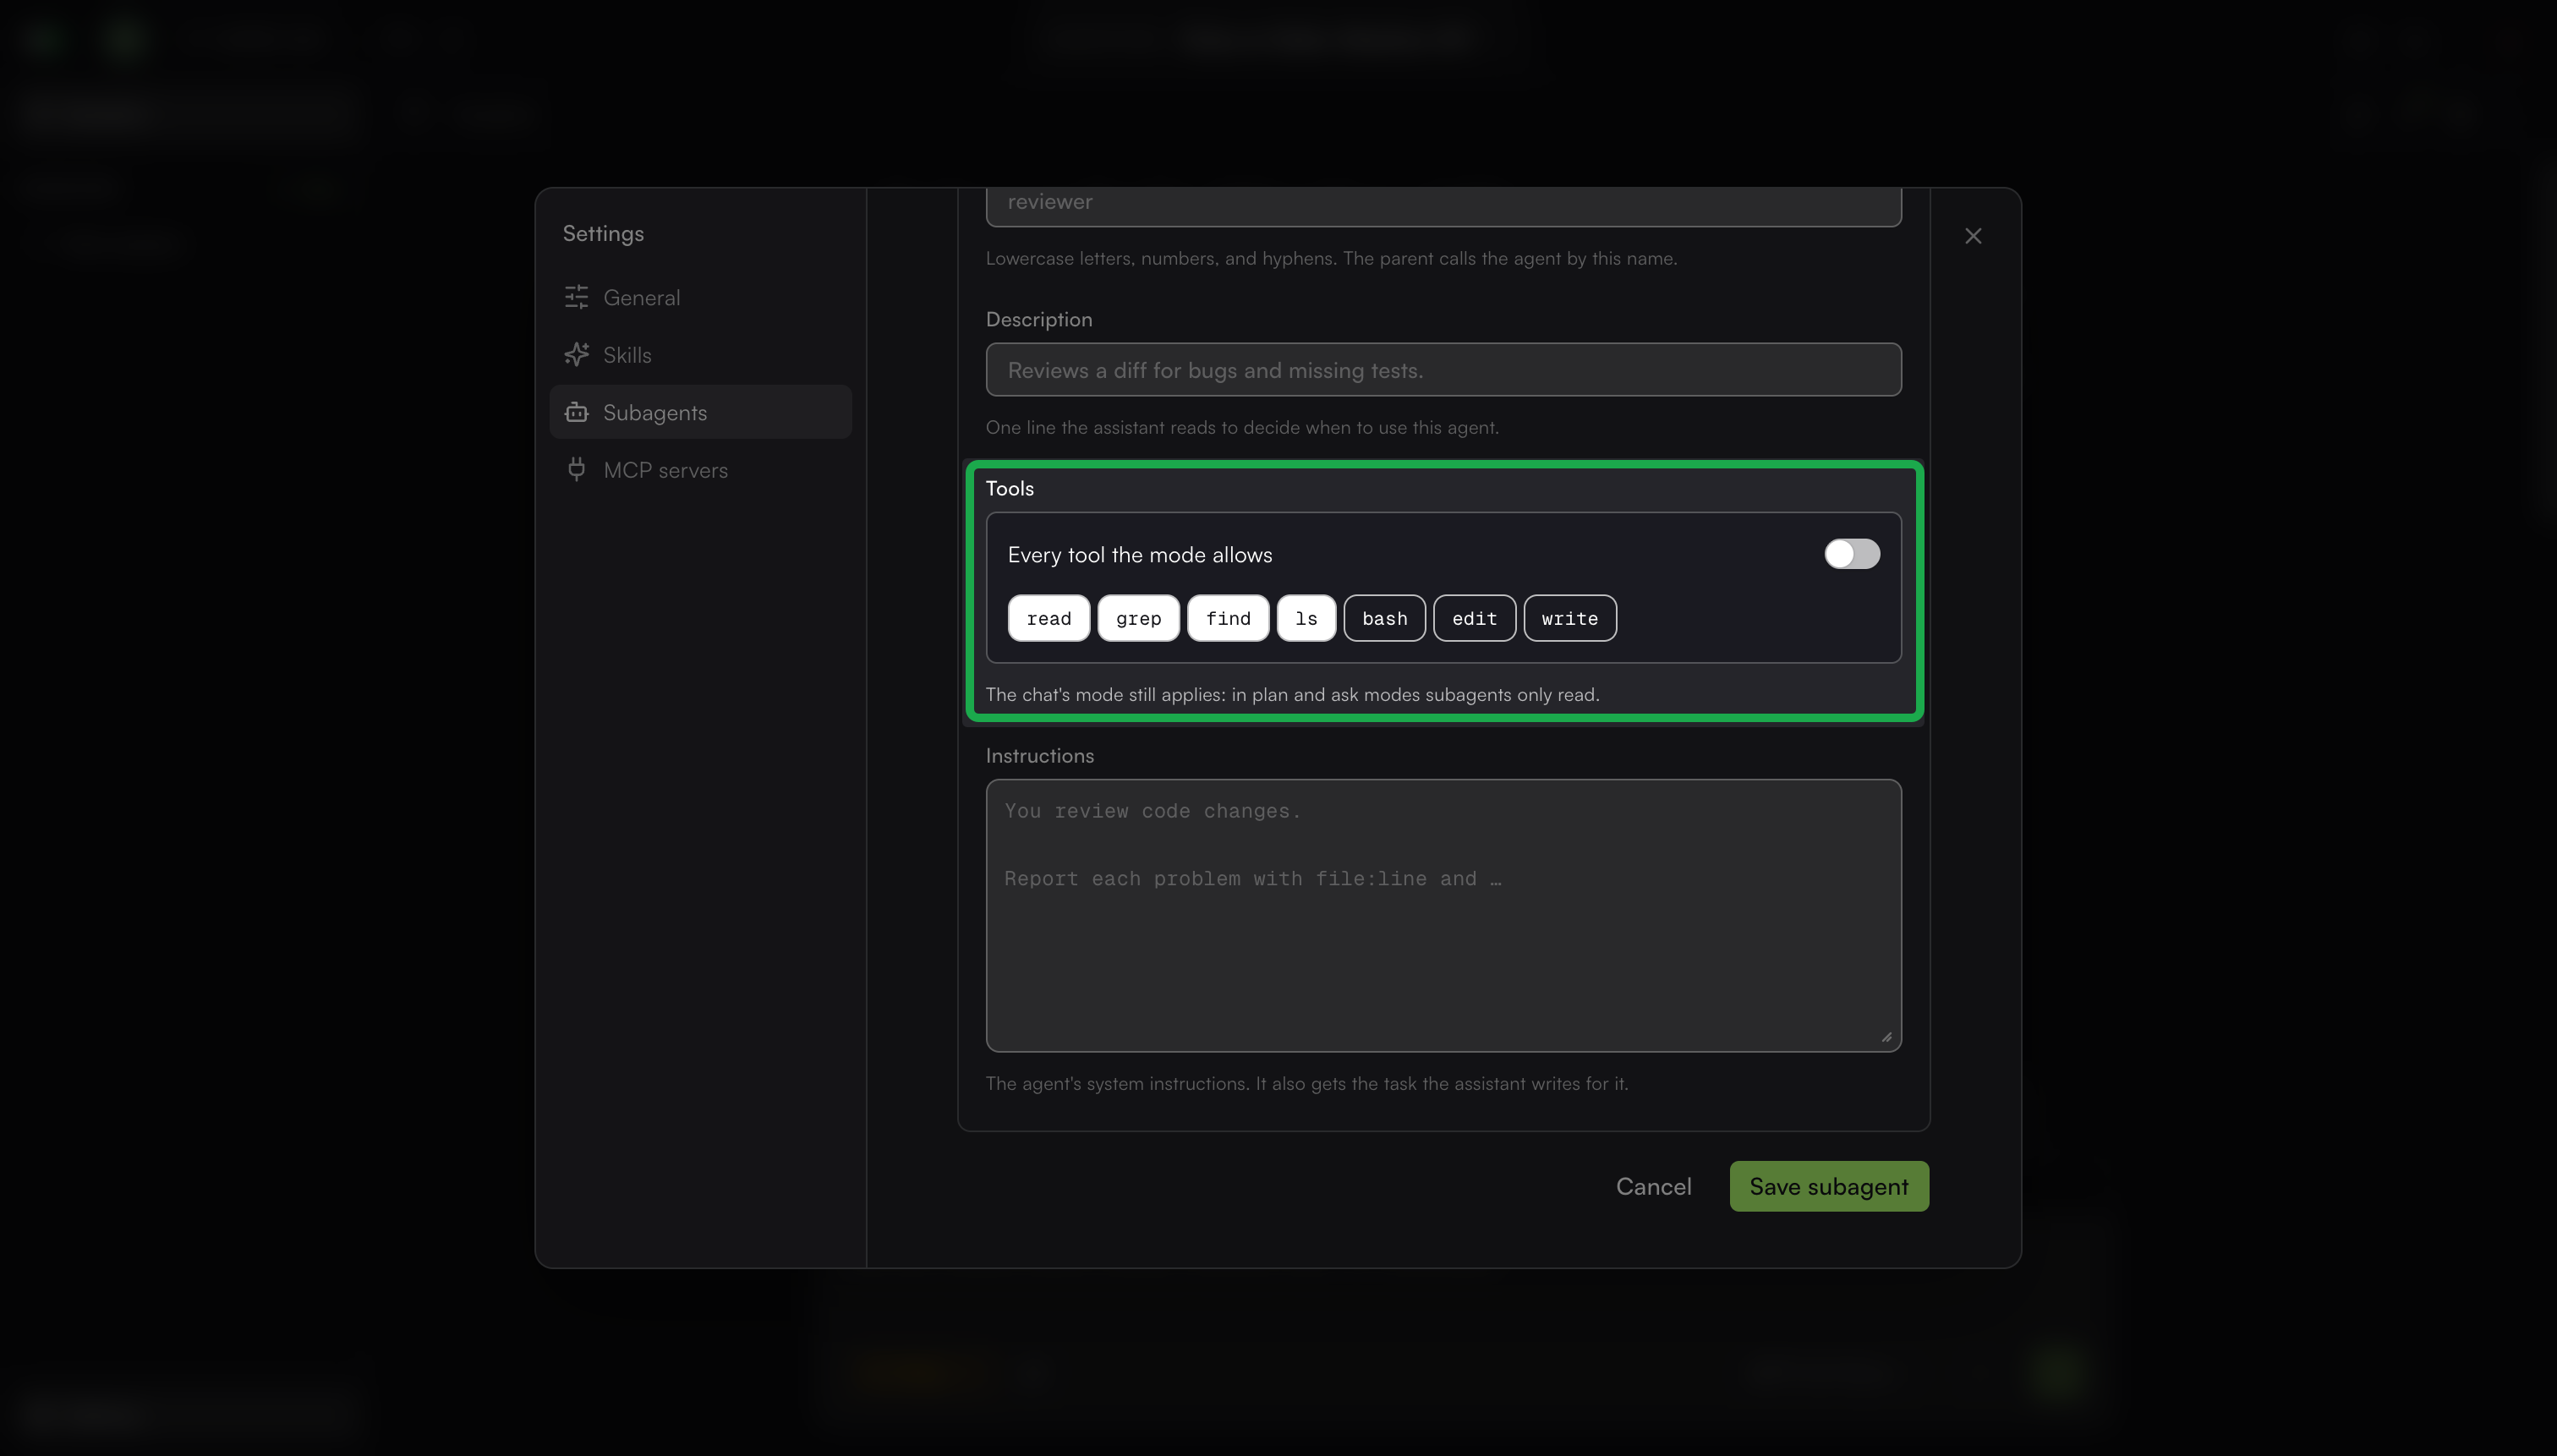
Instructions: Enter instructions that define how the subagent performs its work.
Click Save subagent.
Note: In Plan Mode, subagents can only read files, regardless of the tools you select.
MCP servers
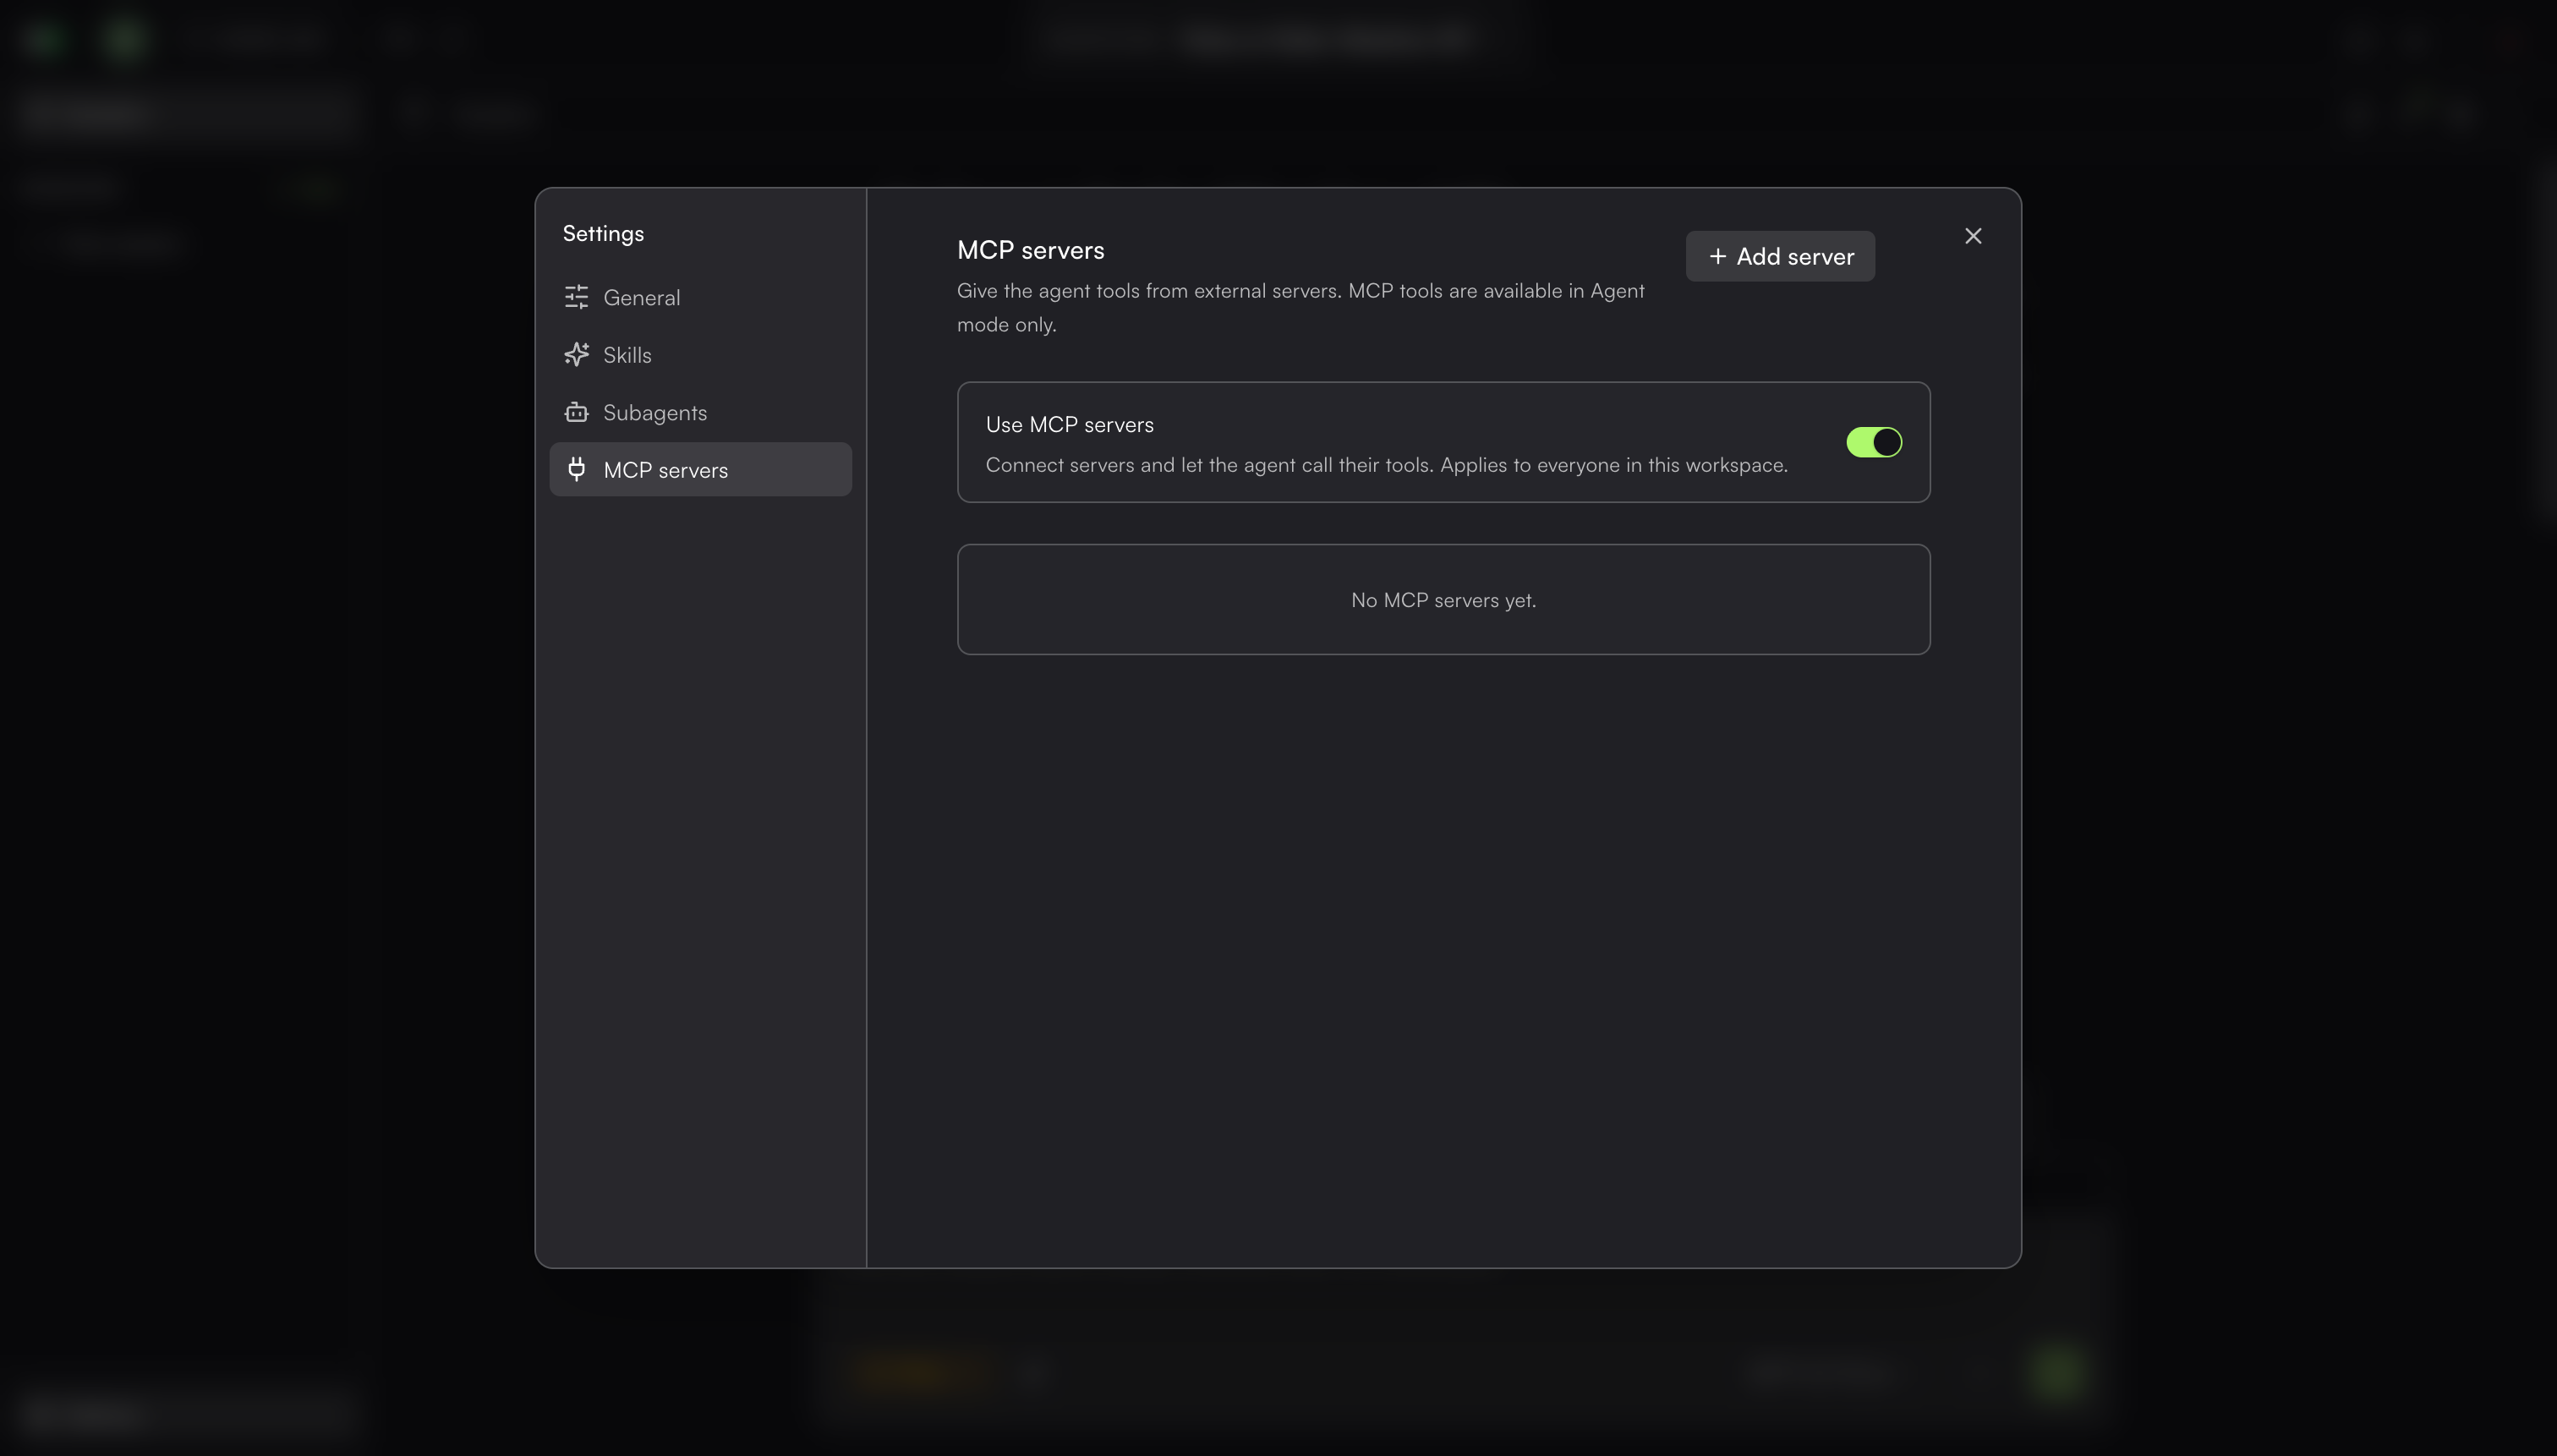
MCP servers connect the AI Assistant to tools from other services. For example, you can connect an MCP server to pull information from another service. MCP tools are available only in Agent Mode.
Adding an MCP server
To add an MCP server:
Go to Settings > MCP servers.
Turn on the Use MCP servers toggle.
Click Add server.
In Transport, select one of the following and enter the details:
STDIO: Runs a local command that starts the server.
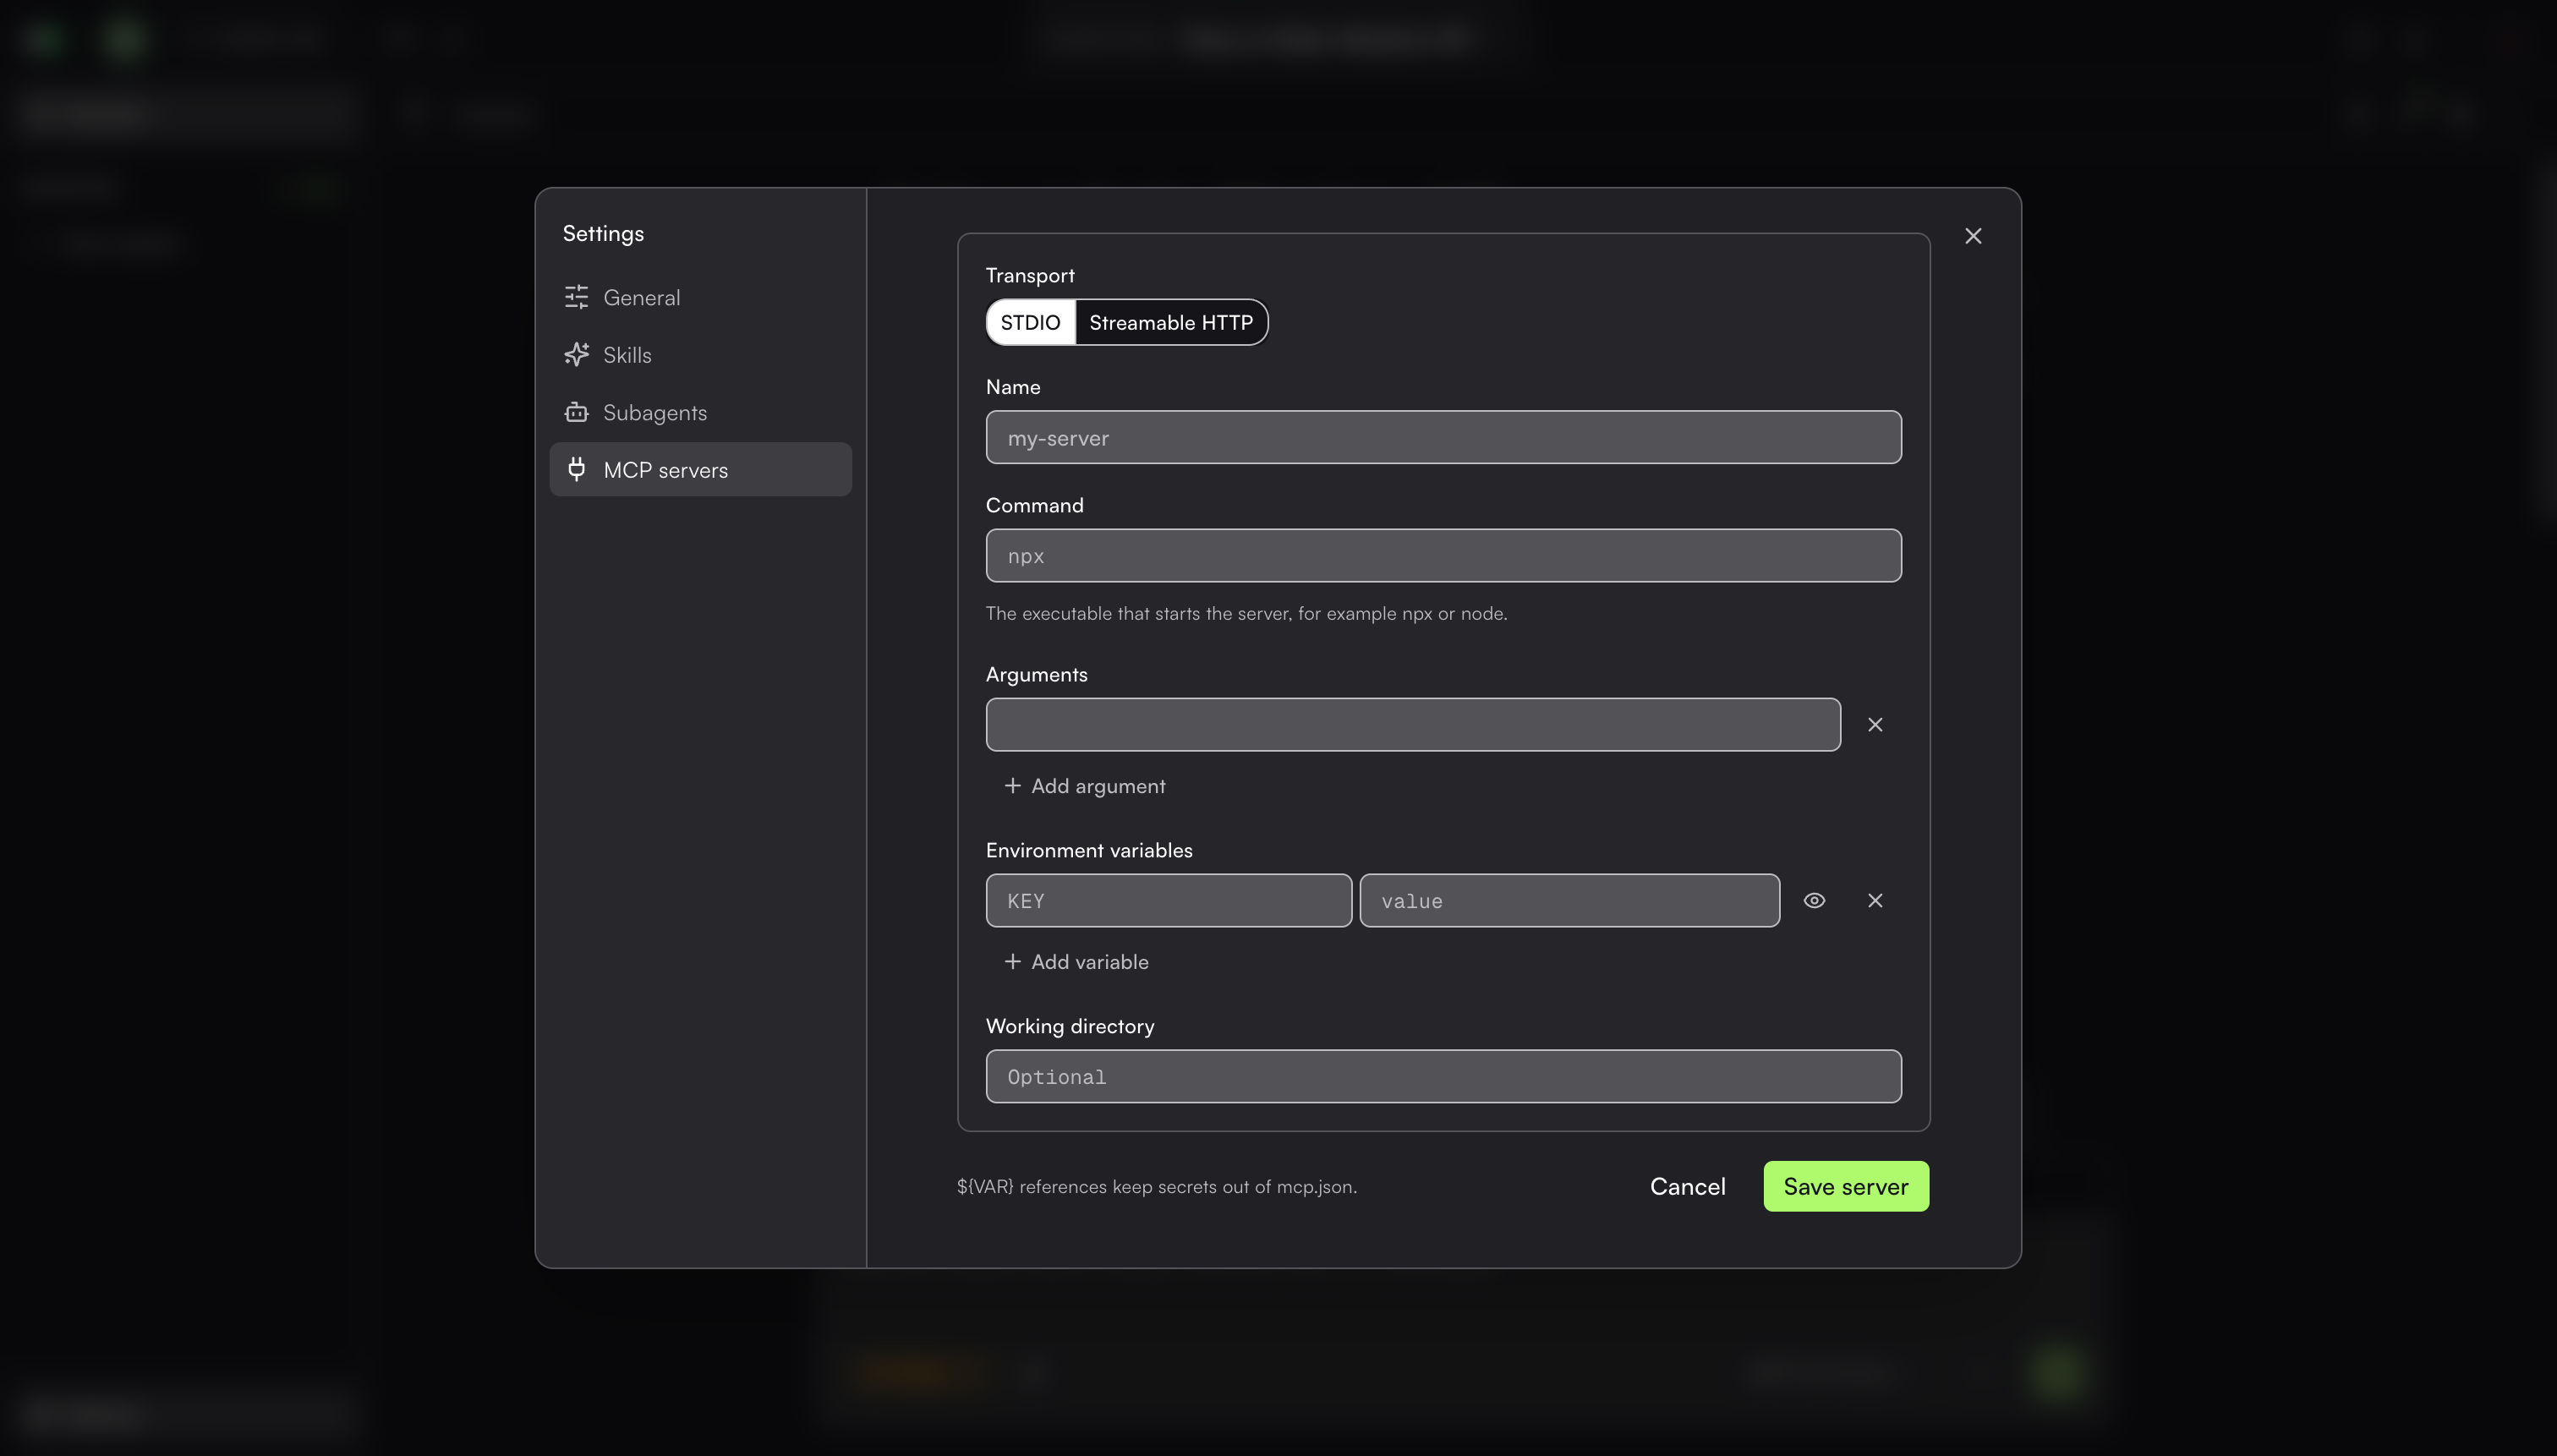
Name: Enter a name for the server.
Command: Enter the executable that starts the server. For example,
npxornode.Arguments: Enter the command arguments. Click Add argument to add more arguments.
Environment variables: Enter a key and value for each variable the server needs. Click Add variable to add more variables.
(Optional) Working directory: Enter the directory to run the command from.
Streamable HTTP: Connects to a Streamable HTTP endpoint.
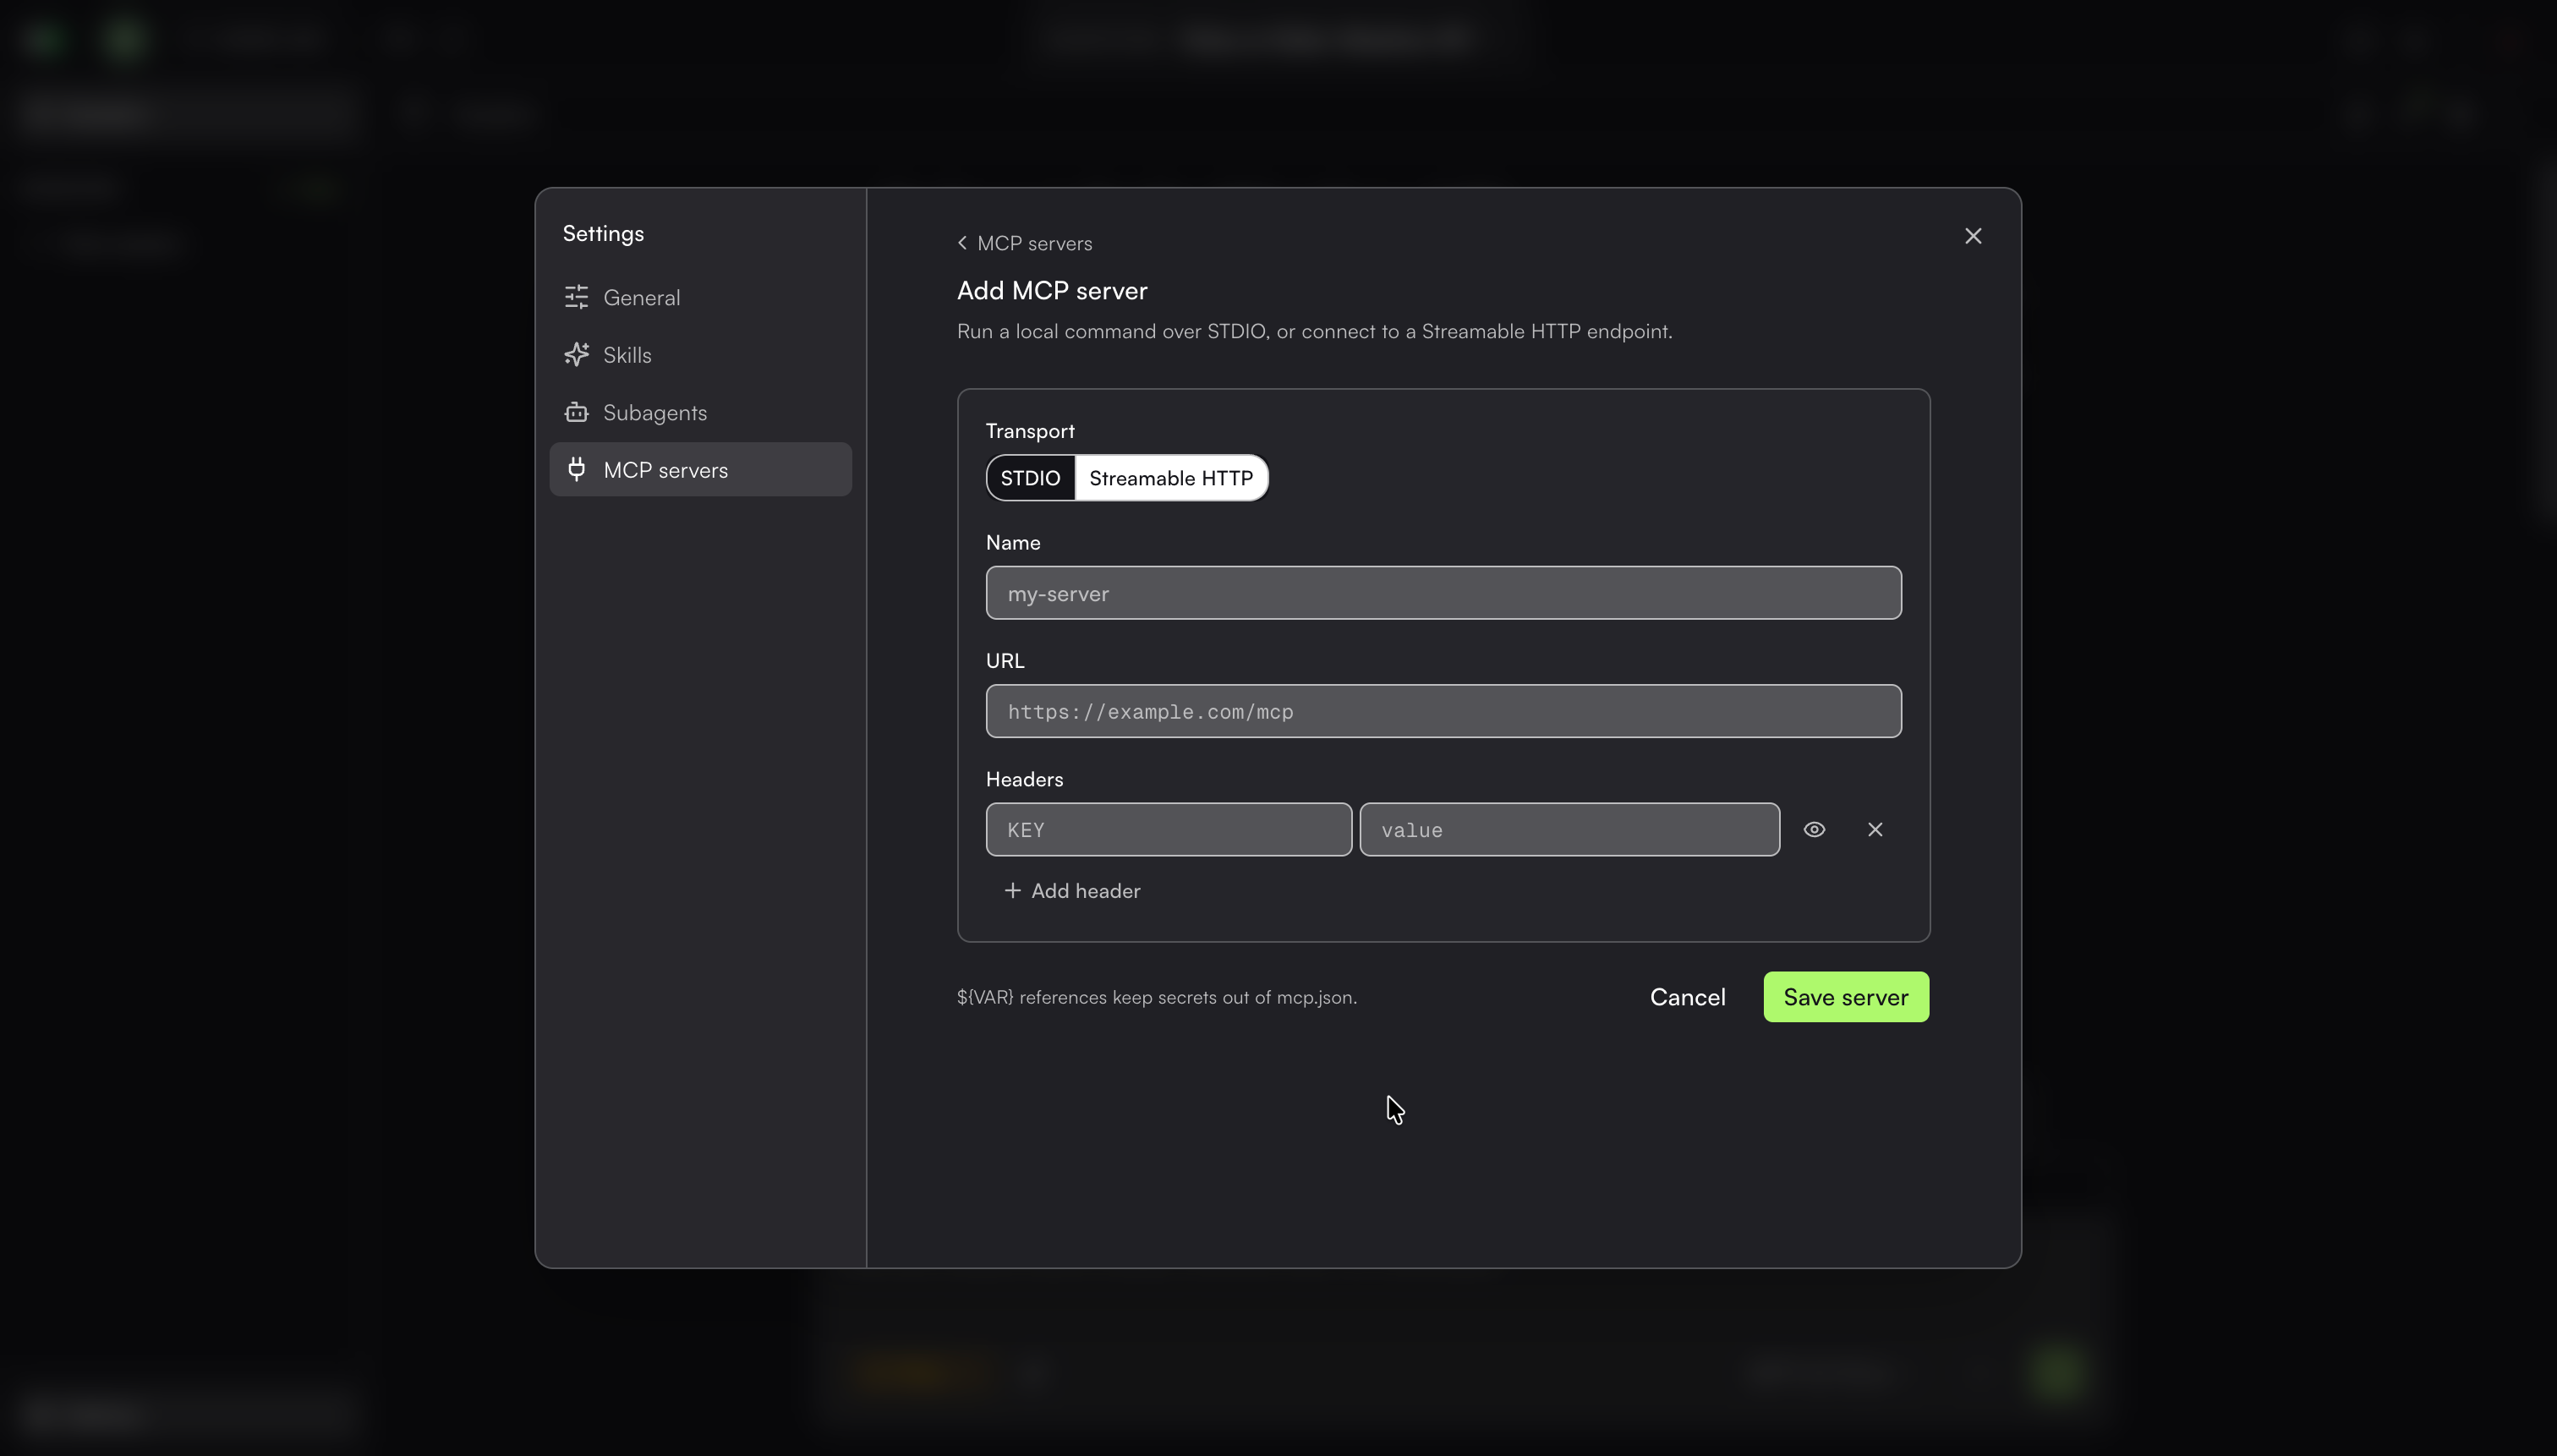
Name: Enter a name for the server.
URL: Enter the MCP server URL. For example,
https://example.com/mcp.Headers: Enter a key and value for each header the server requires, such as an authorization header. Click Add header to add more headers.
Click Save server.
The ADE starts the local server or connects to the HTTP endpoint.